Add Row
Add Element
cropper
update
Marin Home Ideas
update
Add Element
  • Home
  • Categories
    • Home Remodeling Ideas
    • Interior Design & Decor Ideas
    • Gardening & Landscaping Ideas
    • Outdoor Living & Entertaining
    • Health & Wellness at Home
    • DIY at Home
    • Kitchen Ideas
    • Bedroom Ideas
    • Bath Ideas
    • Cooking at Home
    • Home Office Ideas
    • Lighting Ideas
    • Furniture Ideas
    • Architecture Ideas
    • Senior Living at Home
    • Home Finance
    • Real Estate News
July 26.2025
3 Minutes Read

Create Inviting Outdoor Spaces with DIY Citronella Candles

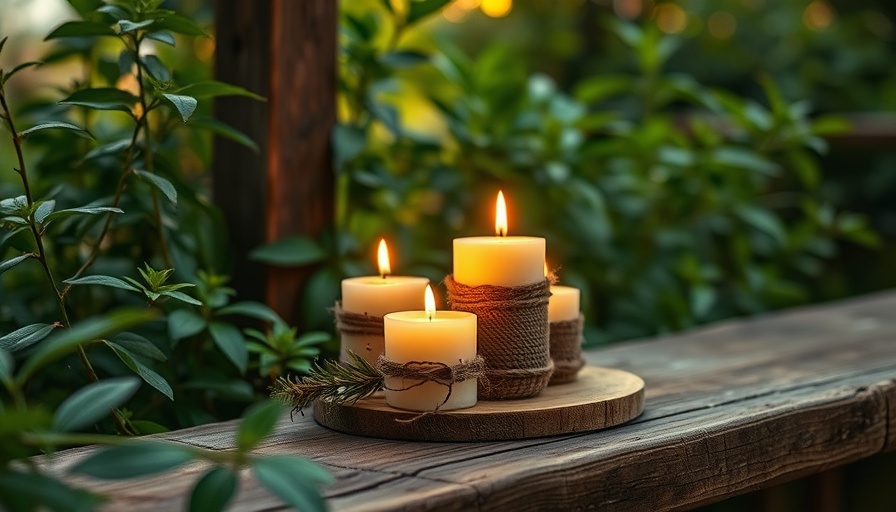
Rustic DIY citronella candles glowing on a wooden step in a garden.

Transform Your Backyard with DIY Citronella Candles

If you're someone who loves spending time outdoors, you’ve probably encountered that one pesky issue that plagues every backyard gathering: mosquitoes. They seem to have a special attraction to some of us (myself included!), turning delightful evenings into an itchy nightmare. But fret not! With DIY citronella candles, you can create a natural barrier against these unwanted visitors while also adding a warm, welcoming glow to your outdoor space.

Why Choose Citronella Candles?

Citronella candles are known for their ability to repel mosquitoes with a scent that masks our own. Recent studies have shown that while they’re not foolproof, they can be effective in a typical garden setting. In fact, they work about 40% of the time, offering a better option than toxic chemicals that might otherwise bombard our backyard sanctuaries. So, if you're enjoying a nice glass of wine after a long day, lighting a few of these candles could help keep those pesky bites at bay.

Gather Your Materials

What makes this project even more appealing is its simplicity! Here’s what you’ll need:

  • Candle wax (beeswax or soy)
  • Citronella essential oil
  • Wicks
  • Containers (old jars, tin cans, or decorative holders)
  • A double boiler or a microwave-safe bowl
  • Optional: old crayons for color

Step-by-Step Candle Making

Let’s dive into the fun part: crafting your candles. First, melt the wax in your double boiler over low heat. If you want to add color, you can include bits of crayon to your wax. Then, once fully melted, mix in the citronella oil—approximately 10-15 drops per cup of wax. This not only enhances the scent but boosts the candle's repelling power.

Next, secure your wick inside the container with a bit of melted wax or tape. Pour the wax mixture into the container and make sure the wick remains centered. Allow your candles to cool completely before trimming the wick to about 1/4 inch above the wax.

Eco-Friendly and Cost-Effective

Going the DIY route is not only fun but also cost-effective! You can even repurpose old containers, minimizing waste and sprucing up your garden decor at the same time. Moreover, for the environmentally conscious gardener, using natural materials means that you’re creating a more sustainable product for your home. This aligns well with organic gardening practices, which emphasize the need for non-toxic pest solutions.

Enhance Your Outdoor Living Space

Imagine your backyard illuminated by the warm glow of homemade candles, while the delightful scent of citronella hangs in the air. Pair these candles with beautiful landscaping elements—like a herb garden or seasonal flower layout—to create the perfect atmosphere for gatherings. Consider adding a seating area near your garden, further enhancing the outdoor experience. Your friends and family will appreciate the thoughtful touches, and you can boast about the charming, natural approach to pest control!

Combining Candle Power with Plant Power

For ultimate effectiveness in mosquito control, pair your citronella candles with mosquito-repelling plants such as marigolds or lavender. These plants serve a dual purpose: beautifying your garden while also warding off pests. As a gardener, you know the importance of plant health and diversity. Incorporating plants that deter garden pests can further ensure that your outdoor sanctuary remains inviting and relaxing.

Conclusion: A Toast to an Enjoyable Summer

As you gear up for those sunny evenings, rediscover the joy of your gardens and outdoor spaces. DIY citronella candles are not just practical; they also reflect a personal touch that embodies the spirit of your home. For those looking to nurture their green thumb while safeguarding their outdoor living experiences, let your creativity flourish. Gather your materials and start crafting today!

Just remember, while citronella candles are effective, combining them with other methods—such as organic bug sprays—creates the best defense against mosquitoes. Embrace the summer with confidence and enjoy the time spent in your garden!

Gardening & Landscaping Ideas

1 Views

0 Comments

Write A Comment

*
*
Related Posts All Posts
09.10.2025

Why Planting Crocus Flowers Is the Ultimate Spring Gardening Tip

Update The Joy of Crocus Flowers: Nature's Early Bloomers Crocus flowers are often the first to burst into color, signaling the end of winter and welcoming the beauty of spring. Known for their cheerful hues, these hardy flowers bring joy to gardens, lawns, and the hearts of seasonal gardeners alike. As someone who gardens with nostalgia for warmer days, I know the unparalleled delight crocus flowers can provide when they poke their heads through the frozen ground. Understanding the Types of Crocus There are several crocus species to choose from, primarily divided into spring and autumn varieties. The spring crocus, often showcased in vibrant purples, yellows, and whites, emerges as a beacon of hope after long winter months. Autumn crocus, however, provides a burst of color in fall, often overlooked due to their unconventional blooming season. What many gardeners may not know is that these two types belong to different genera entirely, with autumn crocuses belonging to the Colchicum genus, while spring crocuses hail from the Crocus genus. This distinction allows for unique planting strategies in your landscape, helping both bloomers to flourish in their individual seasons. Planting Crocus: Timing and Techniques The best time to plant these bulb-like corms is in the fall, ideally before the ground freezes. By scattering the corms about 3 to 4 inches apart, you can create a delightful spectacle of crocus blooms in your garden come spring. A sunny spot is vital, as crocuses adore soaking up the sunlight, making them a perfect addition to flower borders or as a statement in pot arrangements. As you plant, consider incorporating organic matter into the soil to ensure your crocuses have the best nutrients available. Adding compost not only enriches the ground but also supports the delicate ecosystem in your garden, providing food for beneficial pollinators. Caring for Your Crocus Flowers Crocus flowers are relatively low maintenance once established, but some care tips can enhance their growth. Regular watering helps, especially during dry spells; ensure that the soil drains well to prevent rot. Fertilizing can happen in early spring, which gives plants the boost they need to thrive without overwhelming them in the blooming season. A common misconception is that crocuses require constant care. On the contrary, a simple seasonal schedule of observing their growth and waiting for blooms can lead to the best practices in maintaining their health. Naturalizing Crocus: A Beautiful Landscape Enhancer One of the most rewarding aspects of growing crocus flowers is their ability to naturalize. Planting them in drifts across your lawn or between other perennial plants allows for a delightful, wildflower effect, making your backyard a refuge for local wildlife. This technique not only beautifies suburban landscapes but also supports local pollinator populations, like bees and butterflies, that depend on these early blooms for nourishment. The Environmental Impact of Growing Crocus Crocus flowers make excellent companions for vegetable gardening as well. By naturalizing them in your garden beds, you can provide a habitat that supports pollinators, crucial for crop success. Moreover, this interconnectedness between flowers and vegetables exemplifies a sustainable gardening practice where both beauty and utility coalesce. Final Thoughts: Join the Crocus Craze Embracing crocus flowers within your planting projects can significantly enhance your outdoor experience. Their stunning blooms symbolize resilience and the beauty of nature, invigorating the spirit as we await the warmth of spring. Not only does growing crocus flowers provide a picturesque addition to any landscape, but they also support biodiversity in your local ecosystem. As the gardening season approaches, I encourage you to plant crocuses in your flower beds, enhance your landscape with these delightful blooms, and watch as they herald the arrival of spring in your backyard.

09.09.2025

Elevate Your Halloween Decor with These Scary-Looking Plants

Update Transform Your Halloween with Eerie Greenery Halloween is right around the corner, and with it comes the tradition of decorating our homes and yards to suit the spooky season. Why rely on plastic trinkets when nature has gifted us with an array of stunningly creepy plants? Whether you're hosting a haunted house party or simply want to embrace the spirit of the season, incorporating spooky plants into your decor elevates your setup from basic to bewitching. Here are thirteen plant choices that will send shivers down your spine while providing an opportunity for unique gardening projects. 1. Bat Flower: A Beast of a Bloom The bat flower (Tacca chantrieri) is the showstopper of eerie plants. With its unusual deep purple petals that resemble a bat in flight, it's hard to believe how majestic a spooky plant can be! It thrives well in high humidity settings, making it perfect for indoor spaces. Cultural tales about this plant often connect it to tales of transience and shadows, adding a layer of history that increases its appeal. 2. Black Elephant Ears: Dark and Dramatic Another stunning choice is the black elephant ears (Colocasia esculenta). Known for their enormous black and purple heart-shaped leaves, they can grow up to three feet in length. These plants create a striking visual impact in your garden or as an indoor feature. Perfect for creating a shadowy ambiance, they’re great as accents in landscaping ideas or garden pathways. Just be mindful that they require a bit of space to flourish! 3. The Carnivorous Cobra Plant Master the art of thrill with the cobra plant (Darlingtonia californica). This unique carnivorous species not only stands tall but also embodies the excitement of nature’s filters, luring insects into its aquatic depths. However, it does require specific conditions to thrive, making it a project suitable for seasoned gardeners. This commitment can yield rewards beyond aesthetics; after all, carnivorous beauties often spark fascinating conversations! 4. Groundbreaking Ghost Plant The ghost plant (Graptopetalum paraguayense) embodies a spectral presence with its ghostly grayish hues. Its resilience makes it an excellent addition to your indoor gardening collection, as it thrives in various light conditions. Symbolically, it has been linked to transformation, signifying change, which fits perfectly with the themes of Halloween. Plus, maintaining this plant is a breeze and allows for opportunities to share cuttings with friends! 5. Venus Flytrap: Nature’s Little Predator I can't mention spooky plants without highlighting the Venus Flytrap. This infamous carnivorous plant not only captivates with its deadly beauty but also teaches valuable lessons about the delicate balance of nature and sustenance. Although they require specific conditions, their intriguing mechanics of catching prey can serve as educational opportunities for budding gardeners of all ages! Creating a Spooky Landscape: Tips and Tricks For those intrigued by the world of creepy plants, consider combining various species for a multi-layered and engaging garden setup. Here’s some practical insight: plant taller varieties to the back, using shorter, shadowy plants in the foreground. Adding dark mulch can enhance the overall aesthetic while also protecting the plants from weeds. Future Predictions: The Rise of Eerie Gardening As gardening trends continue to evolve, incorporating unusual plants into our homes isn’t merely for Halloween anymore. With the increased focus on organic gardening and sustainable practices, bizarre yet beautiful plants may find themselves at the forefront of contemporary landscaping. Consider how community gardens can benefit from unique plant selections that draw in pollinators while adding an eerie flair. Final Thoughts on Creepy Plant Care As spooky season approaches, embrace the chance to let your garden reflect your personality—even if that means crafting an intentionally eerie environment! Each plant offers a storytelling opportunity, so take gardening to the next level by introducing spooky plants into your outdoor spaces or window sills. After all, why settle for generic Halloween decorations when you can captivate with nature’s own creations?

09.09.2025

Build Your Own Espalier Wood Privacy Screen for a Backyard Oasis

Update Your Backyard Oasis Awaits: Create an Espalier Privacy Screen In urban settings, where space is limited and neighbors might be a stone's throw away, having a slice of privacy can transform your outdoor space. With an effective gardening project, you can combine beauty with functionality by building an espalier wood privacy screen. This DIY project not only screens off prying eyes but can also add a lovely individual touch to your garden with the captivating shapes of espaliered plants. Why Choose a Wood Privacy Screen? Wooden privacy screens serve as an aesthetic boundary while enhancing the overall look of your garden. Unlike dense shrubs or trees that could take years to reach maturity, a well-constructed wooden trellis becomes an instant feature in your outdoor area. Whether it's cedar or other durable wood types, these structures can provide an evergreen backdrop for your chosen plants, creating shadows and dappled light that soften the harsh edges of everyday life. Understanding Espalier: The Art of Trained Growth Espalier is not just a gardening technique; it's an art form. This method involves training trees or shrubs to grow flat against a wall or a trellis, creating a beautiful two-dimensional display. Generally used for fruit tree varieties, such as apples or pears, it can also work well with ornamental plants like the wintercreeper mentioned in the original woodworking project. By selectively pruning and guiding branches, your espaliered plants will form an intricate living sculpture, providing visual interest even in winter. Step-by-Step Guide to Building Your Privacy Screen Working on this project requires some basic woodworking skills and tools, but the results are worth it. Here’s how to get started: Gather Your Materials: For a sturdy structure, you’ll need pressure-treated lumber, concrete for stabilization, post saddles, screws, and, of course, your choice of plants to espalier. Build the Frame: Assemble your wood posts into a rectangular frame at your desired height—11 feet tall, for example. Ensure the stability of the posts by digging deep trenches or using sturdy post saddles to keep moisture away. Install Lattice: Attach a lattice or wires to your frame to support the plants as they grow. This grid structure is essential for guiding the plants into the desired shapes. Choose and Plant Your Espalier: Now it's time to introduce your chosen species; whether a flowering vine or an evergreen, it should complement your space while responding well to the training. Maintenance and Care: Regular pruning is necessary to maintain the desired shape and health of your plants. Local Resources for Your Gardening Projects Many local horticultural societies and gardening clubs offer workshops on DIY projects, including building privacy fences or embracing espalier techniques. You could check with nearby community gardens or library resources for books and guides that delve into advanced gardening techniques, helping you expand your knowledge base and grow your gardening skills. Why This Project Matters Crafting a privacy screen not only enhances your outdoor environment but provides personal satisfaction and ownership of your space. It's a meaningful way to engage with nature, allowing you to create a sanctuary to unwind, entertain, or enjoy solitude. Plus, as gardening projects spur wellness trends, this DIY endeavor can boost your mental well-being through interaction with plants. Taking the Next Steps to Your Green Oasis Begin planning your wood privacy screen project today! Gather your materials, sketch a design, and reach out to your local plant nursery for recommendations on the best crops for espalier growth. Invite friends or family to join you, turning the project into a collaborative garden experience filled with fun and creativity. With these tips, your backyard will evolve into your private paradise, showcasing your personality and dedication to gardening.

Terms of Service

Privacy Policy

Core Modal Title

Sorry, no results found

You Might Find These Articles Interesting

T
Please Check Your Email
We Will Be Following Up Shortly
*
*
*