Add Row
Add Element
cropper
update
Marin Home Ideas
update
Add Element
  • Home
  • Categories
    • Home Remodeling Ideas
    • Interior Design & Decor Ideas
    • Gardening & Landscaping Ideas
    • Outdoor Living & Entertaining
    • Health & Wellness at Home
    • DIY at Home
    • Kitchen Ideas
    • Bedroom Ideas
    • Bath Ideas
    • Cooking at Home
    • Home Office Ideas
    • Lighting Ideas
    • Furniture Ideas
    • Architecture Ideas
    • Senior Living at Home
    • Home Finance
    • Real Estate News
April 14.2025
3 Minutes Read

Essential Grape Hyacinth Care Tips for Post-Bloom Success

Close-up of grape hyacinths in bloom, vibrant purple flowers.

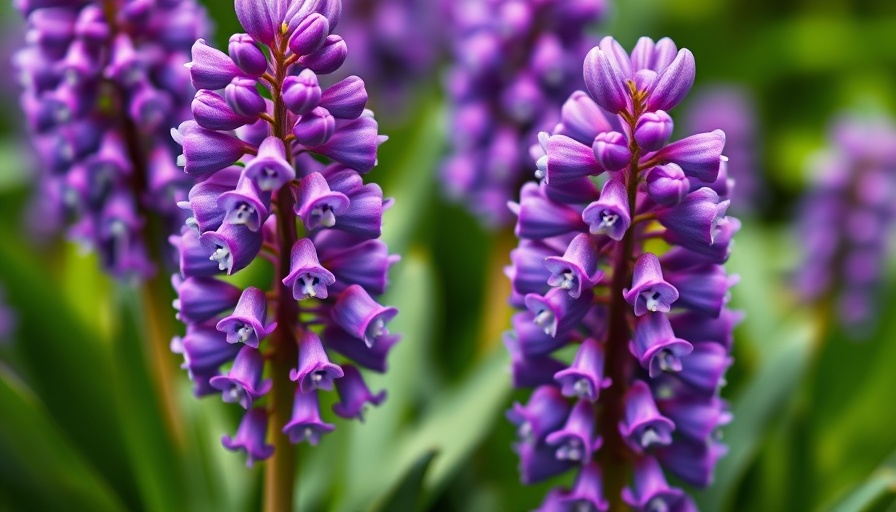
Understanding Grape Hyacinth Care Post-Bloom

Spring’s vibrant hues are often heralded by the beautiful blooms of grape hyacinth (Muscari spp.), a hardy flowering bulb that brings joy to any garden. However, as their lovely flowers begin to fade, many gardeners may wonder how best to care for these understated gems in their landscapes. Here’s a comprehensive guide to what you should do after the blossoms have covered your garden in color and how to help them thrive for years to come.

Water Wisely: Reducing Your Grape Hyacinth’s Need for Moisture

Once your grape hyacinth flowers have finished blooming, they require significantly less water as they transition into their dormancy period. It’s important to allow the top two or three inches of soil to dry out before you water again. This is because the plant’s energy demands diminish after flowering. Wait until the foliage has died back before neglecting to water entirely; this indicates that the plant has stored enough energy for the next growth cycle.

For added assurance, test the soil moisture with your finger or use a moisture meter if your soil is particularly dense. This will help ensure you don’t overwater, which can lead to bulb rot and other issues.

Fertilizing for Future Blooms: The Role of Nutrients

An effective way to boost the health and future blooms of your grape hyacinths is through proper fertilization. Once the flowers fade, consider adding bone meal around the base of the plants. Bone meal is a natural source of phosphorus, which is essential for flowering plants, as it promotes healthy blooms. This organic fertilizer typically has an NPK ratio of around 3-15-0, providing the necessary nutrients to rejuvenate your plants.

Customizing your fertilization strategy based on your soil composition can lead to optimum performance. For instance, if your garden soil already has sufficient nitrogen and potassium, a phosphorus-focused food may be ideal, enhancing flowering without overwhelming the plant with unnecessary nutrients.

Pruning: Tidying Up for Plant Health

After flowering, removing spent blooms is not only a great way to tidy up the garden but also beneficial for the plant’s health. This practice, called deadheading, can help prevent the plant from allocating energy to seed production, allowing it to redirect energy back into the bulb for robust blooming in the following seasons.

While grape hyacinths are relatively low maintenance, taking the time to prune can result in more impressive displays of color in future springs. Likewise, if the foliage becomes too ragged or yellowing, removing the outer leaves can also help the plant concentrate its efforts into healthy growth.

Grapes in Containers: Indoor Grape Hyacinth Care

If you’ve decided to grow grape hyacinths in containers, caring for them post-bloom is similar but has its nuances. Ensure you still have a plan for watering and fertilizing, keeping in mind that container plants can dry out faster than garden beds. After blooming, reduce watering frequency and use a balanced, diluted fertilizer to keep the bulbs nourished.

Container-grown grape hyacinths can also be brought indoors during their dormancy period, allowing you to control the environment. Make sure they remain in a cool, dry place, but don't let them go completely dormant. Consistent care helps maintain their vigor and will yield delightful blooms come spring.

Maintaining Garden Harmony with Grape Hyacinths

Incorporating grape hyacinths into your garden design can create stunning contrasts and vibrant spring colors. However, being mindful of their growth patterns and needs fosters harmony in your landscaping. These bulbs can naturalize beautifully, so planning garden layout with consideration for their eventual spread can lead to a abundant flower garden over time.

They pair wonderfully with other spring flowers, so look into companion planting strategies that make the most of vertical gardening and grouped plantings. Including more diverse plants not only enhances the visual appeal but also supports local wildlife, including bees and butterflies, as they forage for nectar.

Conclusion: Take Action for a Blooming Future

Caring for grape hyacinth post-bloom doesn’t have to be overwhelming. By watering wisely, fertilizing appropriately, and tidying up the plants, you can guarantee they thrive, bringing joy and color to your garden year after year. Remember, a little attention to these beautiful blooms can yield big results in the form of a lush, vibrant flower garden come spring. Start implementing these tips today to ensure your grape hyacinths are primed for their return!

Gardening & Landscaping Ideas

11 Views

0 Comments

Write A Comment

*
*
Related Posts All Posts
02.15.2026

Transforming Small Urban Spaces into Lush Gardens: Tips Inside!

Update Transforming Inner-City Spaces: The Power of Gardening In the hustle and bustle of city life, even the tiniest patches of greenery can provide a vital respite from the concrete jungle. Charlie’s visit to a quaint inner-city courtyard highlights how urban gardening isn’t just about aesthetics; it’s about creating a sanctuary in limited spaces. The transformation of this small area into a vibrant garden showcases innovative techniques that anyone can employ, regardless of how cramped one’s living conditions may be.In 'Transforming Small Inner City Garden', the team highlights community gardening's impact, prompting deeper insights about urban gardening's potential. Why Gardening Matters Urban gardening plays a crucial role in community building, providing not only a source of fresh produce but also a way for neighbors to come together. As we witnessed in the latest episode of Great Home Ideas, spaces like these foster connections and encourage local sustainability efforts. Research shows that community gardens significantly improve neighborhood relationships and overall mental health, making them essential in our increasingly isolated urban living. Common Gardening Techniques Every Urban Gardener Should Know Even in small spaces, there are plenty of techniques for effective gardening. Whether you’re planting flowers for curb appeal or cultivating a veggie patch for your kitchen, understanding these methods sets you up for success: Raised Garden Beds: Elevating plants not only improves drainage but also reduces the strain on your back while gardening. Container Gardening: Perfect for tight spaces, a variety of plants, from herbs to flowers, can flourish in pots. Vertical Gardening: Utilizing wall space can allow more plants in a compact area, creating a striking visual element. Sustainable Gardening Practices: Techniques like composting, mulching, and drip irrigation not only conserve resources but also promote garden health. Design Ideas to Enhance Your Garden’s Aesthetics Every successful garden needs a design that reflects personal style and complements the architecture of the home. Here are a few inspiring ideas featured in the transformation project: Flower Bed Ideas: Mixing perennials with a splash of seasonal color can keep the garden lively all year round. Garden Decor: Items like mirrors can make the space appear larger while also enhancing natural light. Garden Path Ideas: Creating pathways with landscaping rocks can guide visitors through your space while serving as a beautiful focal point. Actionable Insights: Planning Your Urban Garden As you embark on your gardening journey, it's essential to plan meticulously. Establish a watering schedule to keep your plants thriving, and don't forget to keep an eye on soil health. Here are tips to consider: Observe the sunlight in your space. Knowing which areas get full sun can help determine where to plant. Group plants with similar watering and fertilizing needs to simplify care routines. Incorporate organic gardening methods to promote biodiversity and health in your home. Community Engagement: Sharing Your Gardening Journey Engaging with local community gardens can greatly bolster your gardening understanding and provide the emotional support typically lacking in urban settings. Many cities have gardening clubs or initiatives that offer resources, workshops, and shared space to foster garden projects. A bond between individuals can form just as strongly as the roots in the soil, thanks to the shared passion for growing and nurturing plants. Final Thoughts: Why You Should Start Your Garden Today The journey of gardening, as seen in the episode “Transforming Small Inner City Garden,” not only results in a more beautiful living space but catalyzes personal growth and community building. The skills learned through gardening can lead to healthier eating habits, a more connected neighborhood, and a quicker route to emotional well-being. So why delay any longer? Start planning your garden today and become part of the thriving tradition of urban gardening! If you’re curious about gardening tips and want to see how others have transformed their spaces, check out local gardening workshops or community groups to inspire your next project.

02.15.2026

Seed-Starting for Beginners: Avoid Mistakes Pros Never Make

Update Mastering the Art of Seed-Starting: Avoiding Common Pitfalls Starting seeds can be a thrilling journey for aspiring gardeners, but it can also be fraught with obstacles. Whether growing vibrant flowers, lush green herbs, or productive vegetable gardens, the seed-starting process is critical to achieving gardening success. Unfortunately, this phase often presents beginners with unexpected challenges that can lead to frustration. Thankfully, there are several effective strategies to help ensure successful seed germination and growth, enabling gardeners of all levels to cultivate their green thumbs. Understanding the Basics of Seed-Starting Before diving into seed-starting, having a solid grasp of the essential tools and techniques is paramount. Begin by gathering basic supplies: quality seeds, suitable containers, and the right soil mix. It's crucial to select seeds that align with your local climate and the conditions you can provide. Following the guidelines from seasoned experts, like those from Garden Betty, reveals that maintaining moisture without drowning your seeds is vital. Overwatering can lead to damping-off, a fungal disease that is one of the most common killers of young seedlings. The Importance of Light and Warmth Once seeds are sown, they require specific conditions to thrive. For many seedlings, access to adequate light is as crucial as the initial moisture provided to the soil. If you’re starting seeds indoors, placing them near a strong, south-facing window can help, but often, supplemental grow lights are necessary, especially during darker months. Experts recommend exposing seedlings to about 12 to 16 hours of light daily when they're growing. Additionally, many seeds prefer warmth for germination; utilizing a heating mat can ensure your seeds reach optimal soil temperatures, especially for heat-loving varieties like tomatoes or peppers. Timing is Everything: Frost Dates and Planting Windows A common pitfall for new gardeners is not considering the timing of planting. Seed packets generally provide essential information, including the ideal planting windows and frost dates in your area. Starting seeds indoors too early can lead to overcrowded seedlings and stunted growth, while starting too late may mean missing out on the prime growing season. Following a calendar that marks the first and last expected frost dates can help manage this aspect, allowing gardeners to confidently plan their sowing schedules. Choosing the Right Seed-Starting Mix The choice of a seed-starting mix can significantly impact the success of your seedlings. Generally, commercial mixes are preferable because they are designed to retain moisture while providing adequate drainage. However, you can create your own by mixing equal parts of compost, peat, and vermiculite, as recommended in beginner guides. It’s important to avoid regular potting soil, as its chunkier texture can hinder seed germination and root growth. Effective Seed-Sowing Techniques Sowing seeds correctly is foundational to their germination. A common mistake involves planting seeds too deeply. As a rule of thumb, plant seeds to a depth of about twice their diameter; smaller seeds can often be left on the surface while larger seeds need to be adequately covered. Always remember to label your trays to avoid the confusion that many new gardeners face when seedlings begin to pop up. Germination: Keeping Seeds Moist and Monitored Once seeds are sown, monitoring moisture levels is crucial. Maintaining a consistent level of dampness in the soil is essential, yet care must be taken to prevent overwatering. A gentle mist from a spray bottle is often more effective than heavy pouring. As the seedlings emerge, they require fresh air circulation, so removing any plastic covers gradually helps acclimatize them to the outside conditions they will soon face. Transplanting and Hardening Off: Preparing for Outdoor Life As seedlings develop their first true leaves, they are ready for transplanting. However, this is a delicate moment, and the process of hardening off—gradually acclimating seedlings to outdoor conditions—is vital. Start by taking them outside for a few hours a day in a shaded area, then progressively introduce them to more direct sunlight and longer periods outside. This step ensures that when they finally transition to their garden beds, they can withstand the environmental factors they will encounter. Conclusion: Growing Your Gardening Confidence Seed-starting may initially appear daunting, yet with patience, practice, and the right resources, anyone can cultivate a thriving garden filled with vibrant flowers, herbs, and vegetables. By understanding the foundational principles and avoiding common pitfalls, gardeners can grow with confidence, unlocking the joy of nurturing plants from seed to harvest. Dive into this rewarding journey and embrace the myriad possibilities that await in your garden!

02.14.2026

Transform Your Space: Expert Tips on Growing Strawberries in Containers

Update Discover the Joy of Growing Strawberries in Containers Container gardening has blossomed into a popular trend, offering a vibrant way to enhance outdoor spaces, especially with delicious strawberries. Not only do these berries bring beautiful foliage, but they also offer a rewarding harvest, making them an ideal choice for both novice and experienced gardeners alike. If you’re looking for gardening tips to turn your balcony or patio into a strawberry haven, you’re in the right place! Understanding Different Types of Strawberries Before starting your strawberry adventure, it's vital to know the types available. There are three primary categories: June-bearing, Everbearing, and Day-neutral strawberries. Each type has qualities that cater to various gardening styles. June-bearing strawberries produce a bountiful crop once a year, typically in June. They spread out with numerous runners, making them better suited for garden beds than containers. Everbearing strawberries yield fruit from early spring to fall. While they produce less than their June-bearing counterparts, the taste is said to surpass that of store-bought berries, and they adapt wonderfully to container life. Finally, Day-neutral strawberries are a newer variety continuously producing throughout the growing season. These strawberries thrive in cooler weather but can struggle in extreme heat. Picking the right variety based on your local climate is crucial for a fruitful harvest. Essential Tools for Container Gardening Growing strawberries in containers requires minimal yet essential tools. Prepare by gathering: Strawberry seedlings High-quality fertilizer Potting mix A suitable planting container A watering can Most of these items can easily be found at local gardening stores or online platforms! Choosing the Right Pots for Strawberries Selecting an adequate container is vital for successful growth. Strawberries prefer wide, shallow pots with a minimum diameter of 8-12 inches that offer ample drainage. Specialized strawberry pots are ideal but any light-colored container that maintains a cooler temperature for roots will work. Don’t forget the drainage holes to prevent soggy roots! Soil Matters: The Foundation for Growth The right growing medium is crucial. Strawberries thrive in loamy soil, ideally with a pH between 5.3 and 6.5. You can test your potting soil's pH with a simple home kit or even household items like vinegar and baking soda. This step ensures your strawberries grow to their full potential! Maximizing Sunlight for Healthy Plants Sunlight is essential. Place your containers in a location that receives 6-8 hours of direct sunlight daily. This exposure not only helps the plants bear fruit but also fosters more robust, disease-resistant plants. When to Plant Your Strawberries The timing for planting strawberries depends on your climate. You can typically plant strawberries in early spring or, if you reside in warmer areas, in the fall. Be particularly cautious of frost, as strawberries are sensitive to chilly temperatures. Note that day-neutral varieties prefer cooler conditions, so plant accordingly! Common Challenges in Container Gardening While container gardening is a rewarding experience, it comes with its hurdles. Garden pests such as aphids, spider mites, and slugs can quickly become nuisances. Regular checks and employing organic pest control methods can alleviate these issues. Why Container Gardening is Great for Everyone Container gardening allows urban dwellers and those with limited space to engage in gardening. Furthermore, it fosters a connection with nature, which is essential in our increasingly digital world. Cultivating strawberries can uplift spirits, offer fresh produce, and contribute to a sense of community through shared gardening experiences. Conclusion: Start Your Container Garden Today! Growing strawberries in containers opens the doors to a fruitful gardening journey that’s not only productive but also fulfilling. Whether you’re looking to add greenery to your urban apartment or create a beautiful patio space, strawberries can provide earthy goodness and an aesthetic boost. So why wait? Gather your supplies today and start your container garden adventure!

Terms of Service

Privacy Policy

Core Modal Title

Sorry, no results found

You Might Find These Articles Interesting

T
Please Check Your Email
We Will Be Following Up Shortly
*
*
*