Add Row
Add Element
cropper
update
Marin Home Ideas
update
Add Element
  • Home
  • Categories
    • Home Remodeling Ideas
    • Interior Design & Decor Ideas
    • Gardening & Landscaping Ideas
    • Outdoor Living & Entertaining
    • Health & Wellness at Home
    • DIY at Home
    • Kitchen Ideas
    • Bedroom Ideas
    • Bath Ideas
    • Cooking at Home
    • Home Office Ideas
    • Lighting Ideas
    • Furniture Ideas
    • Architecture Ideas
    • Senior Living at Home
    • Home Finance
    • Real Estate News
August 09.2025
3 Minutes Read

Essential Steps You Should Take When Flood Damage Affects Your Home

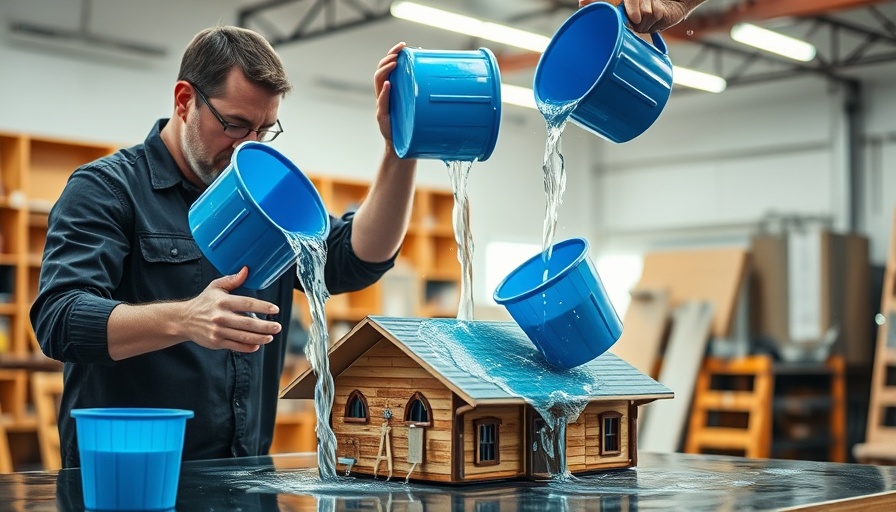
Flood damage recovery demonstration with two men using buckets.

Understanding the Impact of Flood Damage on Your Home

Severe weather can strike at any time, leaving homeowners vulnerable to devastating flooding. When water invades your home, it’s essential to understand what materials are at risk and how to respond effectively. In this article, we’ll discuss the key steps to take when dealing with flood damage, so you can protect your home and restore it efficiently.

In 'What to Do When Severe Weather Floods Your Home | Storm Ready', the discussion dives into crucial flood recovery steps, exploring key insights that sparked deeper analysis on our end.

Your First Steps in Flood Recovery: Safety First!

When water enters your home, your first priority must be safety. Inspect for any potential contaminants like sewage or chemical runoff. If there’s a chance of contamination, or if the cleanup feels overwhelming, don't hesitate to call a professional. Equip yourself with knee-high rubber boots, an N95 mask or respirator, and eye protection to ensure that you are safe while working in hazardous conditions.

Removing Water: Tools and Techniques

Water can cause unnecessary damage if left standing, so swift action is crucial. Start by using a sump pump or a wet/dry vacuum to remove as much water as possible. For smaller amounts, a wet/dry vacuum may suffice, while a submersible pump can handle larger volumes. After removing the bulk of the water, you’ll face the next challenge: drying out the building materials.

Assessing Damage to Building Materials

The type of flooring and wall materials significantly influence recovery efforts. For example, carpets often trap moisture underneath, contributing to mold growth. If your carpets are soaked, you’ll need to pull them up quickly to start drying the area beneath. Additionally, hardwood floors can warp if left in water, resulting in what's known as cupping, which may require sanding or replacement.

The Role of Airflow in the Drying Process

After extracting water, it’s crucial to increase airflow within the affected spaces to promote drying. Use box fans or dehumidifiers to facilitate the process. The goal is to reach the original moisture levels of dry and unaffected areas of your home. To check your progress, a moisture meter can help you identify whether there are still wet areas that need attention.

Preventing Mold Growth After Flooding

Mold can start growing within 24 to 48 hours of water intrusion, making it critical to act quickly. Wet materials can be a breeding ground for mold, so ensure that you remove any saturated insulation and materials. Implementing preventative measures such as applying specialized mold treatments can also safeguard your home.

Long-Term Strategies for Future Flooding

After restoring your home, consider long-term strategies to mitigate future flooding risks. Regularly check your sump pump for functionality, and consider a battery backup system to ensure it operates during power outages, especially if severe storms are forecasted. Alongside these preventive measures, creating a detailed emergency preparedness plan can be invaluable.

Community and Resources for Homeowners

In the aftermath of flooding, it can be comforting to know you’re not alone. There are many resources available, including local remodeling contractors who specialize in water damage restoration. The knowledge they bring can save you time and ensure your home is rebuilt to resist potential threats in the future. When searching for help, consider using terms like 'remodeling contractors near me' or 'basement remodeling ideas' to find professionals suited to your specific situation.

Conclusion: Navigating the Waters of Home Flooding

Addressing flood damage requires care and prompt action to protect your home from further hazards. Whether dealing with untreated water, assessing affected areas, or enacting preventative measures, being well-informed makes all the difference. Remember, investing time now into proper restoration can save you from costly repairs later. If you find yourself in a water situation, refer to our guide to stay safe and restore your home efficiently.

Home Remodeling Ideas

0 Views

0 Comments

Write A Comment

*
*
Related Posts All Posts
09.27.2025

The Amazing Benefits of Tape in Home Remodeling That Go Beyond Aesthetics

Update Unveiling the Practical Benefits of Tape: More Than Just a Color Choice Tape may seem like a simple item—it comes in various colors and shapes, adorning countless DIY shelves and classrooms. However, in remodeling projects, the myriad of tape options extends beyond aesthetics, providing functional benefits that many might overlook. Whether you're diving into a full home renovation or simply sprucing up your space, understanding the diverse uses of tape can enhance your efficiency and creativity!In 'Plot twist: the rainbow of tape options isn’t just aesthetic,' the discussion dives into the functions of various tape options, exploring key insights that sparked deeper analysis on our end. The Hidden Power of Tape in Home Remodeling When embarking on a kitchen remodel or bathroom overhaul, you need more than just paint and tiles; you'll also require the right tools and materials. Specialized tapes are designed to tackle specific tasks: for instance, painter's tape prevents color bleed during painting, while frank or duct tape can support temporary fixes during bigger projects. These items allow for a seamless transition between design and functionality, showcasing the importance of using the correct material in any renovation. Color-Coding for Efficiency: The Smart Way to Organize Your Project One of the most practical uses of colored tape in home renovations is organization. By color-coding materials or even different sections of a project, homeowners can streamline their workflow. Imagine using red tape to signify areas designated for demolition, blue for new installations, and green for maintenance zones. Not only does this reduce confusion, but it also enhances safety, making renovations less stressful and more enjoyable. Real Stories: DIY Success Using Creative Tapeworks Many homeowners have discovered that their projects went smoother by simply leveraging tape's versatility. One homeowner, Sarah, recounted her experience during her bathroom remodel: "I used painter's tape to mark where I didn’t want paint to go, but later realized it could also keep my grout lines clean while tiling. The result? A stunning bathroom that I’m proud to show off!" These narratives reflect that the right tape can truly make all the difference in achieving desired results. Cost-Effective Tools: Saving Penny on Remodeling As remodeling costs can quickly add up, finding cost-effective solutions is crucial. Utilizing tape is a budget-friendly option; a roll of painter's tape generally costs less than $10 and can save hours of tedious cleanup when painting. Similarly, a good quality duct tape can serve multiple purposes, from fixing furniture to reinforcing temporary dividers during renovation, proving that sometimes, the simplest tools can yield the greatest results. Future of Tape: Innovations on the Horizon The future of tape also reveals exciting innovations aimed at improving user experience. Companies are developing eco-friendly tapes and those with removable adhesives that won't damage surfaces. This is particularly relevant for those engaged in frequent home renovations or in situations where walls may need to be treated gently—such as in rented spaces. Conclusion: Embracing the Potential of Tape In the evolving landscape of home improvement, tape is more than merely a decorative element. By merging its various capabilities with creative applications, home renovators can enhance efficiency and aesthetic outcomes. For those considering a remodeling project, remember that the right tape can be a game-changer, supporting your imaginative design while keeping troubles at bay. If you're ready to take the plunge into a remodel—whether of your kitchen, bathroom, or any other space—consider consulting local remodeling contractors who can share more specialized tips tailored to your project. Their expertise can help turn your vision into reality while maximizing efficiency through thoughtful applications, even down to the tape you use!

09.23.2025

Discover the Wonders of Keiki Paste for Your Houseplants!

Update Unlocking the Green Secrets: What is Keiki Paste? Keiki paste is quickly becoming a buzzword in the plant parenting community, coined from the Hawaiian word for "baby". This potent cloning paste acts as a plant growth hormone that encourages new leaves to sprout from nodes, helping you revitalize your houseplants like pothos and orchids. Unlike rooting hormone, which helps establish new roots, keiki paste triggers growth above ground. The Science Behind Keiki Paste: Why It Works At the heart of keiki paste lies a commitment to nurturing plant growth through synthetic hormones. The primary ingredient in these pastes is 6-benzylaminopurine (6-BAP), a type of cytokinin. This hormone promotes cell division and growth in plants, perfect for waking up dormant nodes where new branches or leaves can form. Combined with a sticky medium like lanolin—a natural component from sheep’s wool—keiki paste adheres well to plant nodes, ensuring the hormone penetrates effectively. How to Get Started: A Step-by-Step Guide to Using Keiki Paste One of the best aspects of keiki paste is its user-friendliness: Score the Node: Make a small cut at the desired node location to encourage the hormone to enter easily. Use a toothpick or a similar tool for precision. Apply the Paste: Using a toothpick or a cotton swab, dab a small amount of paste onto the scored node. Remember, less is more! A pea-sized dollop is often enough. Water and Wait: After applying the paste, water your plant as usual and wait for nature to take its course. Benefits of Using Keiki Paste: More Than Just Growth Keiki paste offers more than just a growth solution; it can be a vital tool for any plant enthusiast. Here are some significant benefits: Quick Fix for Bare Spots: Transforming plants that have seen better days is now achievable with minimal effort. Encourages Healthy Growth: The hormone action helps produce robust leaves, ensuring your plants thrive. Easy to Apply: As noted, the process is straightforward and requires no specialized skills or tools. Future Trends in Plant Care: The Growing Popularity of Plant Hormones As more people discover gardening and houseplant ownership, techniques like using keiki paste are gaining traction. This trend speaks to broader shifts towards sustainable living and indoor gardening. With the rise in demand for homegrown plants, the availability and variety of plant hormones are likely to expand, providing even more options for plant care enthusiasts. Practical Takeaways: Why You Should Try Keiki Paste Embracing keiki paste can lead to a more fulfilling planting experience. Not only does it stimulate growth, but it also inspires creativity in how we nurture our green friends. Whether you’re filling in gaps on a pothos vine or attempting to revive a struggling orchid, this innovative product opens new possibilities for revitalizing your houseplants. Connecting with the Community: Share Your Journey Finally, if you’re intrigued by keiki paste, consider documenting your journey on social media or communities dedicated to plant care. Sharing your experiences helps create a collective knowledge base, encouraging others to explore the joyful world of plant ownership. If you’re looking for more tips on home improvement or innovative gardening ideas that can enhance your home, consider exploring related resources tailored to elevate your living space.

09.21.2025

Your Ultimate Guide to Installing a Washer & Dryer Like a Pro

Update Mastering Your Home Installation: A Friendly Guide to Washer & Dryer Setup Installing a washer and dryer can feel daunting, but fear not! With a little guidance, it can become a manageable home improvement project that even beginners can accomplish. In the video, "How To Install a Washer & Dryer | How To Anything," Jackie shares insights into her new washer and dryer setup, providing practical tips to help anyone tackle this task with confidence.In 'How To Install a Washer & Dryer | How To Anything', Jackie shares essential tips that sparked a deeper exploration of how to effectively tackle your home installation projects. Pre-Installation Checklist: Preparing Your Space Before diving into the installation, it's essential to prepare your space efficiently. First and foremost, ensure that the floor is hard and level – uneven floors can lead to issues during operation. Additionally, check that you have the right clearance, especially since front-load washers need ample room to open and close properly. Aside from that, assessing the power requirements is crucial; your washer needs a 120-volt outlet, while your dryer requires a dedicated 240-volt outlet. Having the right setup means less hassle and more effective performance in the long run. The Importance of Utility Connections In her video, Jackie highlights how crucial it is to have the proper installation of utility lines in your laundry area. This includes hot and cold water lines and a drainage line for the washer. Ensuring that these connections are in good working order allows for seamless operation once the machines are plugged in. Moreover, Jackie emphasizes not using extension cords, which can cause safety hazards. Instead, make sure utility lines are positioned correctly, and check their conditions before installation. Transforming Your Laundry Room with Style Not only is installation practical, but it can also be stylish! Jackie expresses her affection for the navy metallic color of her appliances, showcasing how modern designs can elevate laundry spaces. If you're considering a kitchen remodel or a bathroom remodel that includes laundry appliances, adding appeal to your laundry area can make it a focal point of your home. With options like pedestal stands that provide height and extra storage space, your laundry room can serve as both a functional and stylish part of your home. Understanding Power Connections: Safety First! When connecting power cables, safety must be your priority. Jackie shows how to connect the power cable of the dryer step-by-step, emphasizing the differences based on older homes, which may utilize three-prong outlets. Understanding these essential connections not only ensures that your appliances function correctly but also helps you avoid potential electrical hazards. Water Connections: Ensuring Efficiency Connecting water lines is another critical step Jackie walks us through. With two lines, one for hot water (red) and one for cold (blue), it's easy to confuse them – so paying attention is key. Turning on the water to check for leaks ensures everything is running smoothly. A simple tip Jackie shares is to use a bucket to catch debris from the water lines before connecting them to your washer. This attention to detail can save headaches down the line. DIY Remedy: No Professional Needed! One of the biggest takeaways from Jackie’s video is that installing a washer and dryer is often more accessible than homeowners realize. Many people hesitate to take on their home improvement projects out of fear of making mistakes or lacking skills. However, as Jackie demonstrates, you can adopt this DIY approach with a little patience and the appropriate tools. Remember to call in a professional only when dealing with gas dryers or complicated electrical systems. For all other installations, empower yourself with knowledge and chat with local remodeling contractors if you need additional guidance. Ready to tackle your home projects? Whether you're updating your laundry setup or considering a full remodeling venture, remember that resources and support are available. For further inspiration and exploration of remodeling ideas and costs, feel free to reach out to local remodeling services that can tailor solutions to your needs. In conclusion, with Jackie’s insights as a guide, anyone can confidently approach the installation of a washer and dryer. By preparing your space, ensuring proper connections, and injecting a bit of style, your home can feel more functional and beautiful!

Terms of Service

Privacy Policy

Core Modal Title

Sorry, no results found

You Might Find These Articles Interesting

T
Please Check Your Email
We Will Be Following Up Shortly
*
*
*