Add Row
Add Element
cropper
update
Marin Home Ideas
update
Add Element
  • Home
  • Categories
    • Home Remodeling Ideas
    • Interior Design & Decor Ideas
    • Gardening & Landscaping Ideas
    • Outdoor Living & Entertaining
    • Health & Wellness at Home
    • DIY at Home
    • Kitchen Ideas
    • Bedroom Ideas
    • Bath Ideas
    • Cooking at Home
    • Home Office Ideas
    • Lighting Ideas
    • Furniture Ideas
    • Architecture Ideas
    • Senior Living at Home
    • Home Finance
    • Real Estate News
Add Row
Add Element
April 29.2025
3 Minutes Read

Grow a Beautiful Backyard with These Tough, Hardy Roses

Vibrant red hardy roses in a sunlit garden.

Discovering Hardy Roses: Beauty Without the Hassle

For many aspiring gardeners, the notion of cultivating roses can seem daunting. The whispers of those pesky upkeep requirements often discourage new enthusiasts, leading them to shy away from adding these elegant flowers to their gardens. But fear not! With the right choice of hardy roses, you can enjoy vibrant blossoms without the constant worry of maintenance. Not only are these varieties resilient against the elements, but they also bring rich color and fragrance to any backyard or flower garden.

Top 13 Hardy Roses to Brighten Your Garden

In your quest for resilient yet striking rose varieties, consider these top picks known for their hardiness:

  1. Bukavu
  2. Cinderella
  3. Crazy Love
  4. Distant Drums
  5. Hot Paprika
  6. James Gallaway
  7. Lavaglut
  8. Lavender Veranda
  9. Living Easy
  10. Paloma Blanca
  11. Pink Double Knock Out
  12. Teasing Georgia
  13. Viking Queen

These choices prove that you don’t have to sacrifice aesthetics for ease of care!

Understanding Your Gardening Zone

Before investing time and resources in any of these hardy roses, understanding your gardening zone is essential. Those in USDA Hardiness Zones 3 to 5 will find a wider range of suitable varieties. Choosing a rose that thrives in your specific zone is crucial for success. A rose suited for warmer climates won’t perform well in cooler areas, setting you up for disappointment. Consulting local gardening guides or community garden centers can provide additional insights tailored to your climate.

Identifying the Right Location

Another vital aspect of growing roses successfully is selecting the right location within your yard. For instance, many roses thrive in full sun, requiring at least six hours of sunlight daily. If your garden spot is shadier than that, consider varieties that tolerate partial shade. Additionally, be cognizant of prevailing weather conditions in your area. Proper spacing is crucial to prevent disease; crowded roses are more susceptible to mildew and pests.

Resistance is Key: Choosing Disease-Resistant Varieties

The best-kept secret in rose cultivation is selecting varieties known for their disease resistance. Roses that are resistant to common afflictions like powdery mildew and black spot not only reduce your gardening headaches but also promote healthier growth. When shopping, look for roses labeled as “disease-resistant” and inquire about their history in your local soil conditions.

Backyard Landscaping with Roses

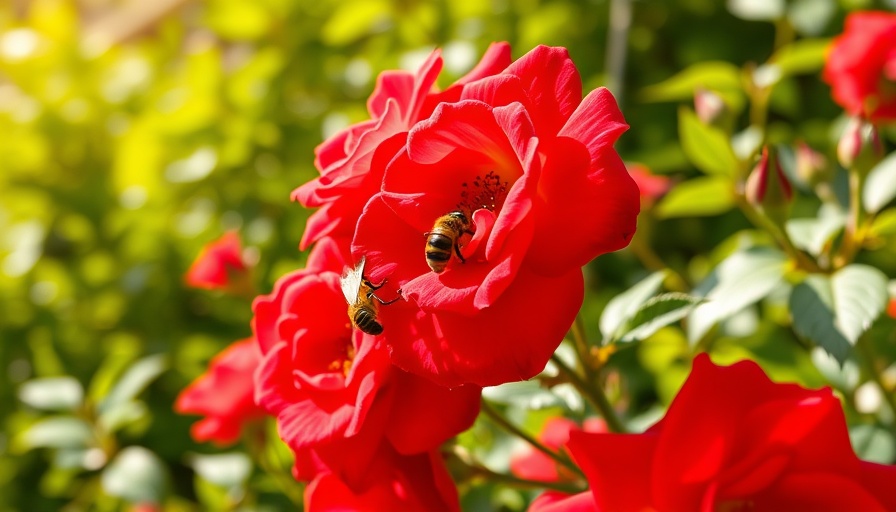
Incorporating roses into your backyard design can transform your outdoor space into a stunning haven. Hardy roses can be integrated into borders, featured in raised garden beds, or trained to climb trellises to create vertical interest. Not only do they add beauty, but they can also attract pollinators like bees and butterflies, boosting your garden’s ecological health. Consider pairing them with companion plants that thrive under similar conditions for a cohesive look.

Final Thoughts on Low-Maintenance Gardening

By selecting hardy rose varieties, understanding your gardening zone, and providing them with the right conditions, you can cultivate a garden of beautiful blooms that require minimal upkeep. This approach not only enhances your home's exterior but also allows you to engage in more enjoyable gardening practices, freeing up time for relaxation and appreciation of your floral masterpieces.

So roll up your sleeves, pick your favorite hardy roses, and let your garden flourish with color and fragrance!

Gardening & Landscaping Ideas

0 Views

0 Comments

Write A Comment

*
*
Related Posts All Posts
06.19.2025

Unlock the Secrets to Growing Delicious Cucumbers in Pots

Update Why Container Gardening is Ideal for Cucumbers Container gardening opens up a world of possibilities for urban dwellers and those with limited garden space. With cucumbers, you not only can enjoy fresh produce but also enhance your outdoor aesthetics. Growing cucumbers in pots allows you to manage their environment easily, ensuring they receive optimal sunlight and nutrients. This flexibility empowers gardeners to cultivate their greens anywhere, from balconies to patios, giving them the freedom to experiment with different varieties. Understanding Cucumber Varieties: Which is Right for You? Cucumbers come in two main types: bush and vining. Bush cucumbers are compact and designed for container gardening, making them ideal for those working with limited space. Meanwhile, vining cucumbers thrive in larger pots or directly in the ground, requiring extra support structures like trellises. When planning your container garden, consider your space and the desired yield, as both types offer unique advantages. The Essential Tools and Tips for Successful Cucumber Growing To grow healthy cucumbers, you will need a few essential tools. Start with high-quality garden pots—each capable of holding at least five gallons of soil. Beyond that, consider sturdy gardening gloves, a watering can or hose for consistent moisture, and organic fertilizers to boost plant health. Remember, maintaining a routine will ensure your cucumbers grow vigorously and produce delicious fruits. Choosing the Perfect Soil for Your Cucumber Plants Your choice of soil can make all the difference in your cucumber yield. A well-draining potting mix enriched with organic compost benefits cucumbers significantly, allowing them to absorb essential nutrients while also preventing waterlogging. Consider adding peat moss for moisture retention and perlite for aeration. A balanced environment gives your cucumbers the best chance for an abundant harvest. Companion Plants that Benefit Your Cucumber Harvest One of the joys of gardening is exploring companion planting. When growing cucumbers, consider planting them alongside legumes, marigolds, or herbs like dill and basil. These companions not only deter pests but also enhance the cucumber's flavor profile. Understanding plant relationships helps you create a harmonious garden ecosystem, thus increasing your chances of success. Embrace the Joy of Harvesting Your Cucumbers The moment you've been waiting for—harvesting! Cucumbers are ready to pick once they reach about six to eight inches long. They should be firm and bright green for the best flavor. Regular harvesting stimulates further production, so don't be shy! The more you pick, the more your plant will produce, leading to a fruitful summer in your container garden. Simple Steps to Ensure Healthy Growth and Maintenance Regular maintenance is key to thriving cucumber plants. Ensure your plants receive at least six hours of sunlight daily, water consistently to keep soil moist but not soggy, and monitor for pests. Early detection of any potential diseases such as powdery mildew is crucial. Addressing issues promptly will save you much heartache down the road. Why You Should Start Growing Cucumbers Today Growing cucumbers in pots empowers gardeners, regardless of space constraints, to reap fresh produce. The simplicity of container gardening paired with the nutritional benefits of cucumbers makes this a worthwhile endeavor. Take the plunge, gather your supplies, and start planting your cucumbers today for a delightfully crunchy future!

06.18.2025

Discovering the Causes of Yellow Leaves on Zucchini: Solutions Inside!

Update Troubleshooting Yellow Leaves on Zucchini: 7 Common Causes Explained Zucchini, or Cucurbita pepo, is a delightful summer squash loved for its versatility in cooking and ease of growth. Thriving in zones 3 to 9, this bushy, or sometimes vining, plant flourishes in full sun and prefers nutrient-rich, well-draining soil. Depending on the variety, zucchini takes approximately 35 to 60 days to reach maturity, creating a blend of vibrant colors and shapes that can bring any garden to life. However, even the most careful gardener may encounter yellowing leaves on their zucchini plants. This discoloration is more than just an aesthetic issue; it can signal various underlying problems that may derail your gardening efforts. Understanding the causes of yellow leaves can empower you to take corrective actions and save your plants. Here are seven common causes of yellowing zucchini leaves, along with their solutions: 1. Disease: A Hidden Threat Diseases can wreak havoc on zucchini plants, and identifying them early is crucial. One prominent disease, Cucurbit Yellow Vine Disease (CYVD), is caused by the bacterium Serratia marcescens. This disease leads to yellowing and curling of leaves, ultimately resulting in the collapse of the entire plant if not addressed. To combat CYVD, control the squash bug populations, which spread the bacteria, using neem oil or diatomaceous earth, and promptly remove any infected plants. Other diseases, such as downy mildew and various types of leaf spot, often present with yellow spots or fuzzy patches on the leaves. Maintaining good air circulation and avoiding overhead watering can reduce your plants' susceptibility to these issues. 2. Inadequate Sunlight: Seek the Light Zucchini plants thrive in full sunlight. If you notice that your zucchini leaves are turning yellow, it could be a result of insufficient sunlight. Ideally, your plants should receive at least six hours of direct sunlight per day. If they are overshadowed by taller plants or structures, consider relocating them to a sunnier spot. 3. Moisture Stress: The Balance of Water Watering practices can significantly impact the health of your zucchini plants. Both underwatering and overwatering can lead to yellow leaves. Aim for consistent moisture without waterlogging the soil. A good rule of thumb is to check the top inch of soil: if it's dry, it's time to water. 4. Nutrient Deficiency: Feed Wisely Yellowing leaves might indicate a nutrient deficiency, particularly in nitrogen. Regularly fertilizing your zucchini with a balanced, organic fertilizer can provide the essential nutrients plants need to remain lush and green. 5. Pests: Tiny Intruders Pests such as aphids and spider mites can also cause yellowing leaves by sucking the sap from the plant. Keep a watchful eye on your plants and try to spot these pests early. Organic pest control methods, including insecticidal soap or neem oil, can be effective treatments. 6. Weather Extremes: Nature's Effects Extreme temperatures—both high and low—can stress zucchini plants, leading them to exhibit yellowing leaves. Protect your plants from harsh weather by providing shade during intense heat or cover during unexpected frosts. 7. Wrong Soil pH: The Soil's Secrets Lastly, the pH of your soil can directly affect your zucchini plants' health. Ideally, zucchini plants prefer a pH between 6.0 and 7.0. Conduct soil testing to ensure it lays within this optimal range, amending the soil as necessary to restore balance. As you work through these potential issues, remember that yellow leaves do not have to signal doom for your zucchini plants. By understanding the common causes and taking proactive measures, you can promote a bountiful harvest. Happy gardening!

06.18.2025

Discover Stunning Water-Wise Permeable Patio Ideas for Your Backyard

Update Transform Your Outdoor Space: The Benefits of Permeable Patios In an age of increasing environmental awareness, permeable patios stand out as an ingenious solution to facilitate natural water drainage while enhancing outdoor aesthetics. More than just a trendy feature, these patios allow rainwater to seep back into the earth, replenishing the garden’s water reserves and reducing the risk of flooding in urban areas. For homeowners grappling with drainage issues, investing in a permeable patio might just be the most rewarding gardening project they embark on this season. Perfect for DIY Enthusiasts: Easy Installation Steps If you've ever daydreamed about a stunning patio that serves both beauty and function, a DIY permeable patio project could be perfect for you. By following a few simple steps, you can contribute to your landscape in an eco-friendly way. Start by planning your design—consider the location, size, and function of your patio. Then, prepare the soil by grading the area to ensure proper drainage. Adding a layer of gravel before placing the pavers will create a solid, permeable base. Creative Ideas for Your Permeable Patio The beauty of permeable patios lies in their versatility. Whether you're leaning towards a rustic stone design or looking to incorporate vibrant interlocking pavers, your outdoor space can reflect your unique style. Combine different textures or integrate natural elements like nearby flower beds or water features to enhance visual appeal. The integration of greenery and artful decor can transform your patio into a relaxing oasis. Exploring the Environmental Impact One significant advantage of permeable patios is their positive contribution to local ecosystems. As rainwater seeps through the pavers, it nourishes the plants and supports groundwater recharge, mitigating the risk of soil erosion. This not only benefits your garden by promoting plant health but also contributes to the larger environment by decreasing runoff that can overwhelm drainage systems. Social Connection: A Community Approach Creating a permeable patio isn't just a personal project; it opens the door for community engagement. Neighbors can come together to discuss sustainable practices, share tips, and even organize patio installation parties. Such initiatives encourage collective learning and enhance community bonds, fostering a space where everyone contributes to a greener future. Steps to Initiate Your Project To kickstart your permeable patio project, begin by researching any local incentives for implementing water-saving measures. Engage with your community through local gardening clubs or social media groups for shared experiences and tips. Doing so not only enhances your knowledge but also builds connections with other local gardening enthusiasts. Revolutionizing the way we manage outdoor spaces is within reach, and permeable patios offer a functional yet aesthetically pleasing solution. Not only will they enhance the look of your yard, but they also support environmental sustainability. So roll up your sleeves, grab your gardening tools, and start a project that benefits both your home and the earth!

Add Row
Add Element
cropper
update
Welcome to Marin Home Ideas
cropper
update

Welcome to Marin Home Ideas: Your Inspiration for Beautiful Living in Marin.
Whether you're dreaming of a full home remodel, refreshing your interior design, or creating the perfect outdoor oasis, Marin Home Ideas is your go-to source for inspiration and expert advice.
From stunning kitchen and bathroom renovations to stylish decor trends, smart home upgrades, and lush garden transformations, we bring you the latest in home design and improvement. 

  • update
  • update
  • update
  • update
  • update
  • update
  • update
Add Element

COMPANY

  • Privacy Policy
  • Terms of Use
  • Advertise
  • Contact Us
  • Menu 5
  • Menu 6
Add Element

4153075228

AVAILABLE FROM 8AM - 5PM

Add Element

ABOUT US

Marin Home Ideas is your go-to resource for turning your Marin home into a true haven. Our blog covers everything from creative remodeling and stylish decor to gardening tips, outdoor living, and smart financial moves. 

Add Element

© 2025 CompanyName All Rights Reserved. Address . Contact Us . Terms of Service . Privacy Policy

Terms of Service

Privacy Policy

Core Modal Title

Sorry, no results found

You Might Find These Articles Interesting

T
Please Check Your Email
We Will Be Following Up Shortly
*
*
*