Add Row
Add Element
cropper
update
Marin Home Ideas
update
Add Element
  • Home
  • Categories
    • Home Remodeling Ideas
    • Interior Design & Decor Ideas
    • Gardening & Landscaping Ideas
    • Outdoor Living & Entertaining
    • Health & Wellness at Home
    • DIY at Home
    • Kitchen Ideas
    • Bedroom Ideas
    • Bath Ideas
    • Cooking at Home
    • Home Office Ideas
    • Lighting Ideas
    • Furniture Ideas
    • Architecture Ideas
    • Senior Living at Home
    • Home Finance
    • Real Estate News
March 30.2025
3 Minutes Read

How to Grow Cantaloupe in Containers: Your Guide to Easy Gardening

Vibrant cantaloupe growing in containers under sun.

Unlocking the Joy of Cantaloupe Cultivation

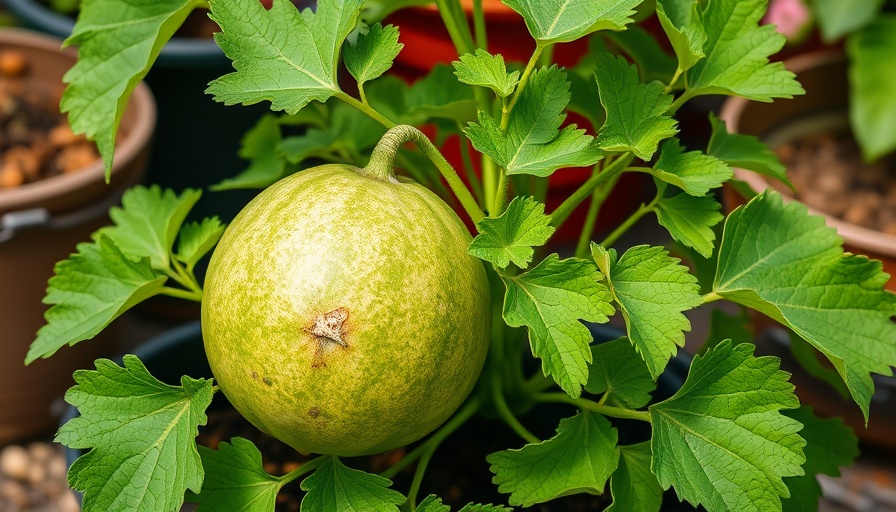
No matter the size of your outdoor space, growing delicious cantaloupe is achievable—and a rewarding venture at that! These sweet melons, belonging to the Cucurbitaceae family, can be easily cultivated in containers, allowing aspiring gardeners to enjoy fresh produce even in urban environments or limited backyard spaces. This article will guide you through the essential steps to successfully grow cantaloupe in pots, enabling you to savor the flavors of homegrown fruits.

Why Container Gardening is a Game-Changer

Container gardening offers numerous benefits, particularly for those with restricted outdoor areas. Not only does it eliminate the need for a traditional garden bed, but it offers flexibility in managing growing conditions. The ability to move pots indoors during unpredictable weather or extreme temperatures is particularly advantageous. For example, cold-climate gardeners can start their melons indoors or in greenhouses before transitioning them outdoors, while those in scorching regions can relocate plants to shady areas when needed.

Choosing the Right Container

When selecting a container for your cantaloupe, opt for something that is at least 5 to 10 gallons in size, as this provides sufficient space for the roots to thrive. Look for materials that retain warmth but allow for drainage, such as terracotta or plastic. Ensure your containers have adequate drainage holes to prevent root rot, a common issue for container gardeners.

Preparing Your Container for Optimal Growth

Before planting, fill your container with quality potting soil rich in organic matter. Integrating compost can boost nutrients and improve soil structure, facilitating better root development. Additionally, consider adding a trellis or support structure to your container, as cantaloupe plants are vining species and benefit from vertical growth. This not only conserves space but also promotes air circulation, reducing the risk of diseases.

Essential Growing Tips for Container Cantaloupe

Besides choosing the right container and soil, watering practices play a vital role in the success of your container-grown cantaloupe. These melons thrive in moist soil but are sensitive to overwatering. Check the soil regularly and water only when the top inch feels dry. Fertilization is key, too; an organic fertilizer added every couple of weeks throughout the growing season helps support vigorous growth and fruit development.

Harvesting Homegrown Cantaloupe: Know When to Pick

Harvest time is one of the most exciting periods of the growing process. Knowing when to pick your cantaloupe is crucial for enjoying their sweet flavor. Look for melons that are full and rounded, slightly soft at the blossom end, and have a golden-yellow hue at the bottom. If they emit a sweet aroma, it’s time to enjoy them fresh or incorporate them into your favorite dishes!

Navigating Challenges: Pest Management and Disease Prevention

Container-grown plants are not immune to pests or diseases, so it’s essential to monitor your cantaloupe regularly. Common pests such as aphids or cucumber beetles may show up, but they can be managed naturally using organic pesticides or companion planting strategies. Keep an eye out for signs of mold or blight, especially if humidity levels rise; maintaining good air circulation is critical to preventing these complications.

Conclusion: Embrace the Container Gardening Revolution

Cultivating cantaloupe in containers is not just feasible; it's an exciting way to engage with nature, enjoy homegrown produce, and practice sustainable gardening methods. So grab your pots, soil, and seeds, and transform your small space into a fruity oasis! Whether you're a seasoned gardener or just starting out, container gardening can make delicious dreams a reality.

Gardening & Landscaping Ideas

14 Views

0 Comments

Write A Comment

*
*
Related Posts All Posts
12.16.2025

Explore the Witch Hazel Plant: A Gorgeous Ornamental with Healing Skin Care Benefits

Update Discover the Enchanting Witch Hazel Plant The witch hazel plant (Hamamelis spp.) is not just a stunning addition to your garden; it also harbors remarkable skin care properties. Known for its vibrant winter blooms and easy maintenance, it can become a beloved feature in your landscaping. This hardy shrub reaches heights of 5 to 15 feet, producing beautiful starburst-like flowers in yellows and reds, which can brighten any garden during winter months. The Multifaceted Benefits of Witch Hazel Witch hazel is primarily revered for its therapeutic properties. Extracted from the bark and leaves of the plant, its astringent qualities make it an effective remedy for various skin ailments. From reducing inflammation and irritation to combating acne, witch hazel is a staple in many natural beauty routines. Its soothing nature makes it suitable for treating minor cuts and insect bites, enhancing its appeal as a must-have home remedy. Growing Witch Hazel: Tips for Your Garden Planting witch hazel requires some basic knowledge for optimal growth. Choose a location that offers full sun or partial shade, ideally in moist, well-drained soil rich in organic matter. Be attentive to your plant's watering needs, especially during its formative years. This beautiful shrub is hardy across USDA Zones 5-8, making it an excellent choice for various climates. Continuously assist its growth by pruning dead branches annually and managing suckers that might emerge at the base. Harvesting Witch Hazel for Skin Care One of the joys of cultivating witch hazel lies in the ability to harvest its branches for homemade skin care products. After a careful pruning session, you can prepare your own witch hazel extract by boiling the bark and twigs, thus creating a natural astringent to incorporate into your skincare regime. A few spritzes can tone your skin and reduce redness, giving you a refreshing feeling post-shower. Ornamental Uses in Landscaping An addition to your landscape, witch hazel can stand out through its seasonal blooms and unique branching structure. Combining it with low-maintenance companions, such as hellebores or snowdrops, can enhance your garden’s visual appeal and ensure year-round interest. Ideal placement near pathways or doorways can provide enchanting experiences as guests pass by and catch the spicy fragrance of its flowers. Enhancing Your Health with Witch Hazel Besides its aesthetic contributions, witch hazel's health benefits shouldn’t be overlooked. Its anti-inflammatory properties are particularly effective for those with oily skin types, helping to minimize the appearance of pores and reduce shine. For anyone prone to mild skin irritations, integrating witch hazel into their skincare can offer relief and rejuvenation. It can even assist in calms scalp sensitivity conditions like psoriasis. Final Thoughts: Embrace the Witch Hazel Whether you’re a seasoned gardener or just starting your journey, witch hazel offers aesthetic and practical benefits that enhance your gardening experience. Its resilience makes it an easy choice for anyone looking to beautify their garden while also reaping the rewards of its skin care properties. Consider integrating witch hazel into your garden plan this season, not only to enjoy its picturesque beauty but also to benefit from its natural healing properties. For those looking to explore and deep dive further into gardening and plant care, consider exploring local gardening workshops or communities that can provide valuable advice and shared experiences. It's a wonderful way to bond with nature and nurture both your garden and your skin!

12.16.2025

Transform Your Space: Make a Stunning Winter Arrangement Today

Update Crafting a Cozy Winter Arrangement: A Step-by-Step Guide As the colder months settle in, many find joy in embracing the beauty of winter through home decor. Creating a decorative winter arrangement is not just about aesthetics; it’s also an opportunity to express creativity and bring a touch of nature indoors. In this guide, I’ll walk you through the steps of making a charming winter arrangement that revitalizes your home and gives you a sense of accomplishment. Understanding the Seasonal Elements Winter arrangements typically use evergreen materials that reflect the season's spirit. Pine branches, holly, and fragrant cedar are excellent choices, providing both visual appeal and a delightful scent. Gathering these materials can be a fun outing—consider visiting a local park or asking neighbors if you can clip a few branches from their yards. It’s a unique way to connect with your community while sourcing beautiful natural elements! Gather Your Supplies Before you start creating, ensure you have the necessary supplies. Here’s what you’ll need: Fresh-cut greens (evergreens, branches, etc.) Seasonal embellishments (such as pinecones, berries, or ornaments) A sturdy container or vase Floral foam or oasis to hold the arrangement in place Pruners for cutting branches Protective gloves to keep your hands safe and clean Creating Your Arrangement To start, prepare your workspace by laying down a tarp or plastic sheet. This will help catch debris and make cleanup easier. Begin by soaking the floral foam in water and then setting it in your container. Next, cut your greens to various lengths and start placing them into the foam. Begin with the larger stems at the base to create a foundation, and gradually build up with shorter pieces. Be mindful of the overall shape you wish to create. Balance is key; consider making one side fuller than the other for a more natural look. Adding Seasonal Touches Now comes the fun part—adding embellishments! Incorporate twigs, pine cones, and berries to create depth and interest. Use your imagination! Think about the colors and textures that will draw attention and harmonize with your home's existing decor. Final Adjustments and Display Once you’ve created your arrangement, step back and take a look from different angles. Adjust any branches or embellishments as needed to achieve a balanced and full appearance. Finally, place your arrangement in an area where it can be admired—this could be your dining table, mantel, or entryway. The Emotional Connection of DIY Projects Creating your own winter arrangement offers more than just aesthetic benefits. Engaging in DIY projects like this can be incredibly therapeutic. The act of bringing your vision to life can reduce stress and foster a sense of accomplishment and pride. It’s a wonderful way to connect with nature, even in the chilly months. In Conclusion: Why You Should Try This Making a winter arrangement is a perfect way to embrace the season while enhancing your living space. It provides a creative outlet and an opportunity to use sustainable practices by repurposing materials from your environment. So gather your supplies, put on your gloves, and enjoy the calming process of creating something beautiful that reflects the warmth of your home in the heart of winter.

12.15.2025

Create Joy With a DIY Mini Grinch Tree: A Charming Holiday Tradition

Update Why a Mini Grinch Tree Makes the Perfect Holiday Gift As the holiday season approaches, many of us begin to think about unique and meaningful gifts to share with friends and family. Enter the mini Grinch tree—an adorable, quirky, and heartfelt decoration that captures the spirit of the season. According to Dr. Seuss, the holidays are about more than twinkling lights and extravagant trees; they are about kindness, generosity, and the warmth of community. For those looking to share a piece of this festive spirit, crafting a small Grinch tree is an opportunity that combines creativity with giving. Materials Needed for Your Tabletop Grinch Inspiration Creating your own mini Grinch tree offers a personal touch that store-bought options simply cannot match. For the best results, gather the following materials: Small evergreen tree (like lemon cypress or cedar boughs) Colorful potting soil Decorative moss for added flair A festive ornament for the top Batter-powered string lights and ribbon Floral wire to secure decor elements Using a lemon cypress provides both aesthetic appeal and a delightful scent, creating keepsakes that can be nurtured year after year. Step-by-Step: Crafting Your Mini Grinch Tree With your materials ready, it’s time to dive into crafting your mini Grinch tree. Follow these simple steps: Begin by planting your evergreen in a colorful pot at a slight angle to give it a Grinch-like appearance. Add decorative moss on top of the soil; while optional, it enhances the overall look. If desired, wind battery-powered string lights around the tree, working from bottom to top for a whimsical effect. Use floral wire or ribbon to create garlands, tucking loose ends into the tree. Complete your decoration with a large vibrant ornament at the top, ensuring it bends toward the center for a signature Grinch finish. This project not only sparks creativity but allows for customization and personalization, perfect for sharing unique holiday cheer! Why It’s More Than Just a Craft: Spreading Holiday Cheer Gift-giving during the holidays is an age-old tradition, and the act of creating something with your own hands brings joy to both the giver and the recipient. The mini Grinch tree symbolizes that it's not the size of the gesture that matters, but the thought and love behind it. The continued popularity of DIY projects underscores a societal shift towards more personal, sustainable holiday practices. According to a recent survey, more individuals are seeking ways to make holidays meaningful through crafting experiences rather than purchasing mass-produced items. Delightful Variations on the Grinch Tree Theme While the classic mini Grinch tree is a show-stopper on its own, experimenting with variations can lead to even more delightful creations. Consider making: Grinch Tree Kits: Put together DIY kits complete with all necessary materials and instructions, great for family bonding. Mini Grinch Garlands: Create mini garlands to hang around homes or offices, echoing the spirit of the Grinch. Personalized Ornaments: Use photos or mementos of loved ones as decorative items on the Grinch tree. These variations offer room for creativity while keeping the joyous spirit of Dr. Seuss alive! Wrapping it Up: Bringing Home the Spirit of Christmas The mini Grinch tree is more than just a quirky decoration; it's a potent reminder of the values that the holiday season stands for. As you engage in this festive craft, think about how it resonates with your loved ones and the joy that comes from sharing something made with love. So, gather your materials, tap into your creative side, and spread some holiday cheer with your own DIY mini Grinch tree!

Terms of Service

Privacy Policy

Core Modal Title

Sorry, no results found

You Might Find These Articles Interesting

T
Please Check Your Email
We Will Be Following Up Shortly
*
*
*