Add Row
Add Element
cropper
update
Marin Home Ideas
update
Add Element
  • Home
  • Categories
    • Home Remodeling Ideas
    • Interior Design & Decor Ideas
    • Gardening & Landscaping Ideas
    • Outdoor Living & Entertaining
    • Health & Wellness at Home
    • DIY at Home
    • Kitchen Ideas
    • Bedroom Ideas
    • Bath Ideas
    • Cooking at Home
    • Home Office Ideas
    • Lighting Ideas
    • Furniture Ideas
    • Architecture Ideas
    • Senior Living at Home
    • Home Finance
    • Real Estate News
May 29.2025
3 Minutes Read

Master the Art of Harvesting Anise Seeds for Culinary Delights

Field of lush green anise plants with white flowers, anise seed harvesting.

Unlocking the Secrets of Anise: A Delightful Herb Journey

For lovers of unique flavors, anise (Pimpinella anisum) is not just a culinary delight; it’s an essential herb that adds a sweet, licorice-like taste to a variety of dishes. As gardening enthusiasts and health-conscious individuals alike look to cultivate their own herbs, learning the ins and outs of harvesting anise seeds becomes vital. Not only does it connect us to our food sources, but it also enhances our culinary experiences. In this article, we explore when and how to harvest anise seeds effectively, ensuring you enjoy the full spectrum of flavors.

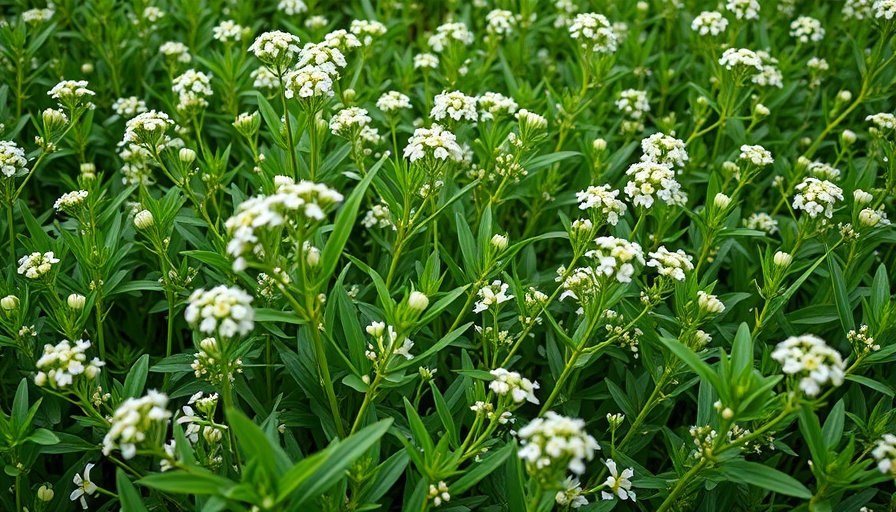
Understanding When to Harvest Anise Seeds

The timing of the harvest is crucial to unlocking the rich flavors of anise. Typically, anise plants require about 100 frost-free days to blossom and develop ripe seeds. The ideal harvesting period falls between late summer and early fall, about two to four weeks post-bloom, when your flowers have transformed from their vibrant green to a beautiful brown, gray, or tan. Waiting for this color change ensures that the seeds have reached their peak flavor and aroma. However, if frost threatens, it’s perfectly acceptable to harvest the green umbels; they can ripen and dry indoors.

Harvesting Techniques: The Right Tools for the Job

Gathering your anise seeds doesn't require advanced machinery; instead, a few simple tools are all you need. Clean, sharp snips are perfect for cutting the flower stems. It’s recommended to leave six to ten inches of the stem attached, as this allows for easier handling. Hang the flower stalks upside down in a warm, dry area to encourage the seeds to dry fully. Using a paper bag can help capture any seeds that fall, minimizing waste and ensuring none of that delightful flavor is lost in the process.

Winnowing and Storing Anise Seeds: Preserve the Flavor

Once your seeds are harvested, it's time to winnow them. This involves separating the seeds from the chaff, the unwanted parts of the plant. A large sieve or winnowing tray can help you with this process, allowing the seeds to fall while keeping the lighter chaff behind. This step ensures that you’re left with pure, flavorful seeds ready for culinary adventures.

Alternative Uses: A Holistic Approach to Anise

Don’t forget about the other parts of the anise plant! The leaves can be harvested before the plant flowers, offering a fresh, aromatic addition to salads and dressings. For the best flavor, harvest in the morning when they’re full of volatile oils. Meanwhile, the flowers can be harvested for a refreshing tea, showcasing the versatility of this remarkable herb.

The Bigger Picture: Growing Anise in Your Garden

Incorporating anise into your garden not only enhances your dishes but also contributes to your overall well-being. By growing your own herbs, you connect with nature, promote sustainable living, and ensure you’re using organic practices. Additionally, anise can attract beneficial pollinators to your garden, enhancing its diversity and resilience against pests. Such practices just reaffirm the connection between gardening and health.

Get Started: Your Gardening Adventure Awaits

Armed with this knowledge, you can now embark on your journey into the world of anise. Whether you are cultivating your garden for culinary purposes or simply seeking a fresh hobby, harvesting anise seeds can be a gratifying part of your gardening experience.

Why not start small? Consider planting anise in your backyard garden or even a container for a smaller space. With a little TLC, you’ll find yourself enjoying the fruits (and seeds!) of your labor, all while indulging in the fragrant, healthy offerings of your garden.

Gardening & Landscaping Ideas

2 Views

0 Comments

Write A Comment

*
*
Related Posts All Posts
08.28.2025

Unlock Garden Beauty: Learn How to Trim Hedges Effectively!

Update Transform Your Garden: The Essential Guide to Trimming Hedges When it comes to creating a beautiful garden, hedges can serve as both functional and stunning elements, providing privacy and structure. But to thrive, hedges need the right care and trimming techniques. If you’ve ever looked at a raggedy hedge and wondered how to make your garden bloom with life, you’re in the right place. With this comprehensive guide, you can learn how to trim hedges effectively and maintain their lovely appearance year-round. Understanding the Right Timing for Hedge Trimming One of the main factors in achieving a flourishing hedge is knowing when to trim. In general, hedges should be pruned in early spring or late winter, before new growth begins. This approach encourages healthy growth and a lush appearance. However, it's vital to consider the specific species of your hedge, as some may thrive better with different pruning schedules. Aim for a mix of seasonal care! It’s also crucial to regularly assess your hedge throughout the growing season to ensure you aren’t letting any wild branches take over. Choosing the Right Hedges for Your Garden Your hedge choices play a significant role in how easy or challenging pruning may be in the future. Slow-growing varieties such as boxwood and yew are excellent choices for easy maintenance, while others like laurel can grow rapidly, requiring more diligent trimming. Investing in the right plants will pay off, transforming your garden into a sleek green wall. The Trimming Techniques You Need Trimming hedges requires finesse, so using the right tools is essential. Hand tools such as pruners and shears are great for small and young hedges, while electric trimmers can help with larger or mature hedges. Ensure your tools are clean and sharp before starting—this fosters smooth cuts and minimizes damage to your plants. Integrating Hedges Into Your Landscape Design When choosing to trim and shape your hedges, keep in mind how they interact with the rest of your garden. Hedges can frame flower beds, create pathways, or act as natural fences. By maintaining a clean edge and consistent shape, you will ensure that your hedges enhance your overall landscape design rather than detract from it. A Common Misconception: Pruning vs. Trimming Many gardeners confuse the terms pruning and trimming. While both are crucial for plant health, pruning usually involves removing dead or diseased wood, whereas trimming keeps plants in shape. Understanding the difference helps you maintain a healthy hedge structure and encourages new growth, paving the way for a vibrant garden. Benefits of Hedge Pruning Beyond Aesthetics The advantages of keeping your hedges well-trimmed go beyond just looking good! Hedging plants can boost biodiversity in your garden by providing habitats for various wildlife. Additionally, healthy hedges can help with controlling pests and improving air circulation throughout your garden. By actively pruning and caring for your hedges, you contribute to a thriving environment for your entire garden ecosystem. Conclusion: Embrace Your Garden’s Potential As you embark on your journey to trim and shape your hedges, remember that patience and regular care are key to making the most of your gardening space. Whether you aim for a structured look or a more whimsical shape, your efforts in trimming hedges will enhance both your home and the surrounding community by creating an inviting outdoor space. Explore the right resources, plan your trimming for success, and watch as your garden flourishes with beauty and life! Transform your backyard into a beautiful oasis and keep your hedges looking spectacular year-round!

08.28.2025

How to Transform Your Side Yard with Budget-Friendly Gardening Ideas

Update Transform Your Side Yard: A Weekend DIY Makeover With a little creativity and ingenuity, giving your outdoor space a fresh take doesn’t always mean a lengthy, costly project. In the recent video titled "Simple Side Yard Makeover On A Budget," Jason and Danny demonstrate that even the smallest of spaces can be transformed into a vibrant and functional area, all within a single weekend. This invigorating approach to home improvement encourages everyone, regardless of skill level, to roll up their sleeves and get started on those outdoor projects that often languish on our to-do lists.In this article, we explore the insights shared in the video 'Simple Side Yard Makeover On A Budget,' highlighting the doable DIY approaches that encourage anyone to revamp their outdoor space. Gardening Without the Grit: You Don’t Need to Dig In their approach, one underlying principle shines: gardening doesn’t always require digging. Instead, they focus on smart means of reconfiguring the existing landscape. Removing overgrown Morayas, they not only opened up the area but also invited light—an essential ingredient for any garden. Their techniques resonate with sustainable gardening practices focusing on usability and joy rather than just aesthetic allure. The Art of Mulching: Low-Cost and High Style After clearing out the invasive plants, Jason and Danny opt to mulch the ground with river pebbles—an affordable choice that boosts curb appeal while serving practical purposes. Mulching is essential for moisture retention and weed control, creating a favorable environment for potted plants. By using materials that are inexpensive yet attractive, they showcase how simple gardening can yield stunning results without breaking the bank. Container Gardening: More Than Just a Fad In addition to mulching, they beautifully illustrate the concept of container gardening. With a carefully curated selection of pots, including some vibrant painted options, the duo emphasizes that plants can express a personalized flair, even in a confined space. Container gardening offers flexibility, enabling quick adjustments if a particular plant doesn’t flourish in its initial spot. This method not only maximizes available space but also allows for the incorporation of seasonal varieties, leading to a dynamic outdoor space throughout the year. Your Plants Matter: Choosing Wisely One of the takeaways from this makeover is the importance of selecting the right plants. Understanding the growth habits of different species plays a crucial role in long-term success. In the video, the introduction of magnolia teddy bear plants highlights how a well-thought-out plant choice can enhance the space's natural beauty and create a sense of enclosure that complements the side yard’s design. Practical Tips for Your Own Makeover This type of gardening is not a one-size-fits-all approach; rather, it encourages exploration and experimentation. Here are some practical tips for incorporating what Jason and Danny so effectively demonstrated: Plan Your Layout: Visualize where your pots, pebbles, and plants will go before getting started. Layout planning saves time and resources. Utilize Vertical Space: Think about adding vertical gardening elements, like wall planters or climbing vines, to take advantage of limited space. Choose Perennials: Rather than constantly replacing annuals, consider planting perennials that create a lasting garden presence. Experiment with Color: Don’t hesitate to bring bold colors into your garden designs with painted pots or brightly colored plants. Stay Sustainable: Use recycled materials where possible and consider organic gardening practices to enhance your garden's health. Final Thoughts: Get Inspired and Get Gardening! As we reflect on Jason and Danny's engaging side yard transformation, it's clear that this is not just about reorganizing plants but about creating a sanctuary where people can connect with nature in their own homes. Whether you’re planting flowers, establishing a vegetable garden, or nurturing a butterfly garden, the important thing is to begin. So, grab your gardening tools, express your creativity, and step into the gratifying world of gardening! Finding inspiration from a simple side yard makeover can spark new ideas for your outdoor space. Challenge yourself to tackle that garden project you’ve been putting off, and witness the joy that a personalized backyard can bring.

08.27.2025

Discover the Secrets to Growing a Stunning Bunny Ears Cactus

Update Becoming Familiar with the Bunny Ears Cactus: A Unique Addition to Your GardenThe bunny ears cactus, or Opuntia microdasys, is not just your ordinary cactus. Native to the arid landscapes of northern Mexico and extending into Arizona, this charming plant is known for its distinctive flat, oval pads resembling the ears of a bunny. Its playful appearance, adorned with fuzzy polka dots, instantly brings a whimsical touch to any garden or indoor space. But while it’s a delightful sight, it’s important to recognize that the 'fuzziness' comes from glochids—tiny but sharp spines that can irritate the skin when touched.Understanding its Growing Needs: Light and Soil PreferencesTo cultivate a thriving bunny ears cactus, understanding its essential needs is pivotal. This cactus thrives in USDA Hardiness Zones 9 to 12, flourishing in full sun. If you live in a cooler climate, consider nurturing it indoors where the light is bright. The soil must be loose, rocky, and well-draining to imitate its natural dry habitat. A slightly acidic to neutral pH, around 6.0 to 7.5, is ideal for optimal growth. This attention to detail ensures that your cactus can grow densely and robustly, enhancing its shrub-like appearance over time.Maintenance: Keeping Your Cactus HealthyYour bunny ears cactus requires minimal maintenance, making it a perfect choice for novice gardeners. Watering should be conservative, only when the soil dries out completely, as cacti are adapted to survive long periods without moisture. It’s essential to watch out for pests common to succulents, such as aphids and scale; however, proper care minimizes these risks. Occasional fertilization during the growing season will promote healthy growth and vibrant blooms.Propagation: Expanding Your CollectionOne of the joys of gardening is propagating plants to expand your collection. Propagating bunny ears cacti is relatively simple. Use clean, sharp tools to cut a paddle from the main plant, allowing it to callus for a few days. Once callused, plant it in a well-draining mix and water lightly. With the right conditions, you’ll see new roots forming in a matter of weeks.Outdoor and Indoor Benefits: Versatile GardeningWhether in outdoor landscapes or potted for indoor display, the bunny ears cactus offers fantastic ornamental value. In gardens, they can serve as striking focal points, xeriscaping elements, or robust companions to other drought-tolerant plants. Indoors, they add unique character to room decor with their vibrant pads and striking blooms. The yellow blossoms that appear in spring and summer, coupled with the red-purple prickly pears that follow, provide seasonal interest in any setting.Creating a Welcoming Environment for WildlifeIn addition to their aesthetic value, bunny ears cacti attract pollinators such as bees and butterflies, making them a valuable asset in fostering ecological balance in your garden. Planting these alongside other native species can enhance your garden’s role in supporting local wildlife, promoting a healthy ecosystem.Conclusion: Embracing Whimsy in Your GardenIncorporating bunny ears cactus into your gardening projects is not only about enhancing beauty—it's about embracing the unique and nurturing a low-maintenance plant that requires little effort yet offers so much in return. Whether you’re designing a rock garden, looking for efficient landscaping ideas, or adding a touch of southwestern flair to your indoor plant collection, the bunny ears cactus is an excellent choice. Take time to understand its needs and you’ll be rewarded with a delightful and resilient companion for many years to come.

Terms of Service

Privacy Policy

Core Modal Title

Sorry, no results found

You Might Find These Articles Interesting

T
Please Check Your Email
We Will Be Following Up Shortly
*
*
*