Add Row
Add Element
cropper
update
Marin Home Ideas
update
Add Element
  • Home
  • Categories
    • Home Remodeling Ideas
    • Interior Design & Decor Ideas
    • Gardening & Landscaping Ideas
    • Outdoor Living & Entertaining
    • Health & Wellness at Home
    • DIY at Home
    • Kitchen Ideas
    • Bedroom Ideas
    • Bath Ideas
    • Cooking at Home
    • Home Office Ideas
    • Lighting Ideas
    • Furniture Ideas
    • Architecture Ideas
    • Senior Living at Home
    • Home Finance
    • Real Estate News
Add Row
Add Element
March 26.2025
3 Minutes Read

Master the Art of Propagating Redbud Trees: A Gardener's Guide

Close-up of redbud tree flowers and seed pods for propagation.

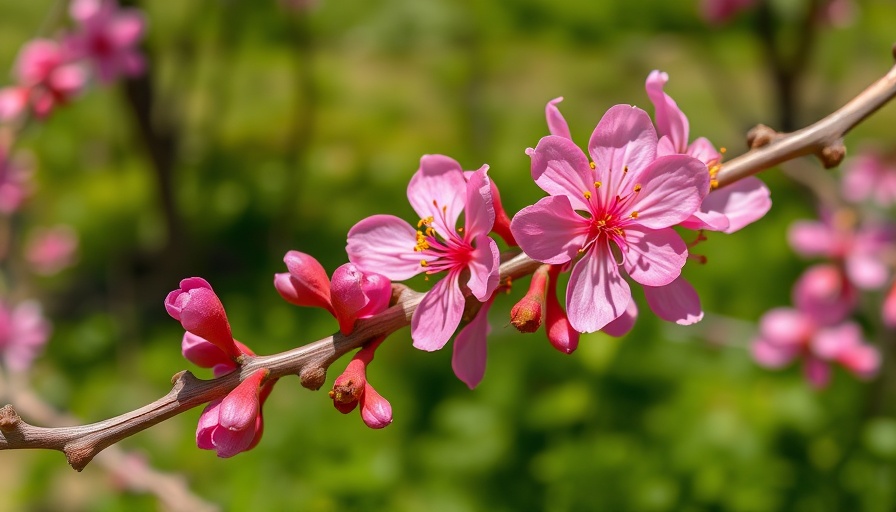
Uncover the Beauty of Redbud Trees

There's something truly enchanting about a redbud tree in full bloom. Renowned for their vibrant early-spring flowers, redbuds bloom in exquisite shades of pink, purple, or white, creating a captivating display that brightens the still-bare landscape. Their heart-shaped leaves and graceful branching ensure they are cherished across gardens and natural areas alike. But for gardening enthusiasts who have fallen for the charm of these trees, the desire to propagate them can come with a set of challenges.

Understanding the Importance of Propagation

For many aspiring gardeners, the first thought when admiring a beautiful tree is not merely to enjoy its splendor but to multiply it. However, redbud trees—especially their popular Cercis species—can be notoriously tricky to propagate. Success requires skill, patience, and knowledge of the right techniques. For beginners, buying improved cultivars from a local or online nursery is a practical choice, but for the adventurous, propagating redbuds from seed, cuttings, or transplanting offers a rewarding challenge.

Getting Started: Propagating from Seed

Starting redbuds from seed is a meticulous process that involves several key steps to ensure your seeds successfully germinate. In the fall, the seeds form inside long, pea-pod-like structures that turn brown as they mature. Harvesting these pods is the first step. After collecting them, allow the pods to air dry on a screen or hang them until fully dry. Inside, you'll find the seeds—be prepared to collect more than you think you'll need to account for germination issues commonly encountered with these trees.

To prepare the seeds, they require scarification—a process that can be achieved by soaking them in sulfuric acid (handle with caution) or immersing them in nearly boiling water. Both methods help soften the seed coat, vital for improving germination rates. After the soaking, immerse the seeds in a mix of sand and sphagnum moss, keeping it moistened, and seal it for a few weeks to prepare the seeds for planting.

Rooting Cuttings: A More Hands-On Approach

Another method for propagation involves taking cuttings. This approach can be somewhat hit-or-miss due to the redbud’s tendency not to root easily. Aiming for semi-hardwood cuttings taken from late-summer growth can yield better results. Prep the cuttings by removing the lower leaves and applying rooting hormone before placing them in a suitable growing medium.

Providing proper humidity and warmth can drastically increase the chances of success. Cover your cuttings in a humidity dome or place them in a greenhouse setting, ensuring they receive indirect light and don’t dry out. While this method takes time and care, it can be a fulfilling way to bring new life to your garden.

Transplanting Young Stock for Success

For those who prefer a more straightforward technique, transplanting young stock offers an effective route to propagate redbud trees. Whether from a nursery or a friend's garden, transplanting involves careful excavation of the root ball to protect the young tree's roots. It's crucial to select healthy specimens and to provide ample care during the transplanting process to ensure they thrive in their new location. Remember to water the newly transplanted redbuds adequately as they establish.

Embracing the Gardening Journey

Propagating redbud trees can be a rewarding experience, lending a sense of accomplishment as you watch these beautiful trees flourish in your garden. Whether you choose to begin from seed, cuttings, or young stock, every method is a lesson in patience and care. Understanding the unique needs of redbuds—along with trial and error—will only enhance your gardening skills. So, gather your materials, roll up your sleeves, and dive into the wonderful world of redbud propagation!

Final Thoughts: Whether you seek the elegance of a redbud in your garden or wish to share this beauty with others, each propagation attempt adds to your gardening journey. Don't hesitate to explore tips and resources for enhancing your overall plant care knowledge. Dive into the joy of gardening today!

Gardening & Landscaping Ideas

1 Views

0 Comments

Write A Comment

*
*
Related Posts All Posts
06.19.2025

Unlock the Secrets to Growing Delicious Cucumbers in Pots

Update Why Container Gardening is Ideal for Cucumbers Container gardening opens up a world of possibilities for urban dwellers and those with limited garden space. With cucumbers, you not only can enjoy fresh produce but also enhance your outdoor aesthetics. Growing cucumbers in pots allows you to manage their environment easily, ensuring they receive optimal sunlight and nutrients. This flexibility empowers gardeners to cultivate their greens anywhere, from balconies to patios, giving them the freedom to experiment with different varieties. Understanding Cucumber Varieties: Which is Right for You? Cucumbers come in two main types: bush and vining. Bush cucumbers are compact and designed for container gardening, making them ideal for those working with limited space. Meanwhile, vining cucumbers thrive in larger pots or directly in the ground, requiring extra support structures like trellises. When planning your container garden, consider your space and the desired yield, as both types offer unique advantages. The Essential Tools and Tips for Successful Cucumber Growing To grow healthy cucumbers, you will need a few essential tools. Start with high-quality garden pots—each capable of holding at least five gallons of soil. Beyond that, consider sturdy gardening gloves, a watering can or hose for consistent moisture, and organic fertilizers to boost plant health. Remember, maintaining a routine will ensure your cucumbers grow vigorously and produce delicious fruits. Choosing the Perfect Soil for Your Cucumber Plants Your choice of soil can make all the difference in your cucumber yield. A well-draining potting mix enriched with organic compost benefits cucumbers significantly, allowing them to absorb essential nutrients while also preventing waterlogging. Consider adding peat moss for moisture retention and perlite for aeration. A balanced environment gives your cucumbers the best chance for an abundant harvest. Companion Plants that Benefit Your Cucumber Harvest One of the joys of gardening is exploring companion planting. When growing cucumbers, consider planting them alongside legumes, marigolds, or herbs like dill and basil. These companions not only deter pests but also enhance the cucumber's flavor profile. Understanding plant relationships helps you create a harmonious garden ecosystem, thus increasing your chances of success. Embrace the Joy of Harvesting Your Cucumbers The moment you've been waiting for—harvesting! Cucumbers are ready to pick once they reach about six to eight inches long. They should be firm and bright green for the best flavor. Regular harvesting stimulates further production, so don't be shy! The more you pick, the more your plant will produce, leading to a fruitful summer in your container garden. Simple Steps to Ensure Healthy Growth and Maintenance Regular maintenance is key to thriving cucumber plants. Ensure your plants receive at least six hours of sunlight daily, water consistently to keep soil moist but not soggy, and monitor for pests. Early detection of any potential diseases such as powdery mildew is crucial. Addressing issues promptly will save you much heartache down the road. Why You Should Start Growing Cucumbers Today Growing cucumbers in pots empowers gardeners, regardless of space constraints, to reap fresh produce. The simplicity of container gardening paired with the nutritional benefits of cucumbers makes this a worthwhile endeavor. Take the plunge, gather your supplies, and start planting your cucumbers today for a delightfully crunchy future!

06.18.2025

Discovering the Causes of Yellow Leaves on Zucchini: Solutions Inside!

Update Troubleshooting Yellow Leaves on Zucchini: 7 Common Causes Explained Zucchini, or Cucurbita pepo, is a delightful summer squash loved for its versatility in cooking and ease of growth. Thriving in zones 3 to 9, this bushy, or sometimes vining, plant flourishes in full sun and prefers nutrient-rich, well-draining soil. Depending on the variety, zucchini takes approximately 35 to 60 days to reach maturity, creating a blend of vibrant colors and shapes that can bring any garden to life. However, even the most careful gardener may encounter yellowing leaves on their zucchini plants. This discoloration is more than just an aesthetic issue; it can signal various underlying problems that may derail your gardening efforts. Understanding the causes of yellow leaves can empower you to take corrective actions and save your plants. Here are seven common causes of yellowing zucchini leaves, along with their solutions: 1. Disease: A Hidden Threat Diseases can wreak havoc on zucchini plants, and identifying them early is crucial. One prominent disease, Cucurbit Yellow Vine Disease (CYVD), is caused by the bacterium Serratia marcescens. This disease leads to yellowing and curling of leaves, ultimately resulting in the collapse of the entire plant if not addressed. To combat CYVD, control the squash bug populations, which spread the bacteria, using neem oil or diatomaceous earth, and promptly remove any infected plants. Other diseases, such as downy mildew and various types of leaf spot, often present with yellow spots or fuzzy patches on the leaves. Maintaining good air circulation and avoiding overhead watering can reduce your plants' susceptibility to these issues. 2. Inadequate Sunlight: Seek the Light Zucchini plants thrive in full sunlight. If you notice that your zucchini leaves are turning yellow, it could be a result of insufficient sunlight. Ideally, your plants should receive at least six hours of direct sunlight per day. If they are overshadowed by taller plants or structures, consider relocating them to a sunnier spot. 3. Moisture Stress: The Balance of Water Watering practices can significantly impact the health of your zucchini plants. Both underwatering and overwatering can lead to yellow leaves. Aim for consistent moisture without waterlogging the soil. A good rule of thumb is to check the top inch of soil: if it's dry, it's time to water. 4. Nutrient Deficiency: Feed Wisely Yellowing leaves might indicate a nutrient deficiency, particularly in nitrogen. Regularly fertilizing your zucchini with a balanced, organic fertilizer can provide the essential nutrients plants need to remain lush and green. 5. Pests: Tiny Intruders Pests such as aphids and spider mites can also cause yellowing leaves by sucking the sap from the plant. Keep a watchful eye on your plants and try to spot these pests early. Organic pest control methods, including insecticidal soap or neem oil, can be effective treatments. 6. Weather Extremes: Nature's Effects Extreme temperatures—both high and low—can stress zucchini plants, leading them to exhibit yellowing leaves. Protect your plants from harsh weather by providing shade during intense heat or cover during unexpected frosts. 7. Wrong Soil pH: The Soil's Secrets Lastly, the pH of your soil can directly affect your zucchini plants' health. Ideally, zucchini plants prefer a pH between 6.0 and 7.0. Conduct soil testing to ensure it lays within this optimal range, amending the soil as necessary to restore balance. As you work through these potential issues, remember that yellow leaves do not have to signal doom for your zucchini plants. By understanding the common causes and taking proactive measures, you can promote a bountiful harvest. Happy gardening!

06.18.2025

Discover Stunning Water-Wise Permeable Patio Ideas for Your Backyard

Update Transform Your Outdoor Space: The Benefits of Permeable Patios In an age of increasing environmental awareness, permeable patios stand out as an ingenious solution to facilitate natural water drainage while enhancing outdoor aesthetics. More than just a trendy feature, these patios allow rainwater to seep back into the earth, replenishing the garden’s water reserves and reducing the risk of flooding in urban areas. For homeowners grappling with drainage issues, investing in a permeable patio might just be the most rewarding gardening project they embark on this season. Perfect for DIY Enthusiasts: Easy Installation Steps If you've ever daydreamed about a stunning patio that serves both beauty and function, a DIY permeable patio project could be perfect for you. By following a few simple steps, you can contribute to your landscape in an eco-friendly way. Start by planning your design—consider the location, size, and function of your patio. Then, prepare the soil by grading the area to ensure proper drainage. Adding a layer of gravel before placing the pavers will create a solid, permeable base. Creative Ideas for Your Permeable Patio The beauty of permeable patios lies in their versatility. Whether you're leaning towards a rustic stone design or looking to incorporate vibrant interlocking pavers, your outdoor space can reflect your unique style. Combine different textures or integrate natural elements like nearby flower beds or water features to enhance visual appeal. The integration of greenery and artful decor can transform your patio into a relaxing oasis. Exploring the Environmental Impact One significant advantage of permeable patios is their positive contribution to local ecosystems. As rainwater seeps through the pavers, it nourishes the plants and supports groundwater recharge, mitigating the risk of soil erosion. This not only benefits your garden by promoting plant health but also contributes to the larger environment by decreasing runoff that can overwhelm drainage systems. Social Connection: A Community Approach Creating a permeable patio isn't just a personal project; it opens the door for community engagement. Neighbors can come together to discuss sustainable practices, share tips, and even organize patio installation parties. Such initiatives encourage collective learning and enhance community bonds, fostering a space where everyone contributes to a greener future. Steps to Initiate Your Project To kickstart your permeable patio project, begin by researching any local incentives for implementing water-saving measures. Engage with your community through local gardening clubs or social media groups for shared experiences and tips. Doing so not only enhances your knowledge but also builds connections with other local gardening enthusiasts. Revolutionizing the way we manage outdoor spaces is within reach, and permeable patios offer a functional yet aesthetically pleasing solution. Not only will they enhance the look of your yard, but they also support environmental sustainability. So roll up your sleeves, grab your gardening tools, and start a project that benefits both your home and the earth!

Add Row
Add Element
cropper
update
Welcome to Marin Home Ideas
cropper
update

Welcome to Marin Home Ideas: Your Inspiration for Beautiful Living in Marin.
Whether you're dreaming of a full home remodel, refreshing your interior design, or creating the perfect outdoor oasis, Marin Home Ideas is your go-to source for inspiration and expert advice.
From stunning kitchen and bathroom renovations to stylish decor trends, smart home upgrades, and lush garden transformations, we bring you the latest in home design and improvement. 

  • update
  • update
  • update
  • update
  • update
  • update
  • update
Add Element

COMPANY

  • Privacy Policy
  • Terms of Use
  • Advertise
  • Contact Us
  • Menu 5
  • Menu 6
Add Element

4153075228

AVAILABLE FROM 8AM - 5PM

Add Element

ABOUT US

Marin Home Ideas is your go-to resource for turning your Marin home into a true haven. Our blog covers everything from creative remodeling and stylish decor to gardening tips, outdoor living, and smart financial moves. 

Add Element

© 2025 CompanyName All Rights Reserved. Address . Contact Us . Terms of Service . Privacy Policy

Terms of Service

Privacy Policy

Core Modal Title

Sorry, no results found

You Might Find These Articles Interesting

T
Please Check Your Email
We Will Be Following Up Shortly
*
*
*