Add Row
Add Element
cropper
update
Marin Home Ideas
update
Add Element
  • Home
  • Categories
    • Home Remodeling Ideas
    • Interior Design & Decor Ideas
    • Gardening & Landscaping Ideas
    • Outdoor Living & Entertaining
    • Health & Wellness at Home
    • DIY at Home
    • Kitchen Ideas
    • Bedroom Ideas
    • Bath Ideas
    • Cooking at Home
    • Home Office Ideas
    • Lighting Ideas
    • Furniture Ideas
    • Architecture Ideas
    • Senior Living at Home
    • Home Finance
    • Real Estate News
August 23.2025
3 Minutes Read

10 Essential Tips for Successful DIY Home Painting Projects

DIY home painting: hand spray painting a blue wall close-up.

Mastering the Art of Spray Painting: What You Need to Know

Spray painting offers a fantastic way to revitalize furniture, update your décor, or embark on your latest DIY home projects. However, before you dive in, it’s essential to understand that a successful spray paint job requires a blend of technique, patience, and the right materials. With that in mind, here are ten key elements that will help you achieve a smooth and long-lasting finish.

1. Use the Right Paint for the Job

Plastic surfaces can be tricky to paint with conventional spray paints. Thankfully, specialized products like Krylon Fusion for Plastic and Rust-Oleum 2x are designed to bond strongly with plastic, resulting in a durable finish. Understanding the material you're painting is a crucial first step in any DIY home decor project.

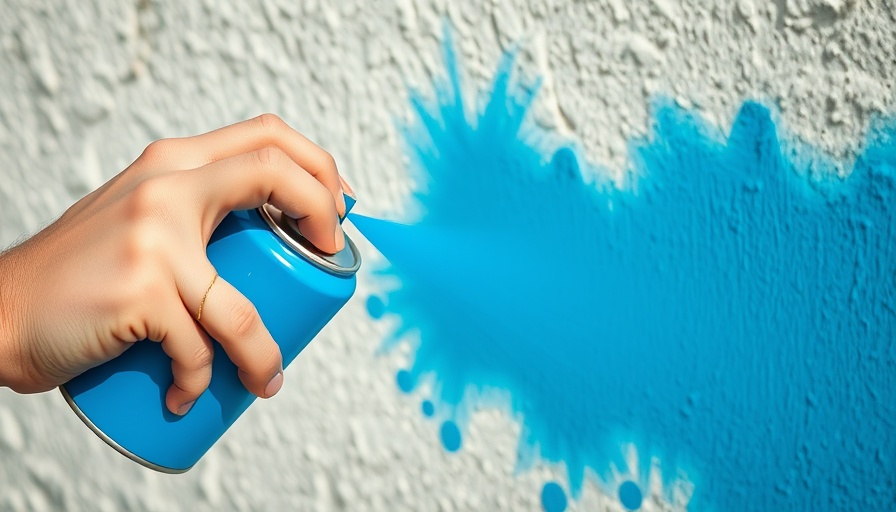
2. Perfect Your Technique to Avoid Runs

One of the most challenging aspects of spray painting is preventing runs, especially on vertical surfaces. To achieve this, it’s better to apply light, even coats and allow each layer to dry before adding more. Consider adopting a strategic approach by starting with vertical surfaces, where gravity often causes issues. This method not only helps in achieving a professional finish but also saves time in the long run by avoiding the need for touch-ups due to mishaps.

3. Overlapping for Consistent Coverage

When spray painting, overlapping your strokes by about 50% leads to even color distribution. If you skip this step, you may end up with inconsistent coverage characterized by stripes of heavy and light paint. This technique is vital for ensuring your DIY home painting project appears seamless and professional.

4. Hold the Spray Can Correctly

A common mistake is to swing the spray can in an arc motion. Instead, keep the can parallel to the surface. This not only gives you better control but also ensures an even application across your project.

5. Use a Trigger Handle for Comfort

If you’re planning on using multiple cans, consider investing in a trigger handle. It reduces finger strain and improves control, making the process of DIY home improvement much more comfortable while enhancing the quality of your work.

6. Safety Comes First

While spray painting can be fun, it’s not without its risks. To protect your lungs and nervous system from harmful fumes, wearing a respirator is strongly advisable. Consider working in a well-ventilated area with doors and windows open, or, better yet, tackle your DIY home projects outdoors when the weather permits.

7. Plan Your Workspace: Avoiding Paint Mishaps

When prepping your project, it’s crucial to consider your workspace. Avoid direct contact with surfaces like newspapers or workbenches that can stick when paint cures. Instead, prop furniture on screws to prevent accidental adhesion while allowing easy maneuverability.

8. Choosing the Right Conditions

Weather can affect your spray paint application. Humidity and temperature play significant roles in determining how quickly paint dries and cures. Aim to spray on dry, mild days for optimal results. This attention to detail is especially important when you’re involved in DIY home renovation projects, ensuring a smoother finish that will stand the test of time.

9. Know When to Stop

Resist the urge to over-apply paint. This includes knowing when a surface is adequately coated. Taking a moment to assess rather than reapplying will save you from the hassle of redoing areas that may lead to uneven textures later down the line.

10. Techniques to Enhance Your Final Look

Beyond these basic tips, consider experimenting with different spray painting techniques, such as gradients, stencils, and patterns to create unique effects in your projects. DIY home decor can genuinely reflect your personality through thoughtful finishing touches.

Embarking on a spray painting project can be a rewarding endeavor with the right preparation and knowledge. Whether you’re revamping your home decor or trying your hand at DIY furniture transformation, these tips will ensure you achieve a professional-looking finish that you can be proud of.

Feeling inspired to tackle your next DIY home decor project? Equipped with these essential tips, your creative potential is boundless!

DIY at Home

0 Views

0 Comments

Write A Comment

*
*
Related Posts All Posts
08.28.2025

Why Thousands of Chevys Are Recalled for Fuel Leak Fire Hazard

Update The Alarm of Car Fires: What Chevy Owners Need to Know For many drivers, the risk of a car fire is an unsettling thought. While everyone takes measures to prevent disasters—like avoiding smoking near gas stations or ensuring regular vehicle maintenance—recent news has introduced a different kind of concern for Chevy owners. The National Highway Traffic Safety Administration (NHTSA) has issued a recall impacting over 23,000 Chevrolet vehicles, highlighting a fuel leak that poses a serious fire hazard. Understanding the Recall: Safety Comes First The recall addresses a potential fuel leak in specific models of the Chevrolet Corvette, which could lead to fuel spilling into areas where ignition sources like a hot engine or exhaust components exist. As a result, the risk of a fire could significantly increase, making it critical for owners to pay close attention to these safety alerts. The vehicles involved in this situation include: 2023 Chevrolet Corvette 2024 Chevrolet Corvette 2025 Chevrolet Corvette 2026 Chevrolet Corvette If you own one of these models, keep an eye out for a notification from Chevy, which will provide guidance on the next steps to address the issue. How Will Chevy Respond to This Hazard? Chevrolet is committed to resolving this safety concern. The company plans to install a shield designed to divert any spilled fuel during refueling, and this service will be offered free of charge. Furthermore, it’s advisable for owners of affected models to refrain from driving their vehicles until the repairs can be made to ensure their safety. Cultural Significance of Car Safety Alerts In a cultural landscape where cars define lifestyle and freedom, recalls and safety alarms stir both concern and loyalty. Car owners often have a deep connection with their vehicles—those moments on the road, the stories shared, and the sense of independence that comes from having reliable transportation contribute significantly to their identity. Therefore, it is understandable that knowing about a potential threat can be disconcerting. The Bigger Picture: The Importance of Monitoring Car Safety This situation highlights a broader issue regarding vehicle safety recalls in the automotive industry. Reports indicate that far too many vehicle recalls often go unaddressed, with many owners unaware of the severity of the potential risks. Owners must be proactive—not just in monitoring recalls but also understanding implications and taking corrective actions. Past Recalls and Community Response Historically, numerous recalls have shed light on significant defects in vehicles ranging from ignition issues to safety belt failures. Each recall usually generates public concern, discussion in community forums, or even consumer actions like changing their vehicle preferences altogether. The emotional weight of these incidents can also lead owners to question the trustworthiness of manufacturers and their commitment to transparency. Your Role as a Vehicle Owner: Stay Informed Being proactive as a vehicle owner not only safeguards your safety but also provides a voice to ensure manufacturers uphold high standards. Remember to engage with your vehicle’s warranty service, ask questions regarding the safety of your car from your dealer, and stay connected with official alerts from the NHTSA. These actions empower you to play an informed role in maintaining your safety on the roads. Conclusion: Take Action for Your Safety As a car owner, it’s essential to remain vigilant about recalls and vehicle safety. For those driving affected Chevrolet models, utilize the resources provided by Chevrolet customer service, and don't hesitate to reach out. Regularly check updates from reliable sources to remain attuned to what's happening regarding the safety of your vehicle. Take a moment to evaluate your vehicle's status and engage actively in ensuring your road safety. Awareness is your first line of defense against potential hazards.

08.28.2025

Master Fire Pit Maintenance: Prevent Rust and Enjoy More Gatherings

Update Keep Your Fire Pit Rust-Free with Regular Maintenance Fire pits are the charm of outdoor living, bringing warmth and ambiance to backyard gatherings. However, much like any outdoor fixture, they require regular maintenance to ensure their longevity and usability. Neglecting your fire pit can lead to rust and deterioration that not only affects its performance but detracts from its aesthetic value. Let's explore how to keep your fire pit in top shape, ensuring you can enjoy cozy evenings by the fire for years to come. What Happens If You Don’t Clean Your Fire Pit? Failing to clean your fire pit regularly results in the accumulation of ash, soot, and creosote, all of which can hasten rust formation. According to fire pit expert Eric Tamminga, exposure to moisture alongside this buildup can create a caustic solution that eats away at metal surfaces. Ideally, a monthly clean is critical, and importantly, covering it when not in use is vital to prevent water intrusion. Cleaning Wood-Burning Fire Pits: Step-by-Step If you have a wood-burning fire pit, the cleaning process is straightforward. Begin by removing any unburned wood chunks, then scoop out the ash and debris with a metal shovel into a container. Afterward, use a brush or shop-vac to eliminate remaining debris. For a thorough clean, scrub the interior of the pit with warm soapy water, ensuring to rinse and dry completely afterward. This step is crucial as moisture can provoke rust. Gas-Burning Fire Pits: Cleaning Essentials For those with gas-burning fire pits, it’s imperative to prioritize safety while cleaning. Always disconnect the gas line before proceeding. Disassemble the components carefully to expose the gas line, valve, and lighter assemblies. Use a clean cloth and a suitable solvent like rubbing alcohol to wipe away soot and grime, making sure everything is reassembled correctly. A final leak check is crucial before relighting your fire pit. Preventing Rust: Proactive Measures to Consider Preventative measures can save you from lengthy cleaning sessions and costly repairs down the line. Regularly emptying the ash, using a cover to shield it from elements, and burning only seasoned wood can significantly decrease rust risks. As Tamminga advises, opting for hardwoods can produce less ash and soot, making your upkeep even more manageable. Benefits of Keeping Your Fire Pit Clean Not only does a clean fire pit amplify your outdoor space's visual appeal, it ensures that your gatherings are anchored in safety. A clean fire pit minimizes fire hazards caused by leftover ash and contributes to better air quality, making your outdoor experience more pleasant. Regular maintenance also prevents costly repairs, ensuring that your investment continues to deliver joy for years to come. Inspirational Ideas: Making Your Fire Pit a Focal Point In addition to cleanliness, consider ways to enhance its presence in your outdoor area. Incorporate DIY home decor elements such as surrounding it with comfortable seating, colorful cushions, and aesthetically pleasing decorations to make the fire pit an inviting centerpiece. Reflect upon your personal style, be it modern, boho, or rustic, and allow that to guide your design choices. Adding some handmade accessories or artwork can make it uniquely yours! Your Next Steps: Take Charge of Your Fire Pit Care By combining these cleaning tips and maintenance practices with creative DIY home decor ideas, you can transform your fire pit into a beautiful and functional centerpiece for summer evenings and chilly winters alike. It’s time to embrace your backyard as an oasis of relaxation.

08.28.2025

Transform Your Winter Comfort: How to Insulate Your Storm Door and Save Money

Update Why Your Storm Door Deserves a Makeover As cooler temps descend, it’s time to ensure your home stays warm and cozy. One of the often overlooked components of home energy efficiency is the storm door. Despite their protective nature, many storm doors lack insulation, making them prime culprits for heat loss. Understanding their role can motivate homeowners to enhance their storm door's insulation, ultimately creating a cozier living space and saving on energy costs. What is a Storm Door? Storm doors come in a variety of styles and serve as a barrier between the outside elements and your main entry door. While full-view glass doors are the most recognized, options such as mid-rail storm doors with screens or cellar storm doors also play an important role. These doors are not just about appearance; they act as essential insulators, preventing cold drafts in winter and helping to manage heat during the hot months. The Importance of Insulating Your Storm Door Insulating your storm door is crucial for more than just temperature control. Proper insulation creates an air pocket, acting as an effective barrier against harsh weather conditions. This insulation not only helps keep indoor temperatures stable but also prolongs the life of your primary doors, shielding them from moisture and extreme weather. Consequently, homeowners can experience considerable savings on utility bills as well. Simple Steps to Insulate Your Storm Door To insulate your storm door successfully, consider the following methods: Weatherstripping: Start at the door's perimeter using self-adhesive foam. For older doors with warped frames, stack high-density foam tape for the best seal. Magnetic Vinyl Strips: Applying magnetic strips can ensure a tight seal and eliminate drafts. Insulated Panels: Consider adding insulative panels or replacing the glass with insulated glass if your storm door design allows for it. These upgrades can yield significant improvements in comfort and energy savings. Common Misconceptions About Storm Doors Many homeowners assume that their existing storm doors are properly insulated, but this is often not the case. Basic models typically provide only a thin layer of glass or vinyl that can't compare to the benefits of enhanced insulation. It's essential to look beyond the manufacturer's promises and consider practical, hands-on upgrades instead. Step-by-Step Implementation of Insulation Techniques Insulating your storm door can feel like a daunting task, but breaking it down into simple steps makes it manageable: Start by cleaning the doorframe. A clean surface ensures proper adhesion for weatherstrips. Measure your door’s parameters. Knowing measurements allows you to purchase the correct materials without excess hassle. Cut the weatherstripping to size. Using scissors, trim to fit perfectly around the door edges for maximum efficiency. Install with care. Follow the manufacturer’s instructions, ensuring that everything is aligned without bubbles. Emotional Connections: The Cozy Home Feel On a chilly winter evening, imagine sipping hot cocoa while the frosty wind howls outside, yet inside your home, everything is warm and inviting. This picture can become a reality by properly insulating your storm door. Not only will you enjoy lower energy bills, but you'll also create a comforting escape from the winter weather outside, enhancing the emotional connection to your home. End Notes: Raising Your Home Comfort Level By taking simple yet effective measures to insulate your storm door, you can profoundly impact your home's comfort and energy efficiency. Don't overlook the importance of this often-forgotten aspect of your home maintenance. Embrace DIY home improvement and decoration by diving into projects that lead to tangible benefits. Simply put, a well-insulated storm door is more than just an improvement; it's an investment in your quality of living!

Terms of Service

Privacy Policy

Core Modal Title

Sorry, no results found

You Might Find These Articles Interesting

T
Please Check Your Email
We Will Be Following Up Shortly
*
*
*