Add Row
Add Element
cropper
update
Marin Home Ideas
update
Add Element
  • Home
  • Categories
    • Home Remodeling Ideas
    • Interior Design & Decor Ideas
    • Gardening & Landscaping Ideas
    • Outdoor Living & Entertaining
    • Health & Wellness at Home
    • DIY at Home
    • Kitchen Ideas
    • Bedroom Ideas
    • Bath Ideas
    • Cooking at Home
    • Home Office Ideas
    • Lighting Ideas
    • Furniture Ideas
    • Architecture Ideas
    • Senior Living at Home
    • Home Finance
    • Real Estate News
July 22.2025
3 Minutes Read

Breeze Through Summer: Fixing AC Side Panels for Optimal Cooling

Efficient AC side panels installation in window frame.

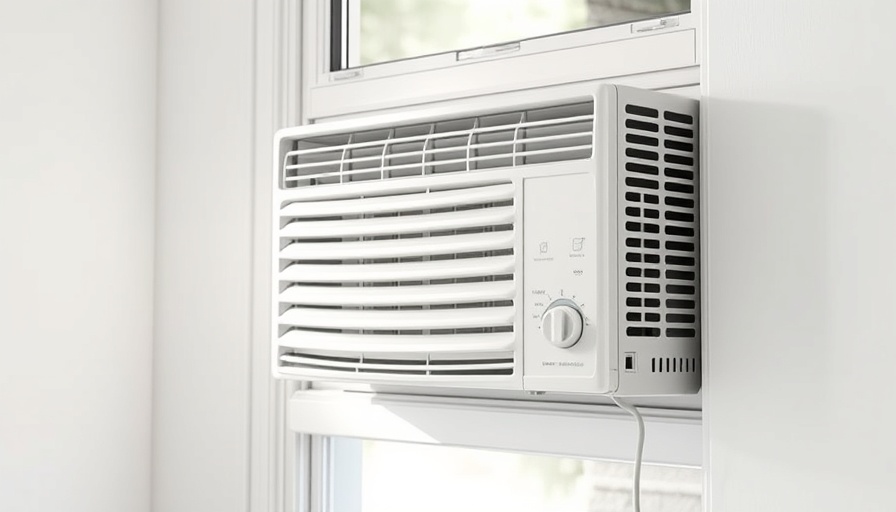
Understanding Your AC Side Panels: The Basics

As summer heat rises, so does the demand for home cooling solutions. For many, this means setting up window air conditioning units. These essential pieces of equipment come with side panels designed to fill gaps between the AC unit and the window frame. However, when you're moving into a new space or dealing with non-standard window sizes, you might find that those panels just don't fit as you expected. Understanding the purpose and functionality of these side panels can help you address common installation issues confidently.

Creative Solutions When Your AC Panels Aren't Fitting

If you find yourself facing the challenge of air conditioning side panels that don’t fit, don't panic. Here are several creative options to consider:

  • Use One Panel: If the window is narrow, start by removing one side panel. Positioning the AC unit closer to one side allows the remaining panel to adequately cover gaps.
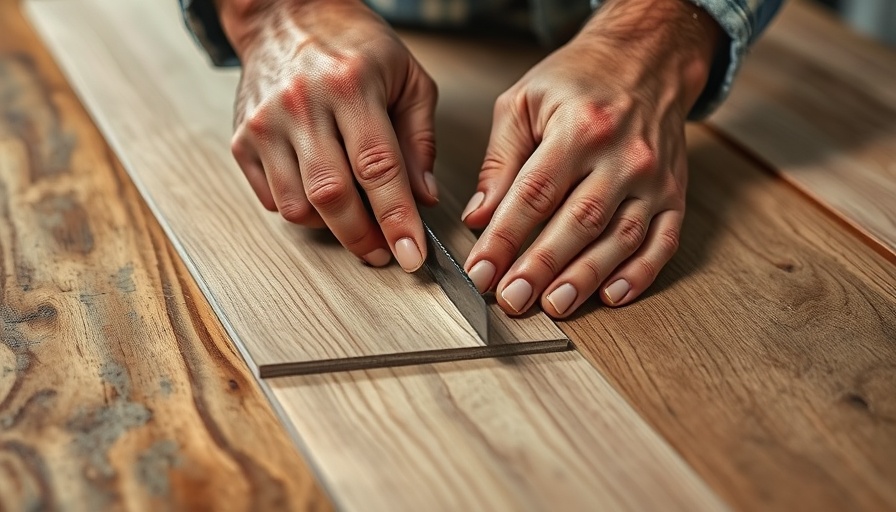
  • Custom Panels: Crafting your own panels from materials like plywood, plexiglass, or foam boards can be a practical solution. Measure the gaps accurately for a snug fit.
  • Upgrade to a Larger AC: If your window is significantly wider than your AC, investing in a larger unit might save you future headaches.
  • Seal Remaining Gaps: Use weatherstripping, caulk, or even painter’s tape to close small gaps where the panels and window meet.

Using Foam Board as an Alternative

As suggested by HVAC expert Micah Sherman, foam board can serve as an effective substitute for side panels. It's lightweight, easy to cut, and can provide insulation against outdoor temperatures if affixed correctly. Cut it to size, press it into place, and tape down the edges for a clean finish. This DIY approach not only ensures that your home remains comfortable but also keeps that summer heat at bay.

Maintaining Home Efficiency in the Summer

Efficiently managing your air conditioning unit isn’t just about the setup—it's also about maintenance. Regularly cleaning filters and ensuring proper sealing can keep your AC running smoothly. A well-maintained unit lowers energy costs and increases the lifespan of your appliance, making it a smart investment for homeowners.

Embracing DIY Home Improvement Projects

DIY home projects, such as modifying your AC side panels, not only help solve immediate problems but also add a personal touch to your living space. Engaging in these important maintenance tasks empowers homeowners to take control over their comfort and provides an opportunity to learn valuable skills. So, if you feel brave enough to tackle such challenges, don your DIY hat and get started!

Future-Proofing Your Home Against Heatwaves

Climate change has made extreme heat more common, making reliable cooling systems essential for any home. Consider investing in solutions that allow you to adapt to changing weather conditions. Whether through landscape choices that provide shade, or by choosing high-efficiency AC units, being proactive can enhance your comfort.

Final Thoughts on Keeping Your Space Cool

Using the right techniques and materials when setting up your AC unit can ensure you're ready for even the hottest days. Addressing side panel issues creatively allows you to maintain your comfort during the summer months. Embrace the DIY spirit—it's not just about fixing a problem; it’s also about enhancing your living environment for years to come.

DIY at Home

0 Views

0 Comments

Write A Comment

*
*
Related Posts All Posts
07.22.2025

Exploring the Importance of Yellow Tags in Road Safety

Update Understanding Temporary Road Markers: More Than Meets the EyeHave you ever driven down a road with yellow tags marking lane boundaries and wondered what they signify? While it might be easy to dismiss them as just another part of road construction, these yellow tags play a vital role in helping guide drivers safely. As construction or maintenance work occurs, clarity is crucial. These yellow tags are temporary markers that denote lane delineations when the usual paint is not visible.What Do Yellow Tags Represent?The yellow tags seen on the road serve specific purposes as directed by state transportation departments. According to the State of California Department of Transportation, they provide “temporary pavement delineation on bituminous seal coat projects.” Similarly, Louisiana's Department of Transportation describes them as “reflectorized tabs,” emphasizing that they should only be employed temporarily during road projects.Distinction Between Markers: Tags vs. BumpsIt’s essential to differentiate between yellow tags and other temporary markers, such as raised pavement markers, which might also be used during road work. The latter, often referred to as “temporary reflectorized raised pavement markers,” are typically employed for short-term lane shifts within work zones. These markers are often used alongside painted stripes to enhance visibility, particularly during nighttime driving. Both types aim to minimize confusion and keep drivers safe.The Evolution of Pavement MarkersRoad markings have evolved over the years, with more durable and reflective materials now available. Permanent lane markers, including reflective yellow raised dots, supplement traditional lines and are vital for extensive highway systems. Knowing the differences between types of markers can enhance your safety awareness while driving.Practical Tips for DriversWhen approaching yellow tags or any temporary markers, it’s important to adhere to the lane designations they represent. Always treat these markers with the same caution you would for painted lines, especially in areas with heavy traffic or ongoing construction. Furthermore, understanding their purpose can help alleviate confusion and foster safer driving habits. Here are a few actionable tips: Stay Alert: Always be attentive to your surroundings and any changes in road markings, especially in construction zones.Follow the Guidance: Respect the lane shifts indicated by yellow tags, especially as they often direct you to maintain safe distances from other traffic.Mitigation Strategies: If you're prone to anxiety in construction areas, consider strategies such as deep breathing or listening to calming music to ease driving stress.Closing ThoughtsWhile yellow tags may appear temporary and unremarkable, they serve a crucial function in our road systems. As you navigate areas with construction, remember that these markers help ensure your safety and the safety of others. Just like the importance of understanding road signs, being aware of temporary markers can enhance your overall driving experience.

07.19.2025

Cutting Vinyl Plank Flooring: 4 Easy Techniques for DIY Success

Update Mastering the Art of Cutting Vinyl Plank Flooring When it comes to DIY home renovation, mastering the necessary skills is key to achieving professional results. Cutting vinyl plank flooring might seem daunting, but with the right tools and techniques, anyone can do it like a pro! In this guide, we will explore various methods that not only make it easier to cut these planks but also ensure that your flooring project looks flawless upon completion. The Significance of Proper Cutting Techniques Cutting vinyl planks is a necessary skill for any DIY home improvement project, particularly if you desire a polished finish. Whether you’re installing it around columns, door frames, or cabinets, making clean and precise cuts can prevent damage to your flooring. Unlike cutting traditional lumber, vinyl planks require a different approach due to their multi-layered composition, which includes polyvinyl chloride (PVC), wood composites, and protective layers. With this in mind, let’s delve into the top four methods for cutting vinyl plank flooring effectively. 1. Score and Snap: A Quick and Effective Method The score-and-snap method is ideal for straight cuts and is very beginner-friendly. Here’s how to execute it: Start by marking your cut line on the vinyl plank. Use a straight edge to ensure a uniform scoring line. Using a clean utility knife, score along your marked line multiple times to create a deep groove. Position the plank so that the cut line is aligned with the edge of a table. Secure the supported part with one hand while you apply downward pressure on the overhanging piece until it snaps cleanly, following the scored line. This method is especially handy for cutting planks at the end of a row. 2. Flooring Saw: For Precision and Comfort If you prefer using power tools, a flooring saw is an excellent option for making straight cuts. To use this tool effectively: Mark your cut line and note the waste side. Position the plank securely against a work surface and ensure your flooring saw is equipped with a carbide-tipped fine-tooth blade to minimize chipping. Carefully guide the saw along your marked line for a precise cut. This approach not only provides accuracy but also makes cutting large quantities of planks more manageable. 3. Jigsaw: Ideal for Curves and Irregular Cuts A jigsaw is your best friend when it comes to cutting around intricate shapes or curves. Here’s what to do: After marking your cut line, use a fine-toothed blade to make smooth cuts without damaging the material. Guiding the jigsaw along curves will allow for greater creativity in your design, adapting to changes in the layout. This method is invaluable when working on areas where precision is critical, such as around door frames or fixtures. 4. Miter and Table Saws: For the Experienced DIYer If your project involves making numerous long, straight cuts, a miter saw or table saw might be the most efficient tools. Follow these steps: Adjust your saw's settings according to the thickness of the planks. Secure your plank and slowly guide it through the saw, ensuring that you maintain straightness and safety. Both miter and table saws can save time on larger projects and ensure uniformly cut pieces. Safety First: Always Protect Yourself Before starting any cutting, always ensure that you’re wearing safety glasses to protect your eyes from debris. Additionally, wear gloves to prevent any potential injuries! Why You Should Embrace DIY Home Renovation Taking on a DIY project like installing vinyl plank flooring can not only save you money but can also be incredibly rewarding. Each cut brings you one step closer to your dream home, creating a sense of accomplishment and pride when you see your finished work. Furthermore, mastering skills in flooring can elevate your DIY home projects, empowering you to tackle even bigger renovations. Conclusion: Start Your DIY Journey Today! The world of DIY home improvement is vast and exciting. Whether you're focused on DIY home decor or planning major renovations, knowing how to cut vinyl plank flooring properly is a valuable skill that can enhance your home’s aesthetics. So grab your tools, and let’s get started on transforming your space!

07.19.2025

Empowering Your Choices: Essential Gasoline Knowledge for Vehicle Owners

Update Essential Insights on Gasoline: Fuel Up with Confidence When it comes to fueling our vehicles, many of us have questions about the best choices and practices. Whether you're an experienced driver or someone who just wants to ensure their car runs smoothly, understanding gasoline is crucial. We consulted Fred Walas, a gasoline expert from Marathon Petroleum, to illuminate essential facts about gasoline that can empower you to make informed decisions. What’s the Difference Between Premium and Regular Gas? One of the most common questions is whether premium gas offers any significant advantages over regular. The answer is nuanced. While premium fuels are designed to resist engine knocking better than lower-octane options, they don't offer additional power or better additives necessary for most vehicles. Major car manufacturers conduct tests to determine the best octane rating for their engines, and it’s best to follow the recommendations in your owner’s manual. Storage and Shelf Life: How Long Can You Keep Gas? If you're one of those who like to stock up on gas for small engines or lawnmowers, knowing how to store it properly can save you from nausea-inducing fumes. Gasoline can last up to a season if stored in a tightly sealed container; however, factors like oxygen exposure can cause problems. Ethanol in gas can separate and cause gumming that damages your equipment. Thus, if you're not using the fuel quickly, consider investing in stabilizers to maintain its quality. Do Gas Additives Really Work? Ah, the lure of miracle gas additives! While the idea of an additive boosting fuel efficiency sounds appealing, the reality is quite different. Most additives on the market won't provide magical benefits, but a few designed for cleaning fuel systems might help, especially those containing ingredients like polyisobutylamine (PIBA) and polyetheramine (PEA). Look for these additives but remember to adhere to manufacturer instructions to ensure optimal results. Brand Name vs. Generic Gas: What's Worth It? With so many options at the pump, is premium gas worth the extra cost? While a marked difference existed between name-brand fuels and lesser-known brands in the past, that gap has narrowed. Today, the quality may not vary as significantly as you'd think. All brands meet minimum standards set forth by the Environmental Protection Agency (EPA), meaning a lower-priced option may be just as effective in many cases. Connecting Knowledge to Everyday Choices Understanding how gasoline functions and how to choose it effectively relates directly to a sustainable lifestyle. Fueling cars efficiently contributes to environmental well-being by reducing unnecessary emissions. Moreover, educating yourself about original equipment manufacturer (OEM) recommendations can lead to significant savings on repairs and enhanced vehicle performance over time. In conclusion, the ultimate takeaway is that knowledge is power when it comes to something as commonplace as gasoline. By being informed, you not only foster a well-functioning vehicle but also practice responsible fueling. Remember, fueling your journey with confidence starts with understanding your gas choices! Whether you are looking to venture into DIY home improvements or simply want to create a more efficient lifestyle through insightful decisions, this knowledge empowers you to fuel responsibly and effectively. Keep an eye on automotive trends and innovations as they develop to stay ahead in your next fueling decision.

Terms of Service

Privacy Policy

Core Modal Title

Sorry, no results found

You Might Find These Articles Interesting

T
Please Check Your Email
We Will Be Following Up Shortly
*
*
*