Add Row
Add Element
cropper
update
Marin Home Ideas
update
Add Element
  • Home
  • Categories
    • Home Remodeling Ideas
    • Interior Design & Decor Ideas
    • Gardening & Landscaping Ideas
    • Outdoor Living & Entertaining
    • Health & Wellness at Home
    • DIY at Home
    • Kitchen Ideas
    • Bedroom Ideas
    • Bath Ideas
    • Cooking at Home
    • Home Office Ideas
    • Lighting Ideas
    • Furniture Ideas
    • Architecture Ideas
    • Senior Living at Home
    • Home Finance
    • Real Estate News
Add Row
Add Element
July 16.2025
3 Minutes Read

Create Stunning Outdoor Spaces with Thrifted Straw Purse Planters this Summer

Thrifted straw bag planter with pink flowers on garden steps.

Transforming Thrift into Treasure: The Beauty of Straw Purse Planters

As the summer sun warms our days, what better way to celebrate the season than with a splash of color using thrifted straw bags? These rustic purses, often overlooked, can transform your garden into a vibrant floral display. Not only do they provide a charming aesthetic, but they also breathe new life into secondhand items, showcasing your commitment to sustainable living.

Why Choose Annuals for Your Straw Purse Planter

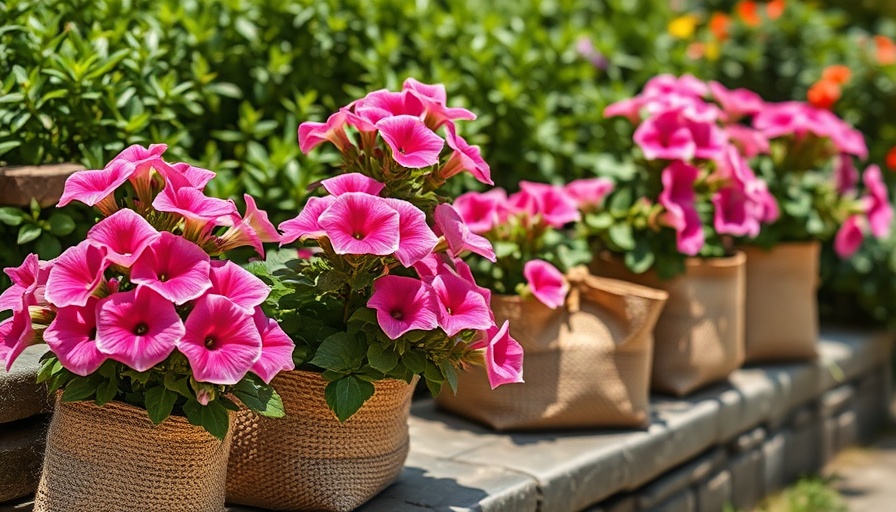
Straw purse planters, filled with colorful annuals, create an eye-catching display perfect for porches or patios. Unlike perennials, which bloom year after year but take their time, annuals such as Sunpatiens burst to life with vibrant flowers all summer long. This quick reward encourages a joyful attitude towards gardening, inviting bursts of color into our immediate environment.

Easy Steps to Make Your Own Straw Purse Planter

Creating a straw purse planter is an enjoyable DIY project that requires minimal materials:

  • Thrifted straw purse
  • Outdoor silicone sealer
  • Plastic sheet or bag for lining
  • Spray adhesive
  • Electric drill or hammer and nails
  • Landscape fabric
  • Container soil
  • Chosen annuals

To start, find a sturdy straw purse from your local thrift store. For under ten dollars, you can find a collection that complements your outdoor aesthetic! Prepare the bag by adding a drainage hole with outdoor silicone, followed by lining the inside with plastic. Fill it with quality soil and plant your chosen annuals.

Personal Touches: Enhancing Your Planters

Each purse planter can reflect your unique style. Consider spray painting the purse or adding embellishments like ribbons or beads for a personal touch. This decorative project not only brightens your space but also encourages creativity, which can inspire others in your community to engage in similar environmentally friendly initiatives.

The Joy of Fleeting Beauty

One of the charming aspects of using annuals in your planters is their transience. Unlike perennials, which offer longevity but require patience, annuals are a celebration of potential and impermanence. The bright blooms invite admiration for their fleeting beauty, encouraging gardeners to appreciate the present moment—even if it’s just for one season.

Practical Gardening Tips for Your Straw Purse Planter

To ensure your purse planter thrives, regular maintenance is key. Here are useful gardening tips:

  • Watering: Keep the soil moist but not drenched. Due to their unique structure, straw plants may require frequent watering.
  • Fertilization: Use organic fertilizers to encourage lush growth and blooming.
  • Pest Control: Monitor the plants for pests and treat infestations promptly with organic pesticides.

By regularly tending to your straw purse planters, you foster an environment that not only enhances your outdoor space but also supports local pollinators.

Building Community Through Gardening

Creating straw purse planters isn’t just about beautifying your home; it serves to inspire community engagement. Invite friends or family over for a planting party—share materials, tools, and experiences as you build colorful displays together. Such gatherings not only cultivate camaraderie but also instill a sense of belonging through shared creativity.

Conclusion: Embrace This Summer Trend

As summer unfolds, consider enhancing your garden space with sustainable DIY projects like straw purse planters. Not only do they beautify your outdoor living area, but they also support environmentally-friendly practices by repurposing items that would otherwise be discarded. Each planter is not just a home for your favorite annuals; it’s a celebration of summer and a testament to your keen eye for creativity.

Let’s join in this vibrant gardening adventure, celebrating the beauty of life’s fleeting moments. Happy Planting!

Gardening & Landscaping Ideas

0 Views

0 Comments

Write A Comment

*
*
Related Posts All Posts
07.17.2025

Affordable Tips for Creating a Vintage Kitchen on a Budget

Update Transforming Your Kitchen on a Budget Imagine walking into a brand-new vintage-inspired kitchen, each corner echoing warmth and nostalgia, yet you haven’t spent a small fortune. This dream is within reach for those who might not have the budget for a full renovation. A fresh coat of paint can unlock a world of affordability, creativity, and style changes that will give your kitchen a revitalized look in a fraction of the time it takes for complete remodeling.In 'Creating Vintage Style Kitchen On A Budget | Great Home Ideas', the discussion dives into DIY kitchen transformations, exploring key insights that sparked deeper analysis on our end. The Power of Preparation As the old adage goes, “Proper preparation prevents poor performance.” This rings especially true in the world of DIY renovations. The first and most crucial step in your kitchen transformation journey is clearing the space and preparing surfaces for painting. Before diving into this creative endeavor, it’s essential to choose the right products. Opt for high-quality paint, like the Dulux Renovation range, which provides a durable finish. Cleaning surfaces thoroughly with sugar soap ensures a clean slate for your work—literally! Color Choices That Speak Choosing the right color can be a game changer when creating a vintage kitchen. For a timeless vintage vibe, consider muted tones like greens and wood accents, which can warm any space. Take inspiration from items you love, just as many successful designers do. Gather decorative pieces that resonate with you, such as a hand-painted landscape or vintage kitchen accessories. By integrating these personal touches, your kitchen will feel uniquely yours while still embodying that vintage charm. Practical Countertop Solutions If you think achieving that classic rustic charm requires splurging on expensive materials, think again. Timber benchtops, like rubberwood, are affordable and can tie the whole vintage theme together beautifully. At under $100 per panel, economically extending your countertop for more prep space makes it a win-win. DIY enthusiasts can stain this wood to match their decor or leave it natural for a rustic feel. Space Maximization Techniques No one wants a cluttered kitchen, especially when cooking or entertaining. Extending your benchtop isn’t merely about aesthetics; it enhances functionality. Creative storage solutions like movable butcher blocks can also provide ample space for food preparation while doubling as storage. These systems combine practicality with style, making them perfect additions to any kitchen. Black Accents: A Stylish Addition As you cement the foundation of your design with paint choices and countertops, don’t overlook the accessories. Incorporating sleek black fixtures like sink taps, lighting, and handles can add an elegant and modern flair to your vintage-inspired kitchen. The juxtaposition of old and new not only provides character but ensures your space remains appealing and functional. Utilizing Vertical Space When it comes to keeping a kitchen spacious and airy, vertical storage is essential. Wall-mounted shelves, affixed with black accents, can highlight decorative items or additional storage without crowding countertops. Additionally, consider installations like chalkboard panels not just for function—to jot down lists or recipes—but as a design element that adds a playful twist. Insider Tips for DIY Enthusiasts For those eager to ensure their kitchen transformation is both beautiful and practical, one pivotal tip is to label your cabinet doors before removal. This makes reassembly seamless and saves time. If you need to fill any holes or cracks, take a moment to patch those up with putty and let it dry before applying your new coats of paint. The Beauty of the Finished Product As the project reaches completion, step back and admire your handiwork. A thoughtfully renovated kitchen can reflect personal taste while providing functionality and comfort. An average scored kitchen transformed into a stunning space filled with character awaits those willing to invest time and creativity into their design. If you’re ready to embark on your journey to creating a vintage kitchen on a budget, take the plunge! Use these insights to guide you, and remember to enjoy the process. After all, your kitchen is more than just a cooking space—it’s the heart of your home where memories are made.

07.17.2025

Master the Art of Growing Jelly Bean Plants with These Tips!

Update Discover the Cultivation of Jelly Bean Plants: A Beginner’s GuideIf you're searching for a resilient yet charming succulent, look no further than the jelly bean plant, scientifically known as Sedum x rubrotinctum. Also referred to as 'pork and beans', this vibrant plant is known for its unique, bead-like leaves that resemble actual jelly beans, making it an intriguing addition to any garden, especially for enthusiasts of container gardening.Why Choose Jelly Bean Plants for Your Garden?This succulent thrives in USDA hardiness zones 9 through 11, making it a perfect candidate for gardeners in warmer climates. Jelly bean plants are particularly beneficial for water-wise gardening due to their drought-resistant properties. Let's explore some of their main advantages:Low Maintenance: This hardy plant requires little care once established, freeing up your time for other gardening projects.Attractive Foliage: Their colorful leaves add a fun visual appeal and can turn any space into a whimsical garden.Versatility: Ideal for rock gardens, indoor plants, or as a ground cover, they can adapt to many landscapes.Essentials for Growing Jelly Bean PlantsTo cultivate healthy jelly bean plants, here are some essential tips:Optimal Growing ConditionsJelly bean plants flourish in full sun to partial shade. They prefer well-draining soil that is loose and sandy, mimicking their native habitat in Mexico. Regular exposure to the sun will enhance their vibrant colors. Ensure the pH level of the soil is between slightly acidic (6.6) to slightly alkaline (7.8) for optimal growth.Maintenance and CareThis plant's care involves simple practices like infrequent watering. Allow the soil to dry out completely between waterings to prevent root rot. During the growing season, minimal fertilization using organic options can promote growth without harming the plant or the environment.Propagation TechniquesPropagating jelly bean plants can be an exciting venture! These succulents can be easily grown from leaf cuttings. Simply remove a healthy leaf, let it dry for a few days until a callus forms, and then place it on moist soil. Over the weeks, you’ll notice new roots and leaves sprouting!Boosting Garden Aesthetics with Jelly Bean PlantsIntegrating these plants into your landscape can enhance its aesthetic quickly. Their colorful leaves contrast beautifully against gravel paths and rocky landscapes, making them ideal for front yard landscaping or as part of a series of backyard landscaping features. Consider planting them in groups or alongside other succulents for a dynamic look.Addressing Common Pests and DiseasesDespite their robust nature, jelly bean plants can be susceptible to issues such as mealybugs and aphids. Regularly inspect your plants and treat them with organic pesticides when necessary to maintain their health and vitality.FAQs: All You Need to Know About the Jelly Bean PlantHow tall do jelly bean plants grow?The mature size of jelly bean plants is between 6 to 8 inches tall, with a potential spread of up to 24 inches wide, making them a stunning ground cover.Can they survive in colder climates?Unfortunately, jelly bean plants are not frost-hardy and should be protected from freezing temperatures. Consider bringing them indoors during winter if you live in a cooler area.Final Thoughts: Embrace DIY GardeningIncorporating jelly bean plants into your garden not only enhances its beauty but also allows you to explore a fun and engaging hobby. Why not take a step towards creating your vibrant garden masterpiece today? Visit your local nursery or search online for jelly bean plants and start your gardening journey!

07.17.2025

Transform Your Garden with Nigella: Easy Tips for Growing Love-in-a-Mist Flowers

Update Why Nigella Plants Are Essential for Your Flower GardenAs gardening continues to burgeon as a beloved hobby, more people are turning to eco-friendly and aesthetically pleasing plants. Among these, nigella plants—often overshadowed by more popular flowers—are making a resurgence. Particularly known as love-in-a-mist, **Nigella damascena** not only brings unique beauty to gardens but is also easy to cultivate and maintain, making it an excellent addition for both novice and experienced gardeners. Meet the Lovely NigellaThe nigella plant originates from southern Europe, North Africa, and Southwest Asia and is characterized by its delicate, fern-like foliage and whimsical blooms. These include star-shaped flowers that can be shades of blue, purple, pink, or white, each featuring lacy bracts that add charm. The plant blooms in spring and early summer, attracting pollinators like bees while maintaining its deer-resistant status. As the flowers turn into seed pods, they can be dried and arranged for long-lasting decor, enhancing your floral arrangements with texture and interest. Planting and Caring for Nigella: Timing Is EverythingNigella plants thrive in USDA zones 2-11, making them suitable for a wide range of climates. They are cool-season annuals that prefer cooler conditions for initial growth. The best time to sow nigella seeds is in the spring, directly in the garden bed about 1-2 weeks before the last frost, or in the fall for those in milder regions. When planting, cover the seeds lightly with soil, as they require darkness to germinate. Spacing them about six inches apart ensures optimal blooming and growth. Unlocking the Beauty of HarvestingWhen it comes to harvesting, patients reap the greatest rewards. Wait until the blooms are fully established, usually around 65-70 days post planting, before cutting them for bouquets. Alternatively, allow the blooms to mature into seed pods for dried arrangements. This dual purpose not only extends your harvest but allows for creative expression in both fresh and dried floral decor. Succession Planting for Continued BloomsTo maximize flower production, consider succession planting your nigella seeds every few weeks up until June. This strategy not only extends the blooming window but also ensures a steady supply of both blooms for fresh arrangements and pods for dried decor. The Diverse Varieties of NigellaDiving deeper into nigella, you’ll find a variety of captivating cultivars, including the white-flowered 'Albion' and the dark blue 'Miss Jekyll.' Each brings its own flair to the garden, ensuring that there's a nigella for every aesthetic preference. Creating a Pollinator-Friendly GardenIncorporating nigella into your garden promotes biodiversity, attracting important pollinators. Given their flowering nature, these plants are a crucial food source for bees and other beneficial insects, contributing to a healthier, vibrant ecosystem. Challenges and ConsiderationsWhile nigella plants are hardy, potential challenges include pest control and ensuring proper planting depth. Nevertheless, implementing sustainable gardening practices, such as organic pest control and proper soil management techniques, will yield a flourishing nigella garden while minimizing environmental impact. Embracing the DIY Spirit in Garden DesignWith their enchanting beauty and ease of care, nigella plants open the door to myriad DIY gardening projects. From designing unique flower arrangements to creating garden borders that boast vibrant colors, they empower gardeners to express their artistic vision. Final Thoughts on NigellaGrowing nigella plants can elevate your gardening game, providing not just stunning blooms, but also a chance to engage with nature. By nurturing these charming flowers, you’ll not only beautify your space but also contribute to a healthier ecosystem for our beloved pollinators. So whether you are looking to enhance fresh arrangements or create long-lasting dried decor, nigella is a plant that deserves a place in your garden!

Add Row
Add Element
cropper
update
Welcome to Marin Home Ideas
cropper
update

Welcome to Marin Home Ideas: Your Inspiration for Beautiful Living in Marin.
Whether you're dreaming of a full home remodel, refreshing your interior design, or creating the perfect outdoor oasis, Marin Home Ideas is your go-to source for inspiration and expert advice.
From stunning kitchen and bathroom renovations to stylish decor trends, smart home upgrades, and lush garden transformations, we bring you the latest in home design and improvement. 

  • update
  • update
  • update
  • update
  • update
  • update
  • update
Add Element

COMPANY

  • Privacy Policy
  • Terms of Use
  • Advertise
  • Contact Us
  • Menu 5
  • Menu 6
Add Element

4153075228

AVAILABLE FROM 8AM - 5PM

Add Element

ABOUT US

Marin Home Ideas is your go-to resource for turning your Marin home into a true haven. Our blog covers everything from creative remodeling and stylish decor to gardening tips, outdoor living, and smart financial moves. 

Add Element

© 2025 CompanyName All Rights Reserved. Address . Contact Us . Terms of Service . Privacy Policy

Terms of Service

Privacy Policy

Core Modal Title

Sorry, no results found

You Might Find These Articles Interesting

T
Please Check Your Email
We Will Be Following Up Shortly
*
*
*