 Add Row
  Add
Add 


Mastering the Art of Cutting Vinyl Plank Flooring
When it comes to DIY home renovation, mastering the necessary skills is key to achieving professional results. Cutting vinyl plank flooring might seem daunting, but with the right tools and techniques, anyone can do it like a pro! In this guide, we will explore various methods that not only make it easier to cut these planks but also ensure that your flooring project looks flawless upon completion.
The Significance of Proper Cutting Techniques
Cutting vinyl planks is a necessary skill for any DIY home improvement project, particularly if you desire a polished finish. Whether you’re installing it around columns, door frames, or cabinets, making clean and precise cuts can prevent damage to your flooring. Unlike cutting traditional lumber, vinyl planks require a different approach due to their multi-layered composition, which includes polyvinyl chloride (PVC), wood composites, and protective layers. With this in mind, let’s delve into the top four methods for cutting vinyl plank flooring effectively.
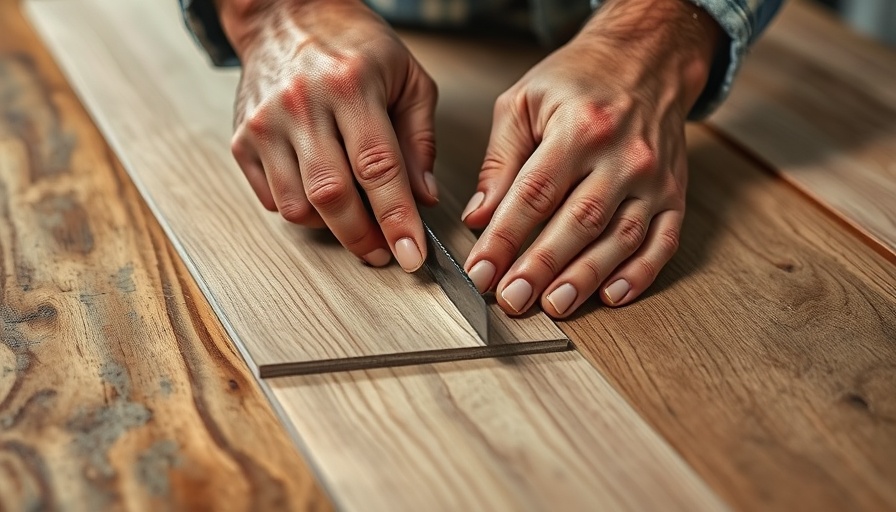
1. Score and Snap: A Quick and Effective Method
The score-and-snap method is ideal for straight cuts and is very beginner-friendly. Here’s how to execute it:
- Start by marking your cut line on the vinyl plank. Use a straight edge to ensure a uniform scoring line.
- Using a clean utility knife, score along your marked line multiple times to create a deep groove.
- Position the plank so that the cut line is aligned with the edge of a table. Secure the supported part with one hand while you apply downward pressure on the overhanging piece until it snaps cleanly, following the scored line.
This method is especially handy for cutting planks at the end of a row.
2. Flooring Saw: For Precision and Comfort
If you prefer using power tools, a flooring saw is an excellent option for making straight cuts. To use this tool effectively:
- Mark your cut line and note the waste side.
- Position the plank securely against a work surface and ensure your flooring saw is equipped with a carbide-tipped fine-tooth blade to minimize chipping.
- Carefully guide the saw along your marked line for a precise cut.
This approach not only provides accuracy but also makes cutting large quantities of planks more manageable.
3. Jigsaw: Ideal for Curves and Irregular Cuts
A jigsaw is your best friend when it comes to cutting around intricate shapes or curves. Here’s what to do:
- After marking your cut line, use a fine-toothed blade to make smooth cuts without damaging the material.
- Guiding the jigsaw along curves will allow for greater creativity in your design, adapting to changes in the layout.
This method is invaluable when working on areas where precision is critical, such as around door frames or fixtures.
4. Miter and Table Saws: For the Experienced DIYer
If your project involves making numerous long, straight cuts, a miter saw or table saw might be the most efficient tools. Follow these steps:
- Adjust your saw's settings according to the thickness of the planks.
- Secure your plank and slowly guide it through the saw, ensuring that you maintain straightness and safety.
Both miter and table saws can save time on larger projects and ensure uniformly cut pieces.
Safety First: Always Protect Yourself
Before starting any cutting, always ensure that you’re wearing safety glasses to protect your eyes from debris. Additionally, wear gloves to prevent any potential injuries!
Why You Should Embrace DIY Home Renovation
Taking on a DIY project like installing vinyl plank flooring can not only save you money but can also be incredibly rewarding. Each cut brings you one step closer to your dream home, creating a sense of accomplishment and pride when you see your finished work. Furthermore, mastering skills in flooring can elevate your DIY home projects, empowering you to tackle even bigger renovations.
Conclusion: Start Your DIY Journey Today!
The world of DIY home improvement is vast and exciting. Whether you're focused on DIY home decor or planning major renovations, knowing how to cut vinyl plank flooring properly is a valuable skill that can enhance your home’s aesthetics. So grab your tools, and let’s get started on transforming your space!


Write A Comment