Add Row
Add Element
cropper
update
Marin Home Ideas
update
Add Element
  • Home
  • Categories
    • Home Remodeling Ideas
    • Interior Design & Decor Ideas
    • Gardening & Landscaping Ideas
    • Outdoor Living & Entertaining
    • Health & Wellness at Home
    • DIY at Home
    • Kitchen Ideas
    • Bedroom Ideas
    • Bath Ideas
    • Cooking at Home
    • Home Office Ideas
    • Lighting Ideas
    • Furniture Ideas
    • Architecture Ideas
    • Senior Living at Home
    • Home Finance
    • Real Estate News
June 30.2025
3 Minutes Read

Discover the Beauty and Care of Flower-of-an-Hour in Your Garden

Flower-of-an-hour with pollen tips in garden sunlight.

A Unique Addition to Your Garden: Flower-of-an-Hour

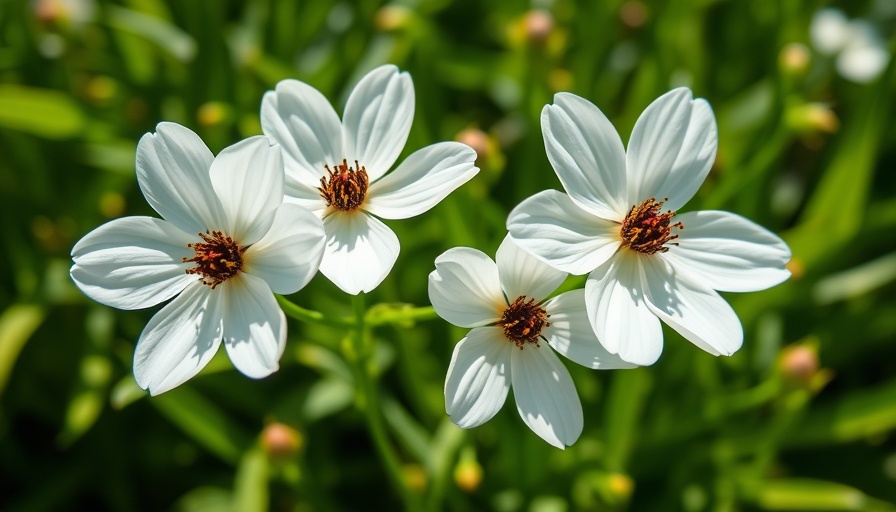
Flower-of-an-hour, scientifically known as Hibiscus trionum, is an enchanting plant that brings vibrancy and charm to any garden. With its soft, papery blooms that last only a few hours, this delicate flower is a popular choice for gardeners seeking a whimsical touch. However, it’s important to approach this beautiful plant with care, as its vigorous self-seeding nature can lead to invasiveness in some regions.

Understanding the Characteristics and Growth Habits

Hibiscus trionum belongs to the mallow family, Malvaceae, and thrives in USDA Hardiness Zones 9 to 11, typically showing its best growth as a perennial in warmer climates. In contrast, those residing in cooler areas will likely cultivate this plant as a seasonal annual. The flower showcases pale blossoms with striking dark centers, drawing in numerous pollinators, including bees and butterflies, enhancing the biodiversity of your garden.

Effective Gardening Tips for Successful Growth

To grow Hibiscus trionum successfully, it's essential to understand its soil and sunlight preferences. This plant flourishes in full sun and requires loose, rich soil that drains well. The ideal pH level for the soil ranges from 6.0 to 7.0, accommodating slightly acidic to neutral conditions. Given these requirements, gardeners might want to conduct a soil test prior to planting to ensure a thriving garden.

Optimal Garden Design Ideas for Flower-of-an-Hour

Incorporating Hibiscus trionum into your garden design can enhance the beauty of your landscape. It works wonderfully in informal borders and cottage gardens, where its relaxed growth style complements other flora. Additionally, consider utilizing containers to manage its growth more easily. Placing this plant on a patio may reward you with a captivating afternoon bloom, perfect for a serene break.

Managing Invasiveness: A Gardener's Responsibility

While the flower-of-an-hour can make a stunning addition, it’s crucial to monitor its growth carefully. As it self-seeds vigorously, it can cluster together or spread beyond intended spaces, potentially overshadowing more delicate plants. One practical approach is to deadhead spent flowers before they set seed, thus controlling its prolific nature effectively.

Propagation: Step-by-Step Guide

Propagating Hibiscus trionum can be a rewarding gardening project. The plant can be grown from seeds sown directly into the soil or by starting them indoors before the last frost. To ensure the best germination rates, soak the seeds in water for a few hours prior to planting. Following the recommended planting depth and spacing will help to create a flourishing patch of these delightful flowers.

Pest Management and Plant Care

As with any garden, Hibiscus trionum may become vulnerable to pests. Common pests include aphids and spider mites. Natural pest control methods, such as introducing ladybugs or using neem oil sprays, can be effective and environmentally friendly options. Regular monitoring of your plants also helps in catching any potential issues early on.

Final Thoughts: Embracing Responsible Gardening

Incorporating Hibiscus trionum into your flower garden offers unique aesthetic value while also presenting challenges that require responsible gardening practices. By understanding its growth habits and maintaining vigilance over its spread, you can enjoy this charming flower's beauty and contribute positively to your landscape's ecosystem. Happy gardening!

Gardening & Landscaping Ideas

2 Views

0 Comments

Write A Comment

*
*
Related Posts All Posts
08.28.2025

How to Transform Your Side Yard with Budget-Friendly Gardening Ideas

Update Transform Your Side Yard: A Weekend DIY Makeover With a little creativity and ingenuity, giving your outdoor space a fresh take doesn’t always mean a lengthy, costly project. In the recent video titled "Simple Side Yard Makeover On A Budget," Jason and Danny demonstrate that even the smallest of spaces can be transformed into a vibrant and functional area, all within a single weekend. This invigorating approach to home improvement encourages everyone, regardless of skill level, to roll up their sleeves and get started on those outdoor projects that often languish on our to-do lists.In this article, we explore the insights shared in the video 'Simple Side Yard Makeover On A Budget,' highlighting the doable DIY approaches that encourage anyone to revamp their outdoor space. Gardening Without the Grit: You Don’t Need to Dig In their approach, one underlying principle shines: gardening doesn’t always require digging. Instead, they focus on smart means of reconfiguring the existing landscape. Removing overgrown Morayas, they not only opened up the area but also invited light—an essential ingredient for any garden. Their techniques resonate with sustainable gardening practices focusing on usability and joy rather than just aesthetic allure. The Art of Mulching: Low-Cost and High Style After clearing out the invasive plants, Jason and Danny opt to mulch the ground with river pebbles—an affordable choice that boosts curb appeal while serving practical purposes. Mulching is essential for moisture retention and weed control, creating a favorable environment for potted plants. By using materials that are inexpensive yet attractive, they showcase how simple gardening can yield stunning results without breaking the bank. Container Gardening: More Than Just a Fad In addition to mulching, they beautifully illustrate the concept of container gardening. With a carefully curated selection of pots, including some vibrant painted options, the duo emphasizes that plants can express a personalized flair, even in a confined space. Container gardening offers flexibility, enabling quick adjustments if a particular plant doesn’t flourish in its initial spot. This method not only maximizes available space but also allows for the incorporation of seasonal varieties, leading to a dynamic outdoor space throughout the year. Your Plants Matter: Choosing Wisely One of the takeaways from this makeover is the importance of selecting the right plants. Understanding the growth habits of different species plays a crucial role in long-term success. In the video, the introduction of magnolia teddy bear plants highlights how a well-thought-out plant choice can enhance the space's natural beauty and create a sense of enclosure that complements the side yard’s design. Practical Tips for Your Own Makeover This type of gardening is not a one-size-fits-all approach; rather, it encourages exploration and experimentation. Here are some practical tips for incorporating what Jason and Danny so effectively demonstrated: Plan Your Layout: Visualize where your pots, pebbles, and plants will go before getting started. Layout planning saves time and resources. Utilize Vertical Space: Think about adding vertical gardening elements, like wall planters or climbing vines, to take advantage of limited space. Choose Perennials: Rather than constantly replacing annuals, consider planting perennials that create a lasting garden presence. Experiment with Color: Don’t hesitate to bring bold colors into your garden designs with painted pots or brightly colored plants. Stay Sustainable: Use recycled materials where possible and consider organic gardening practices to enhance your garden's health. Final Thoughts: Get Inspired and Get Gardening! As we reflect on Jason and Danny's engaging side yard transformation, it's clear that this is not just about reorganizing plants but about creating a sanctuary where people can connect with nature in their own homes. Whether you’re planting flowers, establishing a vegetable garden, or nurturing a butterfly garden, the important thing is to begin. So, grab your gardening tools, express your creativity, and step into the gratifying world of gardening! Finding inspiration from a simple side yard makeover can spark new ideas for your outdoor space. Challenge yourself to tackle that garden project you’ve been putting off, and witness the joy that a personalized backyard can bring.

08.27.2025

Discover the Secrets to Growing a Stunning Bunny Ears Cactus

Update Becoming Familiar with the Bunny Ears Cactus: A Unique Addition to Your GardenThe bunny ears cactus, or Opuntia microdasys, is not just your ordinary cactus. Native to the arid landscapes of northern Mexico and extending into Arizona, this charming plant is known for its distinctive flat, oval pads resembling the ears of a bunny. Its playful appearance, adorned with fuzzy polka dots, instantly brings a whimsical touch to any garden or indoor space. But while it’s a delightful sight, it’s important to recognize that the 'fuzziness' comes from glochids—tiny but sharp spines that can irritate the skin when touched.Understanding its Growing Needs: Light and Soil PreferencesTo cultivate a thriving bunny ears cactus, understanding its essential needs is pivotal. This cactus thrives in USDA Hardiness Zones 9 to 12, flourishing in full sun. If you live in a cooler climate, consider nurturing it indoors where the light is bright. The soil must be loose, rocky, and well-draining to imitate its natural dry habitat. A slightly acidic to neutral pH, around 6.0 to 7.5, is ideal for optimal growth. This attention to detail ensures that your cactus can grow densely and robustly, enhancing its shrub-like appearance over time.Maintenance: Keeping Your Cactus HealthyYour bunny ears cactus requires minimal maintenance, making it a perfect choice for novice gardeners. Watering should be conservative, only when the soil dries out completely, as cacti are adapted to survive long periods without moisture. It’s essential to watch out for pests common to succulents, such as aphids and scale; however, proper care minimizes these risks. Occasional fertilization during the growing season will promote healthy growth and vibrant blooms.Propagation: Expanding Your CollectionOne of the joys of gardening is propagating plants to expand your collection. Propagating bunny ears cacti is relatively simple. Use clean, sharp tools to cut a paddle from the main plant, allowing it to callus for a few days. Once callused, plant it in a well-draining mix and water lightly. With the right conditions, you’ll see new roots forming in a matter of weeks.Outdoor and Indoor Benefits: Versatile GardeningWhether in outdoor landscapes or potted for indoor display, the bunny ears cactus offers fantastic ornamental value. In gardens, they can serve as striking focal points, xeriscaping elements, or robust companions to other drought-tolerant plants. Indoors, they add unique character to room decor with their vibrant pads and striking blooms. The yellow blossoms that appear in spring and summer, coupled with the red-purple prickly pears that follow, provide seasonal interest in any setting.Creating a Welcoming Environment for WildlifeIn addition to their aesthetic value, bunny ears cacti attract pollinators such as bees and butterflies, making them a valuable asset in fostering ecological balance in your garden. Planting these alongside other native species can enhance your garden’s role in supporting local wildlife, promoting a healthy ecosystem.Conclusion: Embracing Whimsy in Your GardenIncorporating bunny ears cactus into your gardening projects is not only about enhancing beauty—it's about embracing the unique and nurturing a low-maintenance plant that requires little effort yet offers so much in return. Whether you’re designing a rock garden, looking for efficient landscaping ideas, or adding a touch of southwestern flair to your indoor plant collection, the bunny ears cactus is an excellent choice. Take time to understand its needs and you’ll be rewarded with a delightful and resilient companion for many years to come.

08.27.2025

Unlock the Secrets of Seed Saving for a Thriving Vegetable Garden

Update Revive Your Garden with Seed Saving Techniques As summer wanes and gardeners prepare to bid farewell to this year’s harvest, there’s no better opportunity to reflect on the bounty of your vegetable garden and ensure future seasons flourish. Saving seeds from your finest vegetables not only preserves your garden’s health but enhances it over time. Join the age-old practice as we explore three effective methods for seed-saving, destined to elevate your gardening skills and deepen your connection to your crops. The Incentives Behind Seed Saving While purchasing seeds may be easier financially, the advantages of saving your own seeds are significant. By opting for seeds from your strongest plants, you cultivate varieties that are uniquely adapted to your garden’s microclimate, enhancing resilience against local pests and diseases. Seed saving isn’t just economical; it connects you to your gardening heritage, enabling you to grow crops that reflect your personal history and values. Essential Supplies for Successful Seed Preservation Before embarking on your seed-saving journey, prepare by gathering essential supplies. You’ll need seed envelopes—typically available as free printables online—to store and label your seeds. A small pair of scissors, such as embroidery scissors, will help you collect pods, and a basket or paper bag is useful for transporting them to your workspace. When drying or fermenting seeds, essential items include paper towels and Mason jars. Organizing your tools beforehand boosts efficiency, ensuring a smooth saving process. Method 1: Allow Seeds to Mature in the Garden Some seeds thrive best when allowed to mature on the plant. This method emphasizes simplicity and aims to retain maximum vigor by harvesting seeds at their prime. To ensure proper harvesting, select a dry afternoon for collection. Among popular choices, lettuce and cabbage seeds can be saved effectively by placing a plastic bag over flowering plants, allowing seeds to drop naturally into the container—convenience at its finest! Method 2: The Art of Fermentation For particularly fruit-heavy plants, such as tomatoes or cucumbers, fermentation serves as an excellent seed-saving technique. This method not only cleans the seeds but helps prevent diseases. Start by scooping the seeds into a jar with water, cover, and let them ferment for a few days, stirring occasionally. This fermentation process separates the viable seeds from pulp and debris, creating a cleaner and healthier seed option for next year’s planting. Method 3: Scoop, Dry, and Store For thick-skinned fruits like pumpkins and peppers, simply scoop the seeds out, rinse off any remaining flesh, and lay them on a paper towel to dry. This method is straightforward and effective, making it a fantastic option for gardeners who prefer a hands-on approach to seed saving. Remember to keep the seeds in a cool, dry place during storage to maintain their viability. Frequently Asked Questions About Seed Saving As you delve deeper into seed saving, you may encounter questions about seed types, best practices, and viability. Remember, not all seeds can be saved, particularly hybrid varieties, which may not produce offspring identical to the parent plant. Research specific plants beforehand to maximize your success! Keeping a journal of your experiences helps refine techniques and track which methods yield the strongest seeds for your garden. Conclusion: Savor the Fruits of Your Labor As the gardening season comes to a close, embracing the art of seed saving not only paves the way for healthier garden produce but adds an enriching aspect to your gardening journey. You become a steward of tradition, cultivating seeds that carry your personal legacy forward, year after year. Dive into the season of reflection and preparation, equipped with new knowledge to empower your future gardening projects! Whether you're new to gardening or looking to hone your skills, consider connecting with local gardening clubs or online forums to share experiences and continue learning. Together, let’s cultivate a community rooted in sustainable practices and enriched by shared stories.

Terms of Service

Privacy Policy

Core Modal Title

Sorry, no results found

You Might Find These Articles Interesting

T
Please Check Your Email
We Will Be Following Up Shortly
*
*
*