Add Row
Add Element
cropper
update
Marin Home Ideas
update
Add Element
  • Home
  • Categories
    • Home Remodeling Ideas
    • Interior Design & Decor Ideas
    • Gardening & Landscaping Ideas
    • Outdoor Living & Entertaining
    • Health & Wellness at Home
    • DIY at Home
    • Kitchen Ideas
    • Bedroom Ideas
    • Bath Ideas
    • Cooking at Home
    • Home Office Ideas
    • Lighting Ideas
    • Furniture Ideas
    • Architecture Ideas
    • Senior Living at Home
    • Home Finance
    • Real Estate News
August 05.2025
3 Minutes Read

Mastering DIY Home Improvement: How to Install a Floor Transition Strip

Close-up DIY home improvement with caulking gun sealing floor.

The Importance of Choosing the Right Floor Transition Strip

When embarking on a home improvement journey, floor transition strips often go unnoticed until they pose an issue. The right transition strip is crucial not just for aesthetics, but for safety. Transition strips serve as vital connectors between different flooring types, ensuring smooth movement and reducing tripping hazards. If you're contemplating a DIY project that involves new flooring, it’s essential to choose the right profile to suit the specific needs of your space.

Understanding Different Types of Transition Strips

Floor transition strips come in various forms, primarily split into three categories: thresholds, T-moldings, and reducers. Thresholds are used in situations where flooring heights match, acting as a smooth bridge across doorways. T-moldings work well when flooring of the same height meets at different angles or materials. Finally, reducer moldings are specifically designed to handle variations in height, creating smooth ramps from higher floors to lower ones, which is especially critical in avoiding falls.

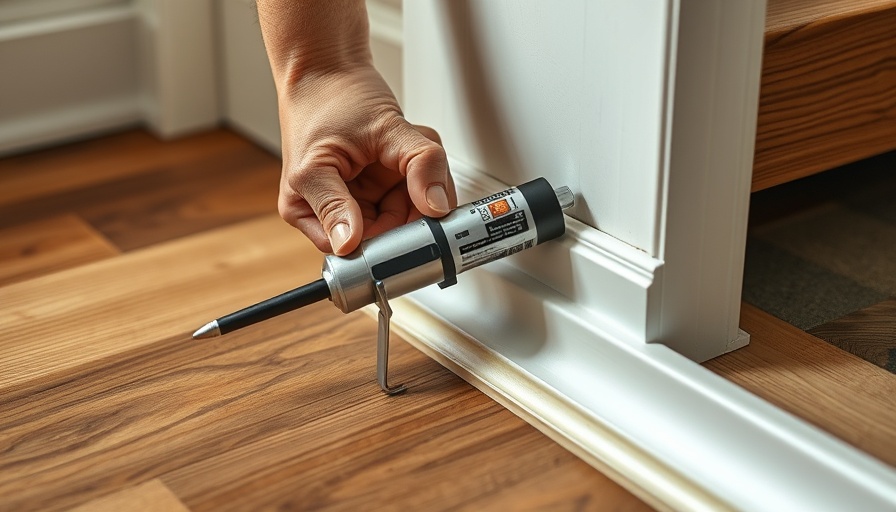
Step-by-Step Guide to Installing Your Transition Strip

Equipped with the right tools and a good understanding of your specific flooring needs, you can follow these steps to successfully install a transition strip:

  1. Choose Your Transition Strip: Consider the style and material that coordinates with your flooring. Options include wood, metal, and plastic.
  2. Measure for Accuracy: Use a measuring tape to determine the length needed for the transition. Precision is vital to avoid gaps or overlaps.
  3. Cut Accordingly: Once measured, proceed to cut the transition strip using a jigsaw or hand saw. Ensure a clean cut for optimal installation.
  4. Install with Care: Depending on your chosen type, use adhesive, nails, or other methods to secure the strip in place. Pay attention to alignment to maintain a neat finish.
  5. Finishing Touches: Once installed, check for any irregularities. A clean, blended transition enhances the look of your entire flooring project.

Benefits of Installing Floor Transition Strips

Not only do transition strips enhance the aesthetic appeal of your floors, but they also play a pivotal role in maintenance. By creating a seamless flow between different flooring types, they can prevent dust buildup and make cleaning easier. Choosing a strip that matches your flooring color can create a cohesive unit, while incorporating practical design aids safety.

DIY Home Improvement: Embracing Your Creativity

The beauty of home renovation lies in its DIY aspect. Taking on a project like installing a floor transition strip can inspire confidence and creativity. Whether you’re enhancing your living room or updating your office space, there are plenty of DIY home improvement projects that allow you to express personal style while also boosting the home's overall value.

Challenges and Solutions in DIY Flooring Projects

DIY projects can present unforeseen challenges, like instructions that feel ambiguous or the need for unexpected tools. For instance, if your flooring displays varying heights, you might feel at a loss. However, tools like oscillating multi-tools can offer the precision you need for a clean install. Additionally, many online resources provide community support and tutorials that can guide you through tricky tasks.

Future Insights: Trends in DIY Flooring Solutions

As DIY culture continues to evolve, so do the materials and methods available. The shift towards sustainable living advocates for using eco-friendly materials in home improvement projects. With an increase in awareness towards sustainable choices, homeowners are more inclined to opt for materials that are both stylish and ethically sourced. Keeping an eye on these trends can help inform your choices, ensuring your home's design remains current.

Starting your DIY journey with flooring transition strips opens a door to enhanced decor and functionality. Each step taken adds not just value to your home, but they also enrich your experience in improving your living space. Don’t hesitate to take that leap into home improvement—your dream space awaits!

DIY at Home

0 Views

0 Comments

Write A Comment

*
*
Related Posts All Posts
08.05.2025

Avoid Costly Repairs: Identify Common Roof Problems Early

Update Spot the Warning Signs Early Your roof is more than just a protective cover; it shields your home and everything within it. It’s crucial to keep a lookout for warning signs of damage before they escalate into costly repairs. From the ground, you can often spot issues such as curling shingles, visible wear around vents, or even sagging areas that might indicate structural damage. Establishing a regular inspection schedule—whether DIY or professional—can save you from unexpected problems down the line. And remember: the earlier you catch a leak, the easier it is to fix! Common Causes of Roof Leaks Understanding where leaks commonly occur can help homeowners address issues proactively. Roof penetrations are often the culprits. This includes anything that might pierce your roof’s surface such as chimneys, plumbing stacks, or vents. Even small imperfections can lead to significant leaks if not addressed. For instance, if you spot stains in your attic or ceiling, it's worth investigating the roof above that area. Real-Life Solutions for Small Leaks For small leaks, pinpointing the source may require some detective work. If you notice water stains but don’t see a clear entry point, inspect around roof penetrations, or beneath nail heads in attic ceilings, which can form condensation leading to leaks. Conducting an attic inspection during a cold night can help spot frost on nails, indicating a potential leak site. A simple solution might be to remove these 'shiners' that create condensation and introduce moisture. Replacing Roof Vents: A DIY Guide Roof vents are essential for maintaining attic air quality, but they can also be weak points in the roofing system. If you discover cracks in plastic housings or broken seams in metal vents, replacing them is the best long-term solution. Attempting to repair them with caulk might provide a temporary fix but will inevitably fail, leading to further issues. Investing in quality rubber-washer screws can prevent future problems and ensure a tight seal. Importance of Regular Maintenance Taking a proactive approach with monthly checks can help you maintain your roof's integrity. Consider seasonal maintenance tips—clearing debris after storms, checking for animal infestations, and ensuring branches don’t scratch the roof surface. Regular maintenance not only extends the life of your roof but also enhances your home’s overall aesthetic. A well-kept roof can significantly boost curb appeal and increase property value. Future Trends in Roofing As climate change accelerates, roofing technologies are evolving. Innovative materials such as reflective shingles can reduce energy costs, while green roofing options—alive with vegetation—are gaining popularity for their environmental benefits and aesthetic appeal. Homeowners should consider these options during their next roof renovation or replacement for a more sustainable solution. Final Thoughts: Empowering Homeowners Understanding your roof’s needs empowers you to maintain it effectively and proactively. The information discussed helps you stay vigilant about potential issues, offers practical solutions for maintenance, and encourages regular inspections. Remember, whether you are looking into DIY home repairs or simply wanting to enhance your property, a well-maintained roof contributes significantly to a healthy home.

08.05.2025

Maximize Your Home Inspection Experience With These Essential Tips

Update The Importance of Home Inspections in the Buying Process As many homebuyers know, a home inspection is a critical step before making one of the biggest purchases of their lives. This thorough examination provides a report on the property’s current conditions, allowing potential buyers to make informed decisions and avoid unexpected expenses later on. The worth of investing in a professional home inspection cannot be watered down, as it serves as a safety net against costly repairs that might arise post-purchase. Show Up: Be Present for Your Inspection One crucial tip for buyers is to be actively present during the home inspection. Being there provides an opportunity to ask questions and share any concerns about specific issues that you have noticed about the home. While your inspector has the expertise, your observations can guide their examination, ensuring that no potential red flags slip through the cracks. This collaborative approach can provide invaluable insights into your home’s current state and functioning. Choosing the Right Inspector: Trust Matters Trusting your home inspector is paramount. While your realtor may suggest inspectors, doing your own research will lead to peace of mind. Finding unbiased, third-party experts can provide objective insights into your potential home’s condition. Websites like homeinspector.org and nachi.org are valuable resources in locating certified home inspectors. Sometimes, spending a little more on a qualified inspector can save you from significant future expenses. Don’t Hesitate to Ask Questions The inspection is the perfect time to clear up any uncertainties. If your inspector mentions something you don’t fully understand, ask for clarification. Your inquiries will help you grasp the overall condition of the home, from structural integrity to potential repairs needed. Knowledge truly is power in these scenarios. Visual Evidence: The Importance of Getting Pictures Request your inspector to take photographs during the inspection, especially of hard-to-reach places such as the attic, crawl spaces, or roofs. This visual documentation serves as vital proof of any concerns and ensures you grasp the severity of potential issues. In today’s digital landscape, many inspectors use infrared cameras that can reveal hidden problems behind walls or floors that would otherwise remain undetected. Focusing on Key Areas: What to Look Out For While inspectors cover a wide scope during assessments, as a buyer, it’s essential to have knowledge of which areas frequently reveal costs down the line. Pay special attention to major systems of the house—like electrical, plumbing, and roofing systems—as issues here can lead to more significant expenditures. Additionally, learning about the inspection process further empowers you to be proactive in maintaining your new home. Post-Inspection: Next Steps Once the inspection concludes, you will receive a detailed report outlining your future home’s condition. This document helps you leverage your negotiating power if there are significant problems identified. Remember, it’s your right to discuss these issues with the seller, potentially requesting repairs before closing or negotiating the price accordingly. A detailed action plan based on the report can serve as both an overview of immediate needs and long-term maintenance goals. Creating Your Dream Home: A DIY Approach After navigating the inspection process successfully, many buyers are excited to dive into DIY home projects that make their new space feel tailored to their needs. Engaging in DIY home decor, improvement, and organization projects not only amplifies the home's aesthetics but also brings personal joy and fulfillment. Whether it’s a full-scale DIY home renovation on a budget or simple DIY home decor ideas, these activities unleash creativity while ensuring that the new house truly feels like home. Conclusion: Empower Your Home Buying Journey Through understanding and actively participating in your home inspection, you set the stage for ownership that is worry-free and rewarding. By remaining engaged, asking the right questions, and focusing on critical areas, you can ease potential concerns about your new home. So whether it’s executing DIY home projects post-inspection or fostering a culture of care for your new space, initiating your new life adventures in a well-informed way ensures you can enjoy each moment to the fullest.

08.05.2025

Transform Your Kitchen with Budget-Friendly Stylish Upgrades

Update Turn Your Kitchen into a Chic Space with Simple Upgrades Are you dreaming of a stylish kitchen without breaking the bank? Fortunately, transforming your kitchen can be both budget-friendly and enjoyable. With a few smart DIY home decor ideas and organization hacks, you can elevate the look of your kitchen quickly and easily. 1. Brighten Up with New Light Fixtures Replacing those outdated light fixtures is an effortless way to freshen up your kitchen. Older fluorescent lights can cast an unflattering glare, but with modern options like pendant or LED lighting, you’ll not only improve the ambiance but also reduce energy costs. Explore different styles that suit your aesthetic; whether you're into rustic vintage or sleek modern looks, there's a fixture that’s just right for you. Lighting can make your space feel larger and more inviting! 2. Refresh Cabinet Hardware for a New Look Changing cabinet handles and drawer knobs may seem trivial, but the impact is significant. Opt for sleek, modern designs or vintage-inspired pieces to match the theme of your kitchen. This simple DIY home improvement project can often be completed in an afternoon and can breathe fresh life into tired-looking cabinets. Plus, many stylish options are quite affordable! 3. Embrace Peel-and-Stick Backsplash Tiles Elevate your kitchen’s style with peel-and-stick backsplash tiles. These easy-to-apply tiles offer an elegant appearance without requiring the substantial effort of traditional backsplash installations. Perfect for DIY home renovations on a budget, simply peel off the backing and stick them on! They can be applied over existing tiles or bare walls, making this project accessible for anyone eager to enhance their space. 4. Upgrade to Gorgeous Wood Countertops If you’re ready to invest a little more, consider switching to wood countertops for that warm, inviting feel. Butcher-block style options are especially popular; they not only look great but are functional for food preparation as well. Compared to laminate or even stone, wood countertops are surprisingly easy to maintain. They can be sanded down and refinished to look new, making them a smart investment for kitchens that see a lot of action. 5. Add Character with Molding Incorporate moldings to add character and elegance to your kitchen. Molding can create visual interest and even help transition from different areas of your home. This is an excellent DIY home project that can be tackled over a weekend, with a variety of styles from contemporary to traditional available at hardware stores. Just a little trim can make a big difference! Why These Upgrades Matter Your kitchen is not just a cooking space; it's where gatherings happen, and memories are made. Making stylish upgrades not only improves your kitchen aesthetically but enhances functionality and can increase your home's value. Don't underestimate the power of simple DIY home improvement projects to transform your living environment into one that inspires joy and comfort. Exploring these upgrades allows you to express your personal style and create a space that's as functional as it is beautiful. So grab your tools, get creative, and start your kitchen transformation today!

Terms of Service

Privacy Policy

Core Modal Title

Sorry, no results found

You Might Find These Articles Interesting

T
Please Check Your Email
We Will Be Following Up Shortly
*
*
*