 Add Row
  Add
Add 


Unlock the Beauty of Your Home: A Step-by-Step Guide to Refinishing Hardwood Floors
There's something undeniably enchanting about hardwood floors. They add character, warmth, and charm to any space. If your home boasts original hardwood flooring, you may be wondering how to breathe new life into it. Luckily, with some dedication and the right technique, you can refinish your hardwood floors effectively without replacing them. Today, we’ll delve into a comprehensive guide on this rewarding DIY project that enhances your home’s aesthetic and value.
In 'How to Refinish Hardwood Floors', the discussion dives into practical steps to restore original hardwood, exploring key insights that sparked deeper analysis on our end.
Understanding the Differences: Solid vs. Engineered Hardwood Flooring
Before you get started on refinishing your floors, it's crucial to know what type of hardwood flooring you have. Solid hardwood is a single solid piece of wood; it’s sturdy and ideal for refinishing. On the other hand, engineered hardwood consists of a thin layer of real wood over a composite base. It's more delicate, generally making it unsuitable for DIY refinishing.
If your home features engineered wood, consider contacting a professional for restoration. However, if you’re equipped with solid hardwood, you're in the clear to transform your space yourself!
Preparation: Setting the Stage for Success
Preparation is key to a successful refinishing project. Start by removing all furniture from the room and covering any vents or fixtures to protect against the inevitable dust. This not only helps keep your workspace organized but also enhances your results by reducing the chances of debris getting trapped in your finish.
Next, check the integrity of your floorboards. Secure any loose boards with small nails and ensure that nail heads are not protruding. This extra attention to detail will promote better sanding and finishing.
The Sanding Process: The Heart of Refinishing
Now, let's get to the exciting part—sanding! Renting an orbital floor sander from your local hardware store (like Lowe’s) can make this process much easier. Begin with 40-grit sandpaper, working along the grain of the wood to achieve a smooth finish. Remember to slightly overlap your sanding passes for even results.
Once the initial sanding is complete, vacuum the area to eliminate dust before moving on to a finer sanding with 60-grit, and finishing with 100-grit paper. Each pass reduces scratches, preparing your floor for staining.
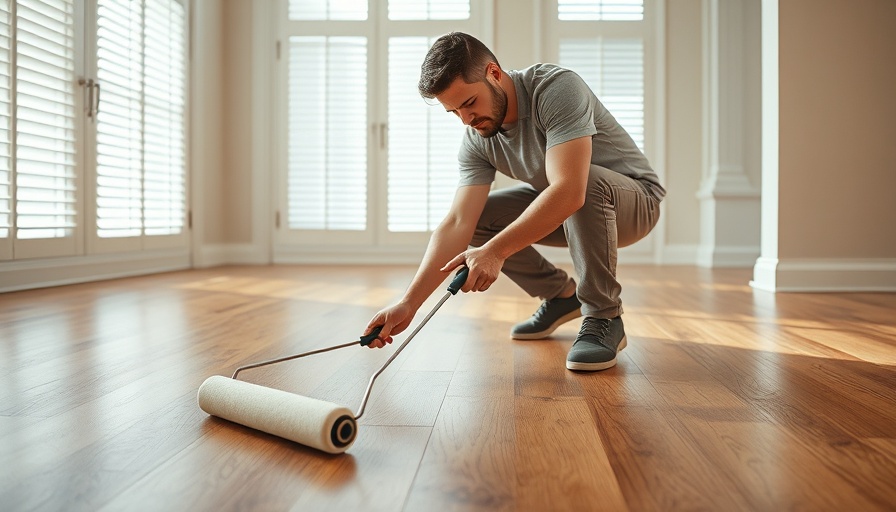
Time for Staining: Adding Color and Depth
After sanding, it’s time to stain your newly prepared floors. Applying a pre-stain conditioner can help achieve an even finish. Choose a stain color that reflects your style; for a natural look, options like 'Simply White' can light up your space beautifully. Utilize a brush for tight areas and a roller for larger sections to maintain efficiency.
Once you’ve stained the floors, wipe away any excess and allow the stain to dry properly. Don’t be alarmed if it appears darker upon application; it will lighten as it cures.
The Final Touch: Sealing Your Work with Polyurethane
The completion of your project comes with the application of a polyurethane finish. This step not only enhances the visual appeal but also protects your floor from scratches and damage. Use a high-quality applicator to ensure an even coat; multiple applications may be beneficial for optimal durability.
After your final coat dries, step back and admire your handiwork! It’s amazing to witness how much of a difference refinishing can make.
Cost-Effective Benefits of Refinishing Hardwood Floors
If you're considering a home renovation or remodel, refinishing your hardwood floors is an excellent way to enhance your home’s value without breaking the bank. While purchasing new flooring can be expensive and labor-intensive, refinishing allows you to boost your floor's appeal at a fraction of the cost.
Homeowners often underestimate the impact of their flooring on overall aesthetic; refinishing could be the unique touch that transforms your space. Plus, refreshing wooden floors can impress potential buyers, making your home more attractive and competitive on the market.
DIY vs. Hiring a Professional: Making the Right Choice
While refinishing hardwood floors can be a fulfilling DIY project, consider your skill level and the condition of your floors before proceeding alone. If you feel uncertain or your floors require extensive repairs, don’t hesitate to seek advice or hire a professional contractor. Sometimes investing in professional services could save you money in the long run by preventing costly mistakes.
Whether you choose the DIY route or hire help, being informed about the refinishing process will empower you to make choices that best suit your needs.
Conclusion: Your Home Deserves the Best
Refinishing hardwood floors can be a fulfilling project that enhances not only the beauty of your space but also its value. As you prepare and embark on this journey, remember that the steps you take today contribute to the comfort and aesthetics of your home for years to come. So roll up your sleeves, prepare your tools, and get ready to transform your floors!
For more insights into home remodeling and improvement tips, connect with us and explore ideas ranging from kitchen and bathroom remodels to complete home renovations. Your dream home is just a project away!


Write A Comment