Add Row
Add Element
cropper
update
Marin Home Ideas
update
Add Element
  • Home
  • Categories
    • Home Remodeling Ideas
    • Interior Design & Decor Ideas
    • Gardening & Landscaping Ideas
    • Outdoor Living & Entertaining
    • Health & Wellness at Home
    • DIY at Home
    • Kitchen Ideas
    • Bedroom Ideas
    • Bath Ideas
    • Cooking at Home
    • Home Office Ideas
    • Lighting Ideas
    • Furniture Ideas
    • Architecture Ideas
    • Senior Living at Home
    • Home Finance
    • Real Estate News
June 29.2025
3 Minutes Read

Unlock the Joy of Building a Dollhouse: A 12-Hour DIY Adventure

Building a dollhouse in a workshop setting as a DIY project.

The Art of Building a Dollhouse in Just One Day

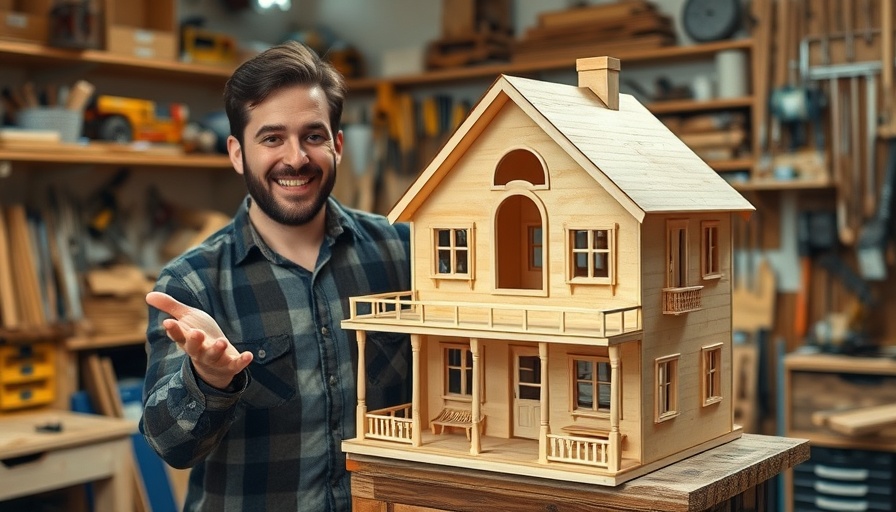
In a stunning display of creativity and craftsmanship, hosts Adam and Juliet take on the incredible challenge of constructing a dollhouse from scratch in just twelve hours. This DIY adventure is not only entertaining but also serves as a reminder of the joy that comes from hands-on projects, fostering connections between generations. The thrill of building brings a sense of accomplishment while sparking imagination in both the creators and future generations playing with the finished product.

In '12 Hour DIY Challenge: Building A Doll House!', Adam and Juliet embark on an ambitious quest to create a dollhouse, igniting deeper reflections about creativity and family bonding.

Understanding the Inspirations Behind DIY Projects

DIY projects like Juliet and Adam's dollhouse are more than mere building exercises; they are a reflection of personal creativity, family values, and memories waiting to be made. The design features mid-century aesthetics that appeal to contemporary tastes, proving that classic styles can be timelessly relevant. Every piece designed and crafted holds a story, carrying the essence of the individual's or family's personality, thereby enhancing its value beyond mere material.

A Mid-Century Marvel: Crafting with Intention

From the moment the first sheet of ply was cut, each decision made during the building process was intentional, leading to a unique dwelling that embodies both function and style. The dollhouse showcases features like an open-plan layout, ensuring spaciousness while offering the ability to furnish it with unique accessories. This thoughtful approach to design reflects current household trends where multifunctional spaces and aesthetic appeal meet functionality.

Lessons in Creativity: Overcoming Challenges

Building a dollhouse is not without its share of challenges, much like any creative endeavor. Adam and Juliet's journey exemplifies problem-solving at its best, emphasizing the importance of adapting strategies as unexpected situations arise. Whether it’s determining how to fit together quirky angles or organizing how to apply finishes, their process teaches valuable lessons about perseverance and ingenuity that are applicable in daily life and work.

The Importance of Family Involvement in DIY Projects

The hands-on nature of building a dollhouse invites involvement from family members, making it a collaborative effort that breeds closeness. As children like Jack and Jill play and interact with the finished results, they benefit from creative thinking and teamwork skills. Such bonding experiences create lasting memories and can even ignite a passion for DIY projects that extends into adulthood, nurturing a future generation that values creativity and craftsmanship.

Adding the Finishing Touch: Decor and Aesthetics

No home is complete without a touch of personality. In the case of the dollhouse, this involved meticulous styling, where every detail counts—from the choice of rug textures to the placement of furniture. By engaging in decor, families not only enhance their designs but also learn the art of curating spaces that resonate personally. This aspect of the project encourages participants to consider color theory, spatial arrangements, and thematic consistency.

Culinary Creativity: The Perfect Picnic to Complement the DIY Spirit

Just when the excitement of crafting a dollhouse peaks, Adam delivers gourmet ideas for a spring picnic that align perfectly with the vibe of creativity. These simple yet sophisticated recipes, like the sticky fingers chicken sandwich, exemplify how passion extends beyond crafting into cooking, encouraging families to share time together in various creative outlets. This holistic approach to creativity intertwines the essence of DIY with food, encouraging a more inclusive experience.

Building for the Future: The Case for Creativity in Homes

The results of Adam and Juliet's ambitious project remind us that the art of building—and crafting—extends beyond just physical structures. By fostering creativity, families can strengthen ties and create unique spaces that serve as symbols of love and tradition. As trends shift towards personalization and self-expression, these DIY endeavors inspire families to explore their creative potential and imbue their homes with character.

Ultimately, whether you’re scaling the heights of DIY projects or enjoying a perfect picnic, the essence remains the same: enrich your life through creativity, connection, and love. So gather your tools and your loved ones, and let your imagination guide your next project!

Gardening & Landscaping Ideas

2 Views

0 Comments

Write A Comment

*
*
Related Posts All Posts
08.28.2025

How to Transform Your Side Yard with Budget-Friendly Gardening Ideas

Update Transform Your Side Yard: A Weekend DIY Makeover With a little creativity and ingenuity, giving your outdoor space a fresh take doesn’t always mean a lengthy, costly project. In the recent video titled "Simple Side Yard Makeover On A Budget," Jason and Danny demonstrate that even the smallest of spaces can be transformed into a vibrant and functional area, all within a single weekend. This invigorating approach to home improvement encourages everyone, regardless of skill level, to roll up their sleeves and get started on those outdoor projects that often languish on our to-do lists.In this article, we explore the insights shared in the video 'Simple Side Yard Makeover On A Budget,' highlighting the doable DIY approaches that encourage anyone to revamp their outdoor space. Gardening Without the Grit: You Don’t Need to Dig In their approach, one underlying principle shines: gardening doesn’t always require digging. Instead, they focus on smart means of reconfiguring the existing landscape. Removing overgrown Morayas, they not only opened up the area but also invited light—an essential ingredient for any garden. Their techniques resonate with sustainable gardening practices focusing on usability and joy rather than just aesthetic allure. The Art of Mulching: Low-Cost and High Style After clearing out the invasive plants, Jason and Danny opt to mulch the ground with river pebbles—an affordable choice that boosts curb appeal while serving practical purposes. Mulching is essential for moisture retention and weed control, creating a favorable environment for potted plants. By using materials that are inexpensive yet attractive, they showcase how simple gardening can yield stunning results without breaking the bank. Container Gardening: More Than Just a Fad In addition to mulching, they beautifully illustrate the concept of container gardening. With a carefully curated selection of pots, including some vibrant painted options, the duo emphasizes that plants can express a personalized flair, even in a confined space. Container gardening offers flexibility, enabling quick adjustments if a particular plant doesn’t flourish in its initial spot. This method not only maximizes available space but also allows for the incorporation of seasonal varieties, leading to a dynamic outdoor space throughout the year. Your Plants Matter: Choosing Wisely One of the takeaways from this makeover is the importance of selecting the right plants. Understanding the growth habits of different species plays a crucial role in long-term success. In the video, the introduction of magnolia teddy bear plants highlights how a well-thought-out plant choice can enhance the space's natural beauty and create a sense of enclosure that complements the side yard’s design. Practical Tips for Your Own Makeover This type of gardening is not a one-size-fits-all approach; rather, it encourages exploration and experimentation. Here are some practical tips for incorporating what Jason and Danny so effectively demonstrated: Plan Your Layout: Visualize where your pots, pebbles, and plants will go before getting started. Layout planning saves time and resources. Utilize Vertical Space: Think about adding vertical gardening elements, like wall planters or climbing vines, to take advantage of limited space. Choose Perennials: Rather than constantly replacing annuals, consider planting perennials that create a lasting garden presence. Experiment with Color: Don’t hesitate to bring bold colors into your garden designs with painted pots or brightly colored plants. Stay Sustainable: Use recycled materials where possible and consider organic gardening practices to enhance your garden's health. Final Thoughts: Get Inspired and Get Gardening! As we reflect on Jason and Danny's engaging side yard transformation, it's clear that this is not just about reorganizing plants but about creating a sanctuary where people can connect with nature in their own homes. Whether you’re planting flowers, establishing a vegetable garden, or nurturing a butterfly garden, the important thing is to begin. So, grab your gardening tools, express your creativity, and step into the gratifying world of gardening! Finding inspiration from a simple side yard makeover can spark new ideas for your outdoor space. Challenge yourself to tackle that garden project you’ve been putting off, and witness the joy that a personalized backyard can bring.

08.27.2025

Discover the Secrets to Growing a Stunning Bunny Ears Cactus

Update Becoming Familiar with the Bunny Ears Cactus: A Unique Addition to Your GardenThe bunny ears cactus, or Opuntia microdasys, is not just your ordinary cactus. Native to the arid landscapes of northern Mexico and extending into Arizona, this charming plant is known for its distinctive flat, oval pads resembling the ears of a bunny. Its playful appearance, adorned with fuzzy polka dots, instantly brings a whimsical touch to any garden or indoor space. But while it’s a delightful sight, it’s important to recognize that the 'fuzziness' comes from glochids—tiny but sharp spines that can irritate the skin when touched.Understanding its Growing Needs: Light and Soil PreferencesTo cultivate a thriving bunny ears cactus, understanding its essential needs is pivotal. This cactus thrives in USDA Hardiness Zones 9 to 12, flourishing in full sun. If you live in a cooler climate, consider nurturing it indoors where the light is bright. The soil must be loose, rocky, and well-draining to imitate its natural dry habitat. A slightly acidic to neutral pH, around 6.0 to 7.5, is ideal for optimal growth. This attention to detail ensures that your cactus can grow densely and robustly, enhancing its shrub-like appearance over time.Maintenance: Keeping Your Cactus HealthyYour bunny ears cactus requires minimal maintenance, making it a perfect choice for novice gardeners. Watering should be conservative, only when the soil dries out completely, as cacti are adapted to survive long periods without moisture. It’s essential to watch out for pests common to succulents, such as aphids and scale; however, proper care minimizes these risks. Occasional fertilization during the growing season will promote healthy growth and vibrant blooms.Propagation: Expanding Your CollectionOne of the joys of gardening is propagating plants to expand your collection. Propagating bunny ears cacti is relatively simple. Use clean, sharp tools to cut a paddle from the main plant, allowing it to callus for a few days. Once callused, plant it in a well-draining mix and water lightly. With the right conditions, you’ll see new roots forming in a matter of weeks.Outdoor and Indoor Benefits: Versatile GardeningWhether in outdoor landscapes or potted for indoor display, the bunny ears cactus offers fantastic ornamental value. In gardens, they can serve as striking focal points, xeriscaping elements, or robust companions to other drought-tolerant plants. Indoors, they add unique character to room decor with their vibrant pads and striking blooms. The yellow blossoms that appear in spring and summer, coupled with the red-purple prickly pears that follow, provide seasonal interest in any setting.Creating a Welcoming Environment for WildlifeIn addition to their aesthetic value, bunny ears cacti attract pollinators such as bees and butterflies, making them a valuable asset in fostering ecological balance in your garden. Planting these alongside other native species can enhance your garden’s role in supporting local wildlife, promoting a healthy ecosystem.Conclusion: Embracing Whimsy in Your GardenIncorporating bunny ears cactus into your gardening projects is not only about enhancing beauty—it's about embracing the unique and nurturing a low-maintenance plant that requires little effort yet offers so much in return. Whether you’re designing a rock garden, looking for efficient landscaping ideas, or adding a touch of southwestern flair to your indoor plant collection, the bunny ears cactus is an excellent choice. Take time to understand its needs and you’ll be rewarded with a delightful and resilient companion for many years to come.

08.27.2025

Unlock the Secrets of Seed Saving for a Thriving Vegetable Garden

Update Revive Your Garden with Seed Saving Techniques As summer wanes and gardeners prepare to bid farewell to this year’s harvest, there’s no better opportunity to reflect on the bounty of your vegetable garden and ensure future seasons flourish. Saving seeds from your finest vegetables not only preserves your garden’s health but enhances it over time. Join the age-old practice as we explore three effective methods for seed-saving, destined to elevate your gardening skills and deepen your connection to your crops. The Incentives Behind Seed Saving While purchasing seeds may be easier financially, the advantages of saving your own seeds are significant. By opting for seeds from your strongest plants, you cultivate varieties that are uniquely adapted to your garden’s microclimate, enhancing resilience against local pests and diseases. Seed saving isn’t just economical; it connects you to your gardening heritage, enabling you to grow crops that reflect your personal history and values. Essential Supplies for Successful Seed Preservation Before embarking on your seed-saving journey, prepare by gathering essential supplies. You’ll need seed envelopes—typically available as free printables online—to store and label your seeds. A small pair of scissors, such as embroidery scissors, will help you collect pods, and a basket or paper bag is useful for transporting them to your workspace. When drying or fermenting seeds, essential items include paper towels and Mason jars. Organizing your tools beforehand boosts efficiency, ensuring a smooth saving process. Method 1: Allow Seeds to Mature in the Garden Some seeds thrive best when allowed to mature on the plant. This method emphasizes simplicity and aims to retain maximum vigor by harvesting seeds at their prime. To ensure proper harvesting, select a dry afternoon for collection. Among popular choices, lettuce and cabbage seeds can be saved effectively by placing a plastic bag over flowering plants, allowing seeds to drop naturally into the container—convenience at its finest! Method 2: The Art of Fermentation For particularly fruit-heavy plants, such as tomatoes or cucumbers, fermentation serves as an excellent seed-saving technique. This method not only cleans the seeds but helps prevent diseases. Start by scooping the seeds into a jar with water, cover, and let them ferment for a few days, stirring occasionally. This fermentation process separates the viable seeds from pulp and debris, creating a cleaner and healthier seed option for next year’s planting. Method 3: Scoop, Dry, and Store For thick-skinned fruits like pumpkins and peppers, simply scoop the seeds out, rinse off any remaining flesh, and lay them on a paper towel to dry. This method is straightforward and effective, making it a fantastic option for gardeners who prefer a hands-on approach to seed saving. Remember to keep the seeds in a cool, dry place during storage to maintain their viability. Frequently Asked Questions About Seed Saving As you delve deeper into seed saving, you may encounter questions about seed types, best practices, and viability. Remember, not all seeds can be saved, particularly hybrid varieties, which may not produce offspring identical to the parent plant. Research specific plants beforehand to maximize your success! Keeping a journal of your experiences helps refine techniques and track which methods yield the strongest seeds for your garden. Conclusion: Savor the Fruits of Your Labor As the gardening season comes to a close, embracing the art of seed saving not only paves the way for healthier garden produce but adds an enriching aspect to your gardening journey. You become a steward of tradition, cultivating seeds that carry your personal legacy forward, year after year. Dive into the season of reflection and preparation, equipped with new knowledge to empower your future gardening projects! Whether you're new to gardening or looking to hone your skills, consider connecting with local gardening clubs or online forums to share experiences and continue learning. Together, let’s cultivate a community rooted in sustainable practices and enriched by shared stories.

Terms of Service

Privacy Policy

Core Modal Title

Sorry, no results found

You Might Find These Articles Interesting

T
Please Check Your Email
We Will Be Following Up Shortly
*
*
*