Add Row
Add Element
cropper
update
Marin Home Ideas
update
Add Element
  • Home
  • Categories
    • Home Remodeling Ideas
    • Interior Design & Decor Ideas
    • Gardening & Landscaping Ideas
    • Outdoor Living & Entertaining
    • Health & Wellness at Home
    • DIY at Home
    • Kitchen Ideas
    • Bedroom Ideas
    • Bath Ideas
    • Cooking at Home
    • Home Office Ideas
    • Lighting Ideas
    • Furniture Ideas
    • Architecture Ideas
    • Senior Living at Home
    • Home Finance
    • Real Estate News
May 21.2025
3 Minutes Read

Unlock the Secrets to Growing Ranunculus as Cut Flowers!

Freshly picked vibrant pink ranunculus flowers in soft natural light.

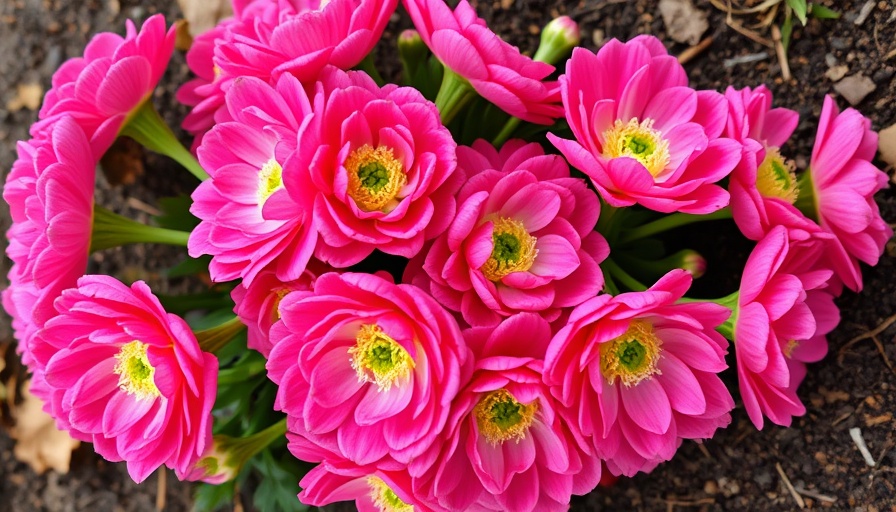
Spring Awaits: Why Ranunculus is a Must-Have Cut Flower

After the last frost, as spring breathes life back into our gardens, ranunculus flowers emerge as one of nature's exquisite gifts. With a visual allure reminiscent of peonies and roses, these blooms are some of the most sought-after cut flowers for floral arrangements—especially for weddings and special occasions. Understanding how to properly grow ranunculus can transform your garden into a blooming spectacle, ensuring that these lovely flowers beds are not just a fleeting beauty.

In this article, we’ll discuss essential gardening tips for growing ranunculus, including pre-sprouting techniques, planting advice, and best practices for harvesting these enchanting flowers for your bouquets.

Pre-Sprouting: An Essential Step for Success

Every successful gardening journey begins with preparation. For ranunculus, the first step is ensuring that the corms—often resembling shriveled calamari—are revitalized before planting. Soaking corms in water for 3-4 hours helps them rehydrate, making them more viable for growth. Post-soaking, you have two choices: you can plant them directly into your garden or go for the extra step of pre-sprouting in a seed tray.

Pre-sprouting offers numerous benefits. By nurturing the corms indoors in a controlled environment, you mitigate risks such as transplant shock and temperature fluctuations. This technique enables your ranunculus to bloom slightly sooner, making it a worthwhile investment for any gardener seeking abundant blooms.

Timing: The Right Moment for Planting

Timing is crucial in gardening, and ranunculus is no exception. Depending on your climate zone, you may choose to plant either in the fall or in late winter/early spring. For those in milder zones (generally zone 7 and above), planting in the fall can yield lovely results, albeit with precautionary measures against colder temperatures.

The rule of thumb suggests that once the corms are soaked, they take about 90 days to transition into blooming flowers. To maximize your blooms, plan your planting date backward based on your expected bloom time—think of it as creating a blooming schedule tailor-made for your garden!

Care and Maintenance: Nurturing Your Ranunculus

To grow robust ranunculus flowers, proper care is essential. These beauties prefer well-drained soil enriched with organic materials. Monitoring soil moisture is crucial; they need consistent watering but are sensitive to over-saturation. As spring unfolds, ensure that your garden provides adequate sunlight without letting harsh midday rays scorch the tender foliage.

To further enhance the growth of your ranunculus, consider implementing a regular fertilization regime using organic pesticides or fungicides as needed. With thoughtful care, your ranunculus flowers can thrive, providing a bounty of stunning blooms.

Harvesting for Maximum Bloom Time

Once your ranunculus flowers reach a vibrant maturity, harvesting should be done with care to ensure maximum longevity. The best time to harvest is just after the blooms have opened partially. Cut the stems at an angle to allow for better hydration once they reach the vase. Always remember to keep your cut stems in a cool place until arranged to ensure freshness.

Saving and Storing Corms for Future Seasons

Once your blooms have faded, don’t discard your corms! With proper care, you can store them for the next growing season. After allowing the corms to dry out completely, store them in a cool, dry, and dark location. This simple practice not only conserves the beauty of your previous blooms but promotes a sustainable gardening practice.

Conclusion: Cultivating Beauty and Community

Growing ranunculus transcends beyond mere gardening; it fosters community, contributes to local biodiversity, and enriches our surroundings with beauty and fragrance. Each bloom tells a story of hard work and passion, and as you begin—or continue—your own gardening journey, let the spirit of ranunculus serve as a reminder of what can emerge from even the smallest seed of effort.

As you venture into growing ranunculus or any other blossoms this spring, remember that every plant nurtured is a step toward connecting with nature and your community. Embrace this gardening season with enthusiasm, and let your flower garden bloom brilliantly.

Gardening & Landscaping Ideas

0 Views

0 Comments

Write A Comment

*
*
Related Posts All Posts
08.28.2025

How to Transform Your Side Yard with Budget-Friendly Gardening Ideas

Update Transform Your Side Yard: A Weekend DIY Makeover With a little creativity and ingenuity, giving your outdoor space a fresh take doesn’t always mean a lengthy, costly project. In the recent video titled "Simple Side Yard Makeover On A Budget," Jason and Danny demonstrate that even the smallest of spaces can be transformed into a vibrant and functional area, all within a single weekend. This invigorating approach to home improvement encourages everyone, regardless of skill level, to roll up their sleeves and get started on those outdoor projects that often languish on our to-do lists.In this article, we explore the insights shared in the video 'Simple Side Yard Makeover On A Budget,' highlighting the doable DIY approaches that encourage anyone to revamp their outdoor space. Gardening Without the Grit: You Don’t Need to Dig In their approach, one underlying principle shines: gardening doesn’t always require digging. Instead, they focus on smart means of reconfiguring the existing landscape. Removing overgrown Morayas, they not only opened up the area but also invited light—an essential ingredient for any garden. Their techniques resonate with sustainable gardening practices focusing on usability and joy rather than just aesthetic allure. The Art of Mulching: Low-Cost and High Style After clearing out the invasive plants, Jason and Danny opt to mulch the ground with river pebbles—an affordable choice that boosts curb appeal while serving practical purposes. Mulching is essential for moisture retention and weed control, creating a favorable environment for potted plants. By using materials that are inexpensive yet attractive, they showcase how simple gardening can yield stunning results without breaking the bank. Container Gardening: More Than Just a Fad In addition to mulching, they beautifully illustrate the concept of container gardening. With a carefully curated selection of pots, including some vibrant painted options, the duo emphasizes that plants can express a personalized flair, even in a confined space. Container gardening offers flexibility, enabling quick adjustments if a particular plant doesn’t flourish in its initial spot. This method not only maximizes available space but also allows for the incorporation of seasonal varieties, leading to a dynamic outdoor space throughout the year. Your Plants Matter: Choosing Wisely One of the takeaways from this makeover is the importance of selecting the right plants. Understanding the growth habits of different species plays a crucial role in long-term success. In the video, the introduction of magnolia teddy bear plants highlights how a well-thought-out plant choice can enhance the space's natural beauty and create a sense of enclosure that complements the side yard’s design. Practical Tips for Your Own Makeover This type of gardening is not a one-size-fits-all approach; rather, it encourages exploration and experimentation. Here are some practical tips for incorporating what Jason and Danny so effectively demonstrated: Plan Your Layout: Visualize where your pots, pebbles, and plants will go before getting started. Layout planning saves time and resources. Utilize Vertical Space: Think about adding vertical gardening elements, like wall planters or climbing vines, to take advantage of limited space. Choose Perennials: Rather than constantly replacing annuals, consider planting perennials that create a lasting garden presence. Experiment with Color: Don’t hesitate to bring bold colors into your garden designs with painted pots or brightly colored plants. Stay Sustainable: Use recycled materials where possible and consider organic gardening practices to enhance your garden's health. Final Thoughts: Get Inspired and Get Gardening! As we reflect on Jason and Danny's engaging side yard transformation, it's clear that this is not just about reorganizing plants but about creating a sanctuary where people can connect with nature in their own homes. Whether you’re planting flowers, establishing a vegetable garden, or nurturing a butterfly garden, the important thing is to begin. So, grab your gardening tools, express your creativity, and step into the gratifying world of gardening! Finding inspiration from a simple side yard makeover can spark new ideas for your outdoor space. Challenge yourself to tackle that garden project you’ve been putting off, and witness the joy that a personalized backyard can bring.

08.27.2025

Discover the Secrets to Growing a Stunning Bunny Ears Cactus

Update Becoming Familiar with the Bunny Ears Cactus: A Unique Addition to Your GardenThe bunny ears cactus, or Opuntia microdasys, is not just your ordinary cactus. Native to the arid landscapes of northern Mexico and extending into Arizona, this charming plant is known for its distinctive flat, oval pads resembling the ears of a bunny. Its playful appearance, adorned with fuzzy polka dots, instantly brings a whimsical touch to any garden or indoor space. But while it’s a delightful sight, it’s important to recognize that the 'fuzziness' comes from glochids—tiny but sharp spines that can irritate the skin when touched.Understanding its Growing Needs: Light and Soil PreferencesTo cultivate a thriving bunny ears cactus, understanding its essential needs is pivotal. This cactus thrives in USDA Hardiness Zones 9 to 12, flourishing in full sun. If you live in a cooler climate, consider nurturing it indoors where the light is bright. The soil must be loose, rocky, and well-draining to imitate its natural dry habitat. A slightly acidic to neutral pH, around 6.0 to 7.5, is ideal for optimal growth. This attention to detail ensures that your cactus can grow densely and robustly, enhancing its shrub-like appearance over time.Maintenance: Keeping Your Cactus HealthyYour bunny ears cactus requires minimal maintenance, making it a perfect choice for novice gardeners. Watering should be conservative, only when the soil dries out completely, as cacti are adapted to survive long periods without moisture. It’s essential to watch out for pests common to succulents, such as aphids and scale; however, proper care minimizes these risks. Occasional fertilization during the growing season will promote healthy growth and vibrant blooms.Propagation: Expanding Your CollectionOne of the joys of gardening is propagating plants to expand your collection. Propagating bunny ears cacti is relatively simple. Use clean, sharp tools to cut a paddle from the main plant, allowing it to callus for a few days. Once callused, plant it in a well-draining mix and water lightly. With the right conditions, you’ll see new roots forming in a matter of weeks.Outdoor and Indoor Benefits: Versatile GardeningWhether in outdoor landscapes or potted for indoor display, the bunny ears cactus offers fantastic ornamental value. In gardens, they can serve as striking focal points, xeriscaping elements, or robust companions to other drought-tolerant plants. Indoors, they add unique character to room decor with their vibrant pads and striking blooms. The yellow blossoms that appear in spring and summer, coupled with the red-purple prickly pears that follow, provide seasonal interest in any setting.Creating a Welcoming Environment for WildlifeIn addition to their aesthetic value, bunny ears cacti attract pollinators such as bees and butterflies, making them a valuable asset in fostering ecological balance in your garden. Planting these alongside other native species can enhance your garden’s role in supporting local wildlife, promoting a healthy ecosystem.Conclusion: Embracing Whimsy in Your GardenIncorporating bunny ears cactus into your gardening projects is not only about enhancing beauty—it's about embracing the unique and nurturing a low-maintenance plant that requires little effort yet offers so much in return. Whether you’re designing a rock garden, looking for efficient landscaping ideas, or adding a touch of southwestern flair to your indoor plant collection, the bunny ears cactus is an excellent choice. Take time to understand its needs and you’ll be rewarded with a delightful and resilient companion for many years to come.

08.27.2025

Unlock the Secrets of Seed Saving for a Thriving Vegetable Garden

Update Revive Your Garden with Seed Saving Techniques As summer wanes and gardeners prepare to bid farewell to this year’s harvest, there’s no better opportunity to reflect on the bounty of your vegetable garden and ensure future seasons flourish. Saving seeds from your finest vegetables not only preserves your garden’s health but enhances it over time. Join the age-old practice as we explore three effective methods for seed-saving, destined to elevate your gardening skills and deepen your connection to your crops. The Incentives Behind Seed Saving While purchasing seeds may be easier financially, the advantages of saving your own seeds are significant. By opting for seeds from your strongest plants, you cultivate varieties that are uniquely adapted to your garden’s microclimate, enhancing resilience against local pests and diseases. Seed saving isn’t just economical; it connects you to your gardening heritage, enabling you to grow crops that reflect your personal history and values. Essential Supplies for Successful Seed Preservation Before embarking on your seed-saving journey, prepare by gathering essential supplies. You’ll need seed envelopes—typically available as free printables online—to store and label your seeds. A small pair of scissors, such as embroidery scissors, will help you collect pods, and a basket or paper bag is useful for transporting them to your workspace. When drying or fermenting seeds, essential items include paper towels and Mason jars. Organizing your tools beforehand boosts efficiency, ensuring a smooth saving process. Method 1: Allow Seeds to Mature in the Garden Some seeds thrive best when allowed to mature on the plant. This method emphasizes simplicity and aims to retain maximum vigor by harvesting seeds at their prime. To ensure proper harvesting, select a dry afternoon for collection. Among popular choices, lettuce and cabbage seeds can be saved effectively by placing a plastic bag over flowering plants, allowing seeds to drop naturally into the container—convenience at its finest! Method 2: The Art of Fermentation For particularly fruit-heavy plants, such as tomatoes or cucumbers, fermentation serves as an excellent seed-saving technique. This method not only cleans the seeds but helps prevent diseases. Start by scooping the seeds into a jar with water, cover, and let them ferment for a few days, stirring occasionally. This fermentation process separates the viable seeds from pulp and debris, creating a cleaner and healthier seed option for next year’s planting. Method 3: Scoop, Dry, and Store For thick-skinned fruits like pumpkins and peppers, simply scoop the seeds out, rinse off any remaining flesh, and lay them on a paper towel to dry. This method is straightforward and effective, making it a fantastic option for gardeners who prefer a hands-on approach to seed saving. Remember to keep the seeds in a cool, dry place during storage to maintain their viability. Frequently Asked Questions About Seed Saving As you delve deeper into seed saving, you may encounter questions about seed types, best practices, and viability. Remember, not all seeds can be saved, particularly hybrid varieties, which may not produce offspring identical to the parent plant. Research specific plants beforehand to maximize your success! Keeping a journal of your experiences helps refine techniques and track which methods yield the strongest seeds for your garden. Conclusion: Savor the Fruits of Your Labor As the gardening season comes to a close, embracing the art of seed saving not only paves the way for healthier garden produce but adds an enriching aspect to your gardening journey. You become a steward of tradition, cultivating seeds that carry your personal legacy forward, year after year. Dive into the season of reflection and preparation, equipped with new knowledge to empower your future gardening projects! Whether you're new to gardening or looking to hone your skills, consider connecting with local gardening clubs or online forums to share experiences and continue learning. Together, let’s cultivate a community rooted in sustainable practices and enriched by shared stories.

Terms of Service

Privacy Policy

Core Modal Title

Sorry, no results found

You Might Find These Articles Interesting

T
Please Check Your Email
We Will Be Following Up Shortly
*
*
*