Add Row
Add Element
cropper
update
Marin Home Ideas
update
Add Element
  • Home
  • Categories
    • Home Remodeling Ideas
    • Interior Design & Decor Ideas
    • Gardening & Landscaping Ideas
    • Outdoor Living & Entertaining
    • Health & Wellness at Home
    • DIY at Home
    • Kitchen Ideas
    • Bedroom Ideas
    • Bath Ideas
    • Cooking at Home
    • Home Office Ideas
    • Lighting Ideas
    • Furniture Ideas
    • Architecture Ideas
    • Senior Living at Home
    • Home Finance
    • Real Estate News
March 14.2025
3 Minutes Read

Say Goodbye to Slow Drying Laundry: How to Unclog Your Dryer Vent

Unclog your dryer vent with a cleaning tool indoors.

Is Your Dryer Taking Too Long? It Might Be Time for a Cleaning!

Have you noticed that your laundry is taking an eternity to dry? While it can be frustrating, the culprit might be simpler than you think—a clogged dryer vent. Cleaning out your dryer vent not only speeds up your laundry process, but it also promotes better air quality in your home and decreases the risk of fire hazards. Consider this your comprehensive guide to tackling this common household chore efficiently!

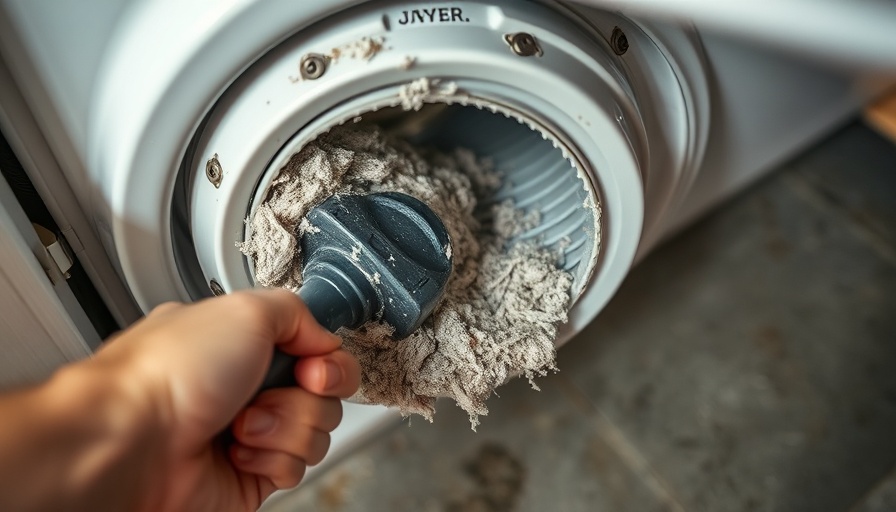
In 'Unclog your dryer vent with this easy fix,' the discussion dives into the essential steps for maintaining your dryer, exploring key insights that sparked deeper analysis on our end.

Understanding the Importance of Dryer Vent Cleaning

According to the U.S. Fire Administration, failure to clean dryer vents is one of the leading causes of home fires. Lint accumulation can block the vent, forcing your dryer to work harder and longer, using more energy while yielding little results. Not only does this take a toll on your electricity bill, but it can also wear down your dryer. Regular maintenance is key to prolonging the life of your appliance.

What You’ll Need for the Job

Equipping yourself with the right tools makes the job easier and more effective. A dryer vent cleaning kit, such as the one from Lowe’s, will usually include a variety of brushes and rods that extend into the vent to help dislodge and clear any built-up lint. Additionally, a vacuum with a narrow nozzle can help collect loose debris from both the dryer and its venting path.

A Step-by-Step Guide to Clean Your Dryer Vent

Cleaning your dryer vent isn’t as intimidating as it sounds. Here’s a simple step-by-step process:

  1. Unplug Your Dryer: Safety first! Unplug your dryer from the outlet to ensure that there’s no power during the cleaning process.
  2. Move the Dryer Away From the Wall: Gently reposition the dryer to access the vent hose at the back.
  3. Disconnect the Vent Hose: Carefully remove the vent hose, taking caution not to damage it.
  4. Use the Cleaning Kit: Insert the brush into the vent, making sure to scrub thoroughly to clear any lint buildup. Use an extension if necessary.
  5. Inspect the Exit Vent: Ensure that the vent outside is clear as well, as this is the point where heat and moisture exit your home.
  6. Reconnect Everything: Once satisfied with your cleaning, reconnect the hose and slide your dryer back into place before plugging it in.
  7. Run a Test Load: Make sure to test the dryer with a small load to check for proper airflow.

Common Misconceptions About Dryer Vents

A prevalent myth about dryer vents is that they don’t require regular cleaning if the laundry isn’t overly full of lint. However, even a small load can generate lint, and over time, this accumulates and obstructs airflow. Therefore, it is wise to adopt a regular cleaning schedule—aim for at least once a year, or more frequently if you have a larger household.

Signs It’s Time to Clean Your Vent

Be on the lookout for these warning signs that indicate it’s time to clean your dryer vent:

  • Your clothes take longer than normal to dry.
  • The dryer feels unusually hot to the touch.
  • Your laundry room has a musty smell or visible lint buildup.
  • There’s excess lint on your dryer’s lint trap.

Making It a Habit

Incorporating dryer vent cleaning into your home maintenance routine is instrumental for not just efficiency, but safety as well. Pair this task with other home improvement jobs, like bathroom remodels or kitchen updates, to maximize your home’s functionality. Setting reminders in your calendar can help keep you on track.

In conclusion, understanding how to clean your dryer vent is a small but significant step toward a safer home. While it may seem trivial, maintaining your dryer can save you time, money, and potential hazards. So grab that cleaning kit, roll up your sleeves, and give your dryer the care it deserves!

Home Remodeling Ideas

8 Views

0 Comments

Write A Comment

*
*
Related Posts All Posts
02.15.2026

Effortlessly Install a Murphy Bed: An Essential Guide for Transforming Small Spaces

Update Maximizing Space: The Benefits of a Murphy Bed Living in spaces that offer flexibility can significantly enhance our overall quality of life. A Murphy bed, known for its adaptability, is a perfect solution for adding sleeping space without compromising precious floor area. Consider how it transforms a small room into a multifunctional space suitable for guests or even an unexpected workspace. With a smart installation approach, transforming your room with a Murphy bed is not only achievable but straightforward.In How to Install a Murphy Bed, the discussion dives into the practical steps of transforming small spaces and the potential benefits of emphasizing home renovation ideas. Step-by-Step Guide to Install a Murphy Bed The video How to Install a Murphy Bed details an easy-to-follow, step-by-step installation process utilized by Jackie and Ricky. By starting with proper wall and floor preparations, users can ensure that their installations are both secure and sustainable. It’s crucial for homeowners to pay close attention to their surroundings and take measurements accurately before embarking on this home renovation project. Tools of the Trade: Essential Equipment for Installation Equipping yourself with the right tools can make all the difference. The installation requires essential tools such as a level, stud finder, drill, and more. Understanding how to use these tools correctly will not only ease the installation but also elevate the bed's overall functionality. This knowledge empowers those venturing into DIY projects to take on future home renovations confidently. Understanding the Costs of Murphy Bed Installation One of the common dilemmas faced by homeowners is weighing the remodeling costs. Generally, the overall cost to install a Murphy bed can vary based on settings and whether professional help is hired. Often, DIY installations are less expensive, and when shared with the right tips, these methods can offer effective solutions without incurring a hefty price tag. Aligning and Leveling: Ensuring Safety and Functionality Once the Murphy bed is anchored to the wall and floor securely, focusing on its alignment is crucial. The video emphasizes ensuring the bed is perfectly level to facilitate smooth opening and closing. This aspect contributes to the aesthetics of the room while also ensuring prolonged safety during use. Real-Life Applications: Space-Saving Success Stories The impact of adding a Murphy bed transcends its immediate functionality. Consider families in urban areas where space is a premium. For them, converting a home office into a guest bedroom overnight is invaluable. This installation journey showcases how practical home improvements can lead to emotional upliftment, especially when family gatherings or overnight guests emerge. After Installation: Final Checks Before Use Prior to putting your Murphy bed into action, the video outlines a checklist to ascertain that everything is functioning as intended. Checking for alignment accuracy and the ease of operation can prevent future inconveniences. This proactive approach to home improvement ensures that your space remains a sanctuary for comfort and utility. Conclusion: Embracing Change with Innovative Solutions As our lifestyles alter, so too should our living spaces reflect those changes. Understanding how to install a Murphy bed stands as a testament to innovative living solutions. Whether for expanding guest space, enhancing a home office, or facilitating versatility in small apartments, Murphy beds open the door to new possibilities. If you’re excited about creating an adaptable space that embodies both function and comfort, consider starting with a Murphy bed installation—an impactful way to embrace change.

02.08.2026

Step-by-Step Guide for Toilet Replacement During Home Renovation

Update Understanding the Essentials of Toilet Replacement Replacing a toilet may seem daunting, but with the right approach, it can become a straightforward weekend project that adds great value to your home. When tackling a bathroom remodel or a larger home renovation, understanding how to replace a toilet can save you time and money.In 'How to Replace a Toilet,' the discussion dives into essential bathroom renovations, inspiring us to expand on the topic for homeowners looking to improve their spaces. Why You Should Consider This DIY Home Improvement Whether you're looking to enhance your living space or increase your home’s resale value, replacing old fixtures like a toilet is a practical step. Simple changes can transform the look and functionality of your bathroom. Materials You’ll Need for Toilet Replacement New toilet Wax ring Toilet bolts Adjustable wrench Bucket Toilet installation kit (if necessary) Before you dive into the project, make sure to gather all necessary materials. Shopping for a new toilet, consider design options that will complement your existing bathroom decor. A Step-by-Step Guide to Replacing Your Toilet Turn Off the Water Supply: Before removing your old toilet, locate the supply shutoff valve behind the toilet and turn it off. Drain the Toilet: Flush the toilet to drain the tank and remove any remaining water using a sponge or towel. Disconnect the Water Line: Use an adjustable wrench to unscrew the water supply line from the toilet tank. Remove the Existing Toilet: Unscrew the nuts securing the toilet to the floor, gently rocking it to loosen it before lifting it off. Install the New Toilet: Follow the installation instructions, using a new wax ring for a proper seal. Reconnect the Water Supply: Reattach the water line, ensuring it’s tight enough to avoid leaks. Test for Leaks: Turn the water supply back on and flush the toilet multiple times to check for leaks. Tips for a Successful Bathroom Renovation Incorporating the replacement process within a broader bathroom remodel can elevate your space further. Consider complementary fixtures, such as a stylish bathroom vanity or shower combination. Additionally, if you're working with limited space, opt for compact toilet designs that maximize usability. The Cost Factor: Budgeting for a Toilet Replacement Understanding remodeling costs is crucial. On average, replacing a toilet can cost between $150-$600 for parts and installation. If you hire remodeling contractors, labor costs can further impact your overall budget. It's essential to compare quotes from different remodeling companies and check local options for the best deals. Frequently Asked Questions About Toilet Replacement How long does it take to replace a toilet? Most homeowners can expect the process to take between 2 to 4 hours if they follow the steps carefully. Can I hire a local remodeling contractor for this job? Absolutely! If you're uncomfortable doing the job yourself, reach out to remodeling contractors near you. They can manage everything from design choices to final installations. What to do with the old toilet? You can check with local waste management services for guidance on proper disposal methods or even donate it if it’s still in good working condition. Conclusion: Your Next Steps in Home Improvement Replacing your toilet is just one of many ways to enrich your home environment while also enhancing its value. Whether you're embarking on a full bathroom remodel or just making targeted improvements, such efforts reflect an investment in your living space. If you’re eager to transform your bathroom or explore more remodeling ideas, remember that each change brings you one step closer to the home of your dreams!

02.02.2026

Exploring Lowe's 10 Million Square Feet of Impact Through Home Renovation

Update Transforming Communities: Lowe's Commitment to Impact In the recent video titled This Is What Showing Up Looks Like | 10 Million Sq Ft of Impact, Lowe's expresses an inspiring commitment to not just the retail world but to the community at large. The company aims to create a positive change by improving local neighborhoods—highlighting a significant initiative of impacting roughly 10 million square feet. This ambitious goal reflects Lowe's dedication to community welfare, aligning with sustainability and health trends that consumers today value.In This Is What Showing Up Looks Like | 10 Million Sq Ft of Impact, Lowe's outlines their vision for community support, prompting us to analyze the implications for homeowners and community activists alike. The Importance of Community Involvement In a world where local support can often feel overshadowed by bigger issues, Lowe's commitment emphasizes how businesses can play a vital role in uplifting and revitalizing their local environments. Community involvement not only fulfills corporate responsibility but also fosters a sense of pride and belonging among residents. For homeowners considering a home renovation or improvement, this connection enhances their purchasing decisions—look for companies that contribute positively to their surroundings. Exploring Home Renovation Opportunities As communities grow stronger through initiatives like Lowe's, many homeowners may contemplate their spaces. From a kitchen remodel to bathroom updates, these improvements can greatly enhance both functionality and aesthetic appeal. The prospect of remodeling sparks excitement, but it’s essential to approach it with informed anticipation. Whether you are looking into remodeling costs or local remodeling contractors, understanding your options fosters better decision-making. Remodeling Ideas That Make a Difference Home renovation is not merely about changing spaces; it’s about creating environments that enhance quality of life. Simple remodeling ideas include utilizing light colors in small bathrooms to give the illusion of space, or integrating storage solutions in kitchens for better organization. For those on a budget, consider DIY approaches or exploring remodeling options that don’t require complete overhauls. Insight into Remodeling Costs A common hesitation in home improvement projects often revolves around costs. Remodeling a bathroom or kitchen can span a variety of budgets. For example, understanding the remodeling costs per square foot can help homeowners gauge affordable options versus luxury upgrades. Planning is key; knowing the average costs allows for a more realistic budget that can match your aspirations for your home. Local vs. Global Perspectives in Home Renovation The desire for more sustainable living continues to challenge traditional renovation practices. Locally sourced materials, for instance, have grown in popularity due to their lower environmental impact and the support they provide to regional economies. When engaging with remodeling companies in your area, consider asking about their materials' sourcing—this not only supports your local economy but contributes to greener renovation practices. Future Trends in Home Renovation As we look ahead, the home improvement industry is likely to continue evolving with technology. Smart homes are becoming the norm, integrating energy-efficient appliances and systems that not only transform living spaces but also promote sustainability. Those considering remodeling should explore options that future-proof their investments, including energy-efficient designs that not only benefit homeowners but also contribute to broader efforts of environmental stewardship. Why Home Improvement Matters For many, investing in home renovation symbolizes personal growth and an enhanced lifestyle. Spaces can profoundly influence mood, productivity, and overall well-being. As Lowe's emphasizes community impact, remember that each renovation, large or small, contributes to your local community and the world at large. By choosing sustainable methods and supporting local businesses, you participate in a cycle of positivity. In the wake of Lowe’s 10 million square feet commitment, homeowners are encouraged to join the movement—be it through simple improvements or larger remodeling projects, contributing to a healthier community and lifestyle. Embrace this opportunity by considering how your next project can reflect your values, as well as beautify your home.

Terms of Service

Privacy Policy

Core Modal Title

Sorry, no results found

You Might Find These Articles Interesting

T
Please Check Your Email
We Will Be Following Up Shortly
*
*
*