Add Row
Add Element
cropper
update
Marin Home Ideas
update
Add Element
  • Home
  • Categories
    • Home Remodeling Ideas
    • Interior Design & Decor Ideas
    • Gardening & Landscaping Ideas
    • Outdoor Living & Entertaining
    • Health & Wellness at Home
    • DIY at Home
    • Kitchen Ideas
    • Bedroom Ideas
    • Bath Ideas
    • Cooking at Home
    • Home Office Ideas
    • Lighting Ideas
    • Furniture Ideas
    • Architecture Ideas
    • Senior Living at Home
    • Home Finance
    • Real Estate News
September 07.2025
3 Minutes Read

Transform Your Bathroom with Radiant Floor Heating: A DIY Guide

Two women installing radiant floor heating in a bathroom.

Elevate Your Space: The Benefits of Radiant Floor Heating

Radiant floor heating is transforming the way we think about warmth in our homes. Not only does it create a cozy atmosphere, but it also enhances the aesthetic appeal of a space. Imagine stepping onto a warm bathroom floor on a chilly morning—a delightful way to start the day! This type of heating isn’t just about comfort; it effectively raises the overall value of your home. Whether you're considering a bathroom remodel or more extensive home renovations, radiant heating can be a worthwhile investment.

In How to Install Radiant Floor Heating | A Step-by-Step Guide, the discussion dives into home renovation techniques, exploring key insights that sparked deeper analysis on our end.

Home Renovation for a Modern Lifestyle

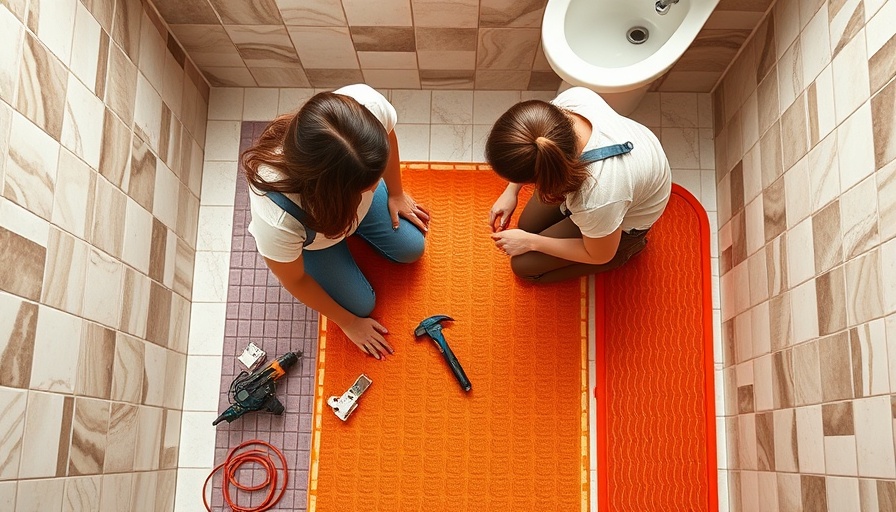
In the journey of home renovation, small changes can make a significant impact. Megan and Zoe, the focused DIYers from the video, illustrate this perfectly as they tackle the installation of heated floors in their 1922 Craftsman home. Their excitement to transition from chilly tiles to warm comfort is universal. In a time when home improvement is more accessible than ever, individuals are motivated to enhance their personal spaces by incorporating modern amenities.

How to Choose the Right Tools and Materials

Megan and Zoe's successful installation is anchored in careful preparation. Before starting your own project, ensure you have all the tools and materials ready. This includes radiant heating kits, a multimeter for electrical testing, and a few key implements for cutting and laying tiles. Thorough preparation not only creates efficiency but also prevents delays once you're deep into the DIY project.

The Essential Steps of Installing Radiant Floor Heating

The process begins with stripping away older tiles to create a clean slate. In their bathroom, Megan and Zoe meticulously chiseled out the existing tiles, venturing into what can be an intimidating yet rewarding task. Importance lies in ensuring a level surface for the radiant heating cables to sit properly beneath the tile. Testing the cables before installation is crucial; it’s a small step that safeguards against future complications.

The Role of Professionals in DIY Projects

While the DIY spirit is strong, expertise is a must when it comes to electrical work. Megan and Zoe wisely consulted an electrician before their project began. This approach underscores a critical aspect of home remodeling: some tasks are better left to the professionals. For those venturing into comprehensive home renovations, understanding the complexities of specific installations can save time, money, and stress in the long run.

A DIY Project is About Learning

One of the most empowering aspects of DIY projects like installing radiant floor heating is the personal growth that comes with it. As character-driven DIYers, Megan and Zoe leave the project proud not only of their new bathroom but enriched with new skills. The idea of embracing challenges and learning from them is invaluable in any home renovation, whether tackling a small bathroom or even a full kitchen remodel.

Final Thoughts on Remodeling Your Bathroom

Radiant floor heating can revolutionize your bathroom experience—both in comfort and aesthetics. If you’re considering bathroom remodeling, adding a radiant heating system represents an opportunity to modernize your space while boosting your home’s resale value. To start your journey, gather information, consult with experts, and prepare to dive into the world of renovation with confidence!

In conclusion, whether it’s a modest improvement or a complete overhaul, don’t shy away from tools that enhance your living experience. Embrace the journey, learn from it, and transform your house into a home.

Home Remodeling Ideas

1 Views

0 Comments

Write A Comment

*
*
Related Posts All Posts
10.30.2025

Discover the Secrets to Making Cold Brew Coffee at Home

Update Mastering Cold Brew Coffee: Your Ultimate Guide When the temperatures rise, so does the quest for the perfect iced coffee. If you're tired of bitter or watery alternatives, cold brew is where it's at. Not only is it easy to make, but it also results in a beautifully smooth, flavorful cup. Let's explore the simple yet rewarding process of making cold brew coffee at home, perfect for anyone looking to elevate their coffee game without breaking the bank. What Exactly is Cold Brew Coffee? At its core, cold brew is a method of extracting coffee flavors without heat. By steeping coarse coffee grounds in cold or room temperature water over an extended period (usually 12 to 24 hours), you allow the flavors to meld beautifully while minimizing the bitterness and acidity often found in traditional brewing methods. The result? A rich, gently sweet cup of coffee that’s ideal for those scorching hot days. Essential Supplies for Crafting Cold Brew Coarse Coffee Grounds: Opt for a medium to dark roast, which will give you that deep, rich flavor. Cold Brew Maker or Container: These simple apparatuses, which typically retail under $25, allow you to steep and strain your coffee easily. Filter: Most cold brew makers come with reusable filters, making them eco-friendly and convenient. Water: Quality filtered water can make a noticeable difference in taste. Optional Ingredients: Consider adding cinnamon sticks or flavored syrups to enhance the flavor profile. How to Make Cold Brew at Home Getting started with cold brew is almost as delightful as sipping it. Here’s a concise guide: **Grind Your Coffee:** Using coarsely ground coffee beans on a French press setting gives the best results. **Combine and Steep:** Mix the coffee grounds with water in your cold brew maker and let it steep for 12-24 hours. **Strain:** Once steeped, strain the mixture to remove the grounds, ensuring a smooth beverage. **Serve:** Pour over ice, adding milk or sweeteners to taste. Enjoy your homemade masterpiece! Common Misconceptions: Cold Brew vs. Iced Coffee While both methods deliver refreshing coffee, they are fundamentally different. Cold brew is steeped in cool water, while iced coffee is brewed hot and then cooled. Cold brew generally offers a smoother flavor and higher caffeine concentration due to the prolonged steeping process, which removes many of the bitter compounds. Practical Insights for the Home Brewer Don't worry if you don’t have specialized equipment. All you really need is a pitcher or jar, a filter, and some patience. The DIY aspect means you can make a big batch, saving time throughout the week. Filtered water is recommended for the best flavor, and don't hesitate to experiment with different coffee types to find your perfect blend! Using Leftover Grounds Creatively After enjoying your cold brew, don’t discard the used grounds! They can be composted for plant nourishment or used as a textured body scrub for your skin. Other creative uses include pest deterrents in your garden or a natural deodorizer for your fridge. Embracing Cold Brew: A Healthier Lifestyle Choice Making cold brew coffee at home not only broadens your coffee variety but also contributes to a more sustainable lifestyle. By cutting out the frequent coffee shop visits, you can enjoy significant savings and reduce waste. Plus, preparing your beverages allows you to control the strength and flavor, making it ideal for health-conscious coffee lovers. Make Your Cold Brew Experience Unique Get adventurous with your cold brew. Try adding flavors like hazelnut syrup, vanilla extract, or even a sprinkle of cocoa powder. Each little twist can transform your daily cup of coffee into an extraordinary experience. Now that you know how to create the ultimate cold brew experience in your kitchen, you can be the barista of your own home. Tailor your blend, relish the flavors, and enjoy the rich coffee culture right at your fingertips!

10.27.2025

Mastering the Art of Pour Over Coffee: A Guide for Home Brewers

Update Brewing Basics: What is Pour Over Coffee? Pour over coffee is an artisanal brewing method that elevates your coffee game beyond basic electric machines. It involves pouring hot water over coffee grounds and allows for more control over flavor extraction, leading to a fresher and less bitter cup of joe. With no need for bulky machinery, it's a space saver, making it perfect for small kitchens. Each cup can be a unique experience, dependent on variables like water temperature and grind size, which is why many enthusiasts swear by this method. The Process: How to Make Pour Over Coffee While pour over may sound intimidating, the process is surprisingly straightforward. You only need three key pieces of equipment—a pour over brewer, a hot water kettle, and a coffee scale. According to industry experts, start with about 20 grams of medium-fine coffee grounds and 320 grams of hot water between 205°F to 210°F. Begin by saturating the grounds with a bloom pour of about 60 grams of water and let it sit for 30-45 seconds. Then, split the remaining water into two final pours for a well-balanced cup. Emotional Appeal: Morning Rituals and Mental Health Making pour over coffee can transcend the act of brewing; it turns into a morning ritual that fosters mindfulness. As each drop of water hits the grounds, you have a moment to reflect before the day begins. This proactive step in self-care not only enhances your coffee flavor but can set a positive tone. Studies suggest that engaging in daily rituals can significantly improve mental well-being by offering a comforting routine amidst chaos. Pros & Cons: Is Pour Over Worth It? There are many advantages to the pour over method, including a more flavorful cup and greater control over brewing variables. It is eco-friendlier as it typically eliminates wasteful pods and filters. However, the process requires more time and attention compared to single-serve machines. For those on the go, the additional commitment may seem unappealing. Yet, for coffee aficionados, even slight adjustments in brewing can yield a significantly different cup, making every brew an adventure. Future Trends: The Evolving Coffee Landscape As consumers become more conscious of sustainability, pour over coffee suits modern demands for quality and minimalism. The trend is pushing cafes toward offering more educational experiences around brewing, inviting people to learn more about what they drink. In a world where fast coffee is the norm, this method invites slower, intentional consumption that many are craving. Connecting to Home Improvement: A Stylish Kitchen Upgrade If you're considering a kitchen remodel, integrating a pour over coffee station can enhance both aesthetics and functionality. It not only opens up your kitchen space but also promotes a love for gourmet coffee at home. Designing a dedicated area with stylish coffee equipment can encourage friends and family to gather and appreciate the nuances of a good brew, enhancing social connections over delicious conversations. Taking Action: Get Started with Pour Over If you’re eager to elevate your coffee experience, consider investing in a pour over set-up today! Whether you fancy a simple brewing device or a high-end kettle, making this easy switch can immensely enhance your daily routine. Take the plunge and start enjoying fresher, more flavorful coffee right at home.

10.26.2025

Revitalize Your Home: Master How to Paint a Ceiling Like a Pro

Update Elevate Your Space: Why Painting a Ceiling Matters Painting a ceiling might seem like a minor task, but it plays a vital role in transforming the ambiance of your home. Whether you aim to repair a mismatched paint job, cover up drywall repairs, or simply enhance the aesthetic of your space, a freshly painted ceiling can create a sense of harmony and spaciousness within any room. Understanding the impact this simple renovation can have on your home's overall appearance motivates many homeowners to consider this often-overlooked project.In 'How To Paint a Ceiling Like a Pro', the discussion dives into the essential steps for a successful ceiling renovation, exploring key insights that sparked deeper analysis on our end. The Importance of Preparation for a Flawless Finish Before diving into the painting process, preparation is key. This includes not only choosing the right tools and paint, but also ensuring the area is safe and clean. As highlighted in the video, prior to application, it’s essential to check for any hazardous materials such as lead or asbestos, especially in older homes. Protecting your furnishings and flooring is another crucial step. By carefully covering everything in the workspace, you minimize mess and keep your space tidy. Further preparation entails cleaning the ceiling of dust and cobwebs, and addressing any repairs ahead of time. Spot priming areas that have been repaired ensures an even paint application. This attention to detail at the outset makes the final results stand out professionally. Choosing the Right Materials: Paint and Tools Matter When it comes to painting a ceiling, selecting the right products can significantly influence the outcome. Opting for a paint with built-in primer, such as Valpar’s paint, simplifies the process and enhances durability. The dead flat finish commonly used for ceilings reduces glare and improves the overall aesthetics. Additionally, using appropriate rollers and brushes tailored to the texture of your ceiling fosters smoother application and reduces the likelihood of brush marks. Utilizing paint calculators available on websites like Lowe’s not only aids in determining the amount of paint required, but also in estimating costs effectively, making for a more budget-friendly home improvement experience. The Transformation: A Step-by-Step Approach According to the video, the process begins with painting the edges and corners using a small angled brush. This allows for precision in covering intricate areas before using a roller for the main surface. An innovative technique mentioned involves applying paint in a sweeping W pattern, ensuring maximum coverage without wasting time. After the first coat, it’s essential to allow for drying time, often leading to a subsequent coat to perfect the finish. Removing tape while the paint is still slightly wet helps in achieving clean lines and a professional appearance. Future Trends in Home Renovation: The Ceiling's New Role As the trend of open-concept living spaces continues to prevail, ceilings are taking on new significance in home design. The choice of ceiling color can make a space feel more cohesive or expansive. New technologies allow for innovative finishes, such as textures and patterns that can elevate the conventional white ceiling into a design statement. Looking forward, ceiling treatments that incorporate lighting solutions or unique textures are becoming popular, offering both function and flair in modern homes. This approach not only enhances the aesthetic but can also increase home value over time. The Emotional Connection of Home Renovation Engaging in home renovation projects like painting a ceiling can evoke a range of emotions. For many, the act of transforming their living space brings about a sense of accomplishment and pride. It creates a physical manifestation of their personal style and preference, contributing to a fulfillment that resonates within their daily life. In essence, such projects allow individuals to reclaim their homes, making them a true reflection of themselves. As viewers of the video learn, a little investment of time and attention can yield great results, not only enhancing the physical space but also contributing positively to the mental well-being of its inhabitants. Reminders of the effort and creativity put into their environment often uplift individuals, fostering a deeper appreciation for their living spaces. Take Action: Your DIY Journey Begins Now Armed with the insights from this article and the video tutorial on painting ceilings, you are now equipped to embark on your own DIY project to elevate your home. Whether you’re considering a kitchen remodel, a bathroom upgrade, or a simple update to your ceiling, there are endless possibilities to enhance your living environment. Next time you think about home improvement, remember that each small change, like painting a ceiling, can create substantial differences in aesthetics and ambiance. So grab your brushes, don your protective gear, and let your creative juices flow as you transform your space!

Terms of Service

Privacy Policy

Core Modal Title

Sorry, no results found

You Might Find These Articles Interesting

T
Please Check Your Email
We Will Be Following Up Shortly
*
*
*