Add Row
Add Element
cropper
update
Marin Home Ideas
update
Add Element
  • Home
  • Categories
    • Home Remodeling Ideas
    • Interior Design & Decor Ideas
    • Gardening & Landscaping Ideas
    • Outdoor Living & Entertaining
    • Health & Wellness at Home
    • DIY at Home
    • Kitchen Ideas
    • Bedroom Ideas
    • Bath Ideas
    • Cooking at Home
    • Home Office Ideas
    • Lighting Ideas
    • Furniture Ideas
    • Architecture Ideas
    • Senior Living at Home
    • Home Finance
    • Real Estate News
Add Row
Add Element
March 14.2025
4 Minutes Read

Transform Your Memories: Create Stunning Resin Coasters with Pressed Flowers

Elegant resin coasters with pressed flowers on a table with plants.

Transform Your Memories: Create Stunning Resin Coasters with Pressed Flowers

Have you ever wished to preserve the beauty of your garden or those special flowers from a memorable event? Creating resin coasters adorned with pressed garden flowers is not just a delightful DIY project; it's a chance to encapsulate cherished memories in a stunning form. These coasters offer not only a practical use but also serve as heartfelt gifts for friends and family, infusing any space with a touch of nature's beauty.

Why Create Resin Coasters?

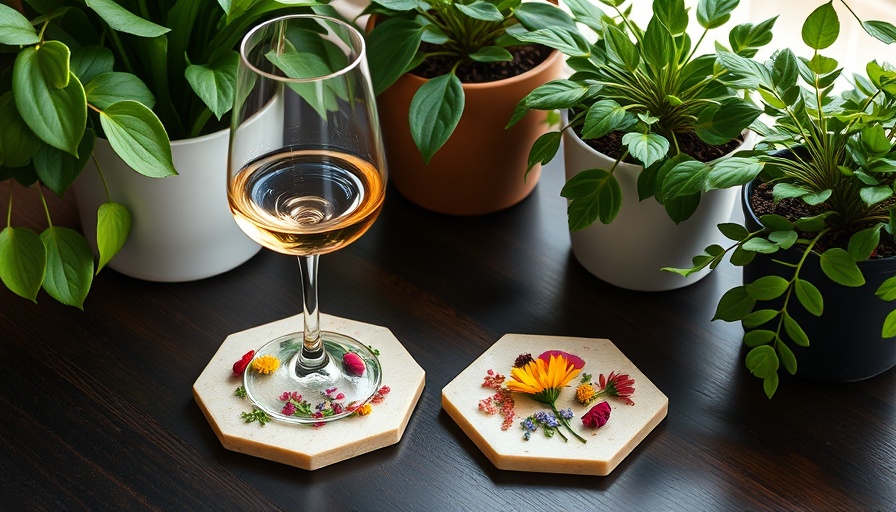
Resin coasters made with dried flowers provide a unique way of relishing the visual charm of your favorite blooms all year round. Whether it's flowers from your garden or a special bouquet from an occasion, these coasters can immortalize those fleeting moments. Beyond aesthetics, they are practical for use with both hot and cold drinks, guaranteeing that your coffee table is not just stylish but also functional.

Gathering Your Materials: What You'll Need

Before diving into this artistic endeavor, it's essential to assemble the right materials to ensure a smooth crafting experience. You’ll need:

  • Resin and hardener (commonly sold as kits)
  • Silicone coaster molds (at least 4 inches in diameter)
  • Dried flowers (either purchased or pressed from your garden)
  • Gold flakes (for added flair)
  • Disposable cups and wooden sticks for measuring and mixing
  • Protective gear such as gloves and eyewear

Having all these materials prepped and organized will make the process feel seamless. Remember, resin is time-sensitive, so preparation is key!

The Process: Step by Step

Creating beautiful resin coasters can be broken down into manageable steps:

  1. Preparation: Clean your molds thoroughly to avoid any unwanted particles ending up in your finished product. Lay out your workspace with a protective covering to manage sticky resin spills.
  2. Mix the Resin: Follow the instructions of your resin kit closely. Generally, mix equal parts of resin and hardener until fully combined, stirring slowly to minimize bubbles.
  3. Design Your Coasters: Before pouring, design the layout of your flowers in the mold. Play with the colors and shapes, ensuring each coaster will reflect your creativity.
  4. First Pour: Pour a layer of resin into the molds, filling them about a third of the way. Allow the resin to sit for a short period (approximately 15 minutes) before adding your pressed flowers.
  5. Adding Flowers: Carefully place your dried flowers into the resin, using tweezers to position them as desired. Ensure they are submerged well in the resin.
  6. Second Pour: Once arranged, pour another layer of resin over the flowers to fully encase them, then cover your molds to protect them from dust.
  7. Cure Time: Let your coasters cure as per the resin instructions (typically 24-48 hours). This step is crucial for a durable coaster.
  8. De-mold: After the curing period, gently remove the coasters from their molds, and enjoy your beautiful, custom creations!

Valuable Lessons from DIYers

As with any crafting project, patience and practice are your best allies. Many first attempts may yield imperfect results, but each mistake teaches valuable lessons. Whether it’s figuring out the ideal flower placement or understanding the nuances of resin mixing, the journey itself adds to the joy of crafting.

Environmental Connection and Lifestyle Benefits

Making resin coasters from pressed flowers is more than just a craft; it resonates with sustainable practices and the joy of gardening. By using blooms you’ve nurtured, you’re contributing to a personal and environmentally-conscious lifestyle. This project allows others to witness the beauty of what you've grown, bridging the gap between your living space and the outdoor world.

Embracing the Beauty of Nature in Your Home

These resin coasters not only protect your surfaces but also breathe life and color into your space. Consider them as conversation starters during gatherings or as a beautiful representation of your passion for gardening. They encapsulate the essence of seasons past, reminding you of sunny days spent among the flowers.

Conclusion: Get Started on Your Resin Coaster Journey!

Now that you are equipped with the knowledge and insights on how to craft resin coasters with pressed garden flowers, it’s time to bring this project to life! Gather your materials, explore your creativity, and enjoy the process. With every pour and placement, you grow not just as a crafter but as a storyteller of your own floral memories.

Whether you're gifting these coasters to celebrate life’s milestones or simply decorating your own home, the satisfaction derived from creating something beautiful and functional is immeasurable.

Let each coaster be a reminder of the beauty that surrounds us and a testament to your creativity!

Gardening & Landscaping Ideas

0 Views

0 Comments

Write A Comment

*
*
Related Posts All Posts
07.02.2025

Essential Gardening Tips: Transform Your Yard with Rainwater Gardens

Update Discovering the Art of Rain Gardens As our climates shift and rain seems to fall more frequently, the need for sustainable gardening practices has never been more important. Rain gardens – designed to capture rainwater runoff from impervious surfaces – provide a dual benefit of beautifying our landscapes while promoting environmental health. These gardens don’t just act as passive water catchers; they actively reshape our relationship with the rain, allowing precipitation to nurture the soil instead of overwhelming our stormwater systems. Why Rain Gardens Are Essential Rain gardens are ingeniously crafted ecosystems that filter pollutants from stormwater, allowing water to return to the earth. These beautiful spaces not only help recharge groundwater reserves but also create habitats for local wildlife. For many, they represent a harmonious blend of aesthetics and environmental responsibility, contributing to the overall beautification of neighborhoods. The Role of Native Plants in Rain Gardens One of the core principles of rain garden design is the prioritization of native plants. These flora are inherently suited to your local climate, thriving in local soil conditions without excessive resources for maintenance. They provide food and shelter for local wildlife, helping boost biodiversity. By utilizing native plants like black-eyed Susans and aromatic asters, gardeners can cultivate stunning landscapes that are sustainable and supportive of local ecosystems. Drought-Tolerant Plants for Variable Conditions In a well-designed rain garden, it’s vital to consider that conditions may vary. At the top of the garden area, where there is good drainage, drought-tolerant plants come into play. Choices such as blazing star and blue oat grass not only endure drier spells but also provide visual interest and texture all year round. These plants flourish during the drier months while their roots reach deep into the soil, promoting healthier gardens. Moisture-Loving Plants That Thrive in Rain At the heart of the rain garden, where standing water collects after heavy rainfall, moisture-loving plants are essential. Varieties such as cardinal flowers and swamp milkweed thrive in these conditions and contribute vibrant colors to the landscape. These plants are adapted to handle periods of saturation and demonstrate stunning blooms that can transform any rainy patch into a vibrant, welcoming space. Designing the Layout of Your Rain Garden Creating a successful rain garden involves careful planning and a clear design. It often resembles a slightly sunken bowl or gentle slope, where rainwater can pool and naturally filter through soil. The arrangement of plants varies, depending on their specific moisture needs, which creates an engaging and visually appealing landscape. Proper spacing is paramount; plants should have enough room to grow without crowding one another, allowing ease of access for maintenance like weeding and pruning. Best Practices for Rain Garden Maintenance Establishing a rain garden is just the beginning. Maintaining these beautiful spaces requires regular attention, from removing invasive species to ensuring that the native plants remain healthy and vibrant. Monitoring water drainage and adjusting the garden design as it grows can help adapt to changing climates and conditions. It can be rewarding to watch as your rain garden matures into a thriving habitat for pollinators and other wildlife. Conclusion: Take Action for Sustainable Gardening By creating a rain garden, you’re taking a meaningful step toward sustainable gardening practices. Not only do you help manage local water resources, but you also participate in an enriching ecological endeavor that benefits your community and the environment. It’s time to embrace these verdant spaces that connect us to nature and foster a sense of responsibility towards our planet.

07.02.2025

Unlocking the Secrets of a Vibrant Edible Garden in Your Front Yard

Update Transforming Your Front Yard into a Beautiful Edible Garden In today’s world where grocery prices can skyrocket, turning a front yard into a thriving vegetable garden is not just a trendy idea, but a practical solution for many households. We love to celebrate community initiatives that aim for self-sufficiency. That's why sprucing up your front yard to grow vegetables can bring neighbors together, both as a source of delicious produce and a stunning visual element in your landscape.In 'Turning Front Yard Into Thriving Veggie Garden', the discussion explores innovative gardening techniques, inspiring us to delve deeper into how to create our own vibrant edible spaces. Why Grow Your Own Food? Imagine walking down your street and seeing vibrant greens flourishing in your neighbor’s front yard. Vegetables not only enhance curb appeal but also remove some of the financial pressure associated with rising food costs. Whether it’s zucchini, tomatoes, or herbs, home-grown food is fresher, often more delicious, and can lead to healthier eating habits for your family. Plus, there’s a certain joy in cooking with ingredients you’ve harvested yourself. Easy Design Ideas for Your Edible Garden Transforming your front yard into an edible garden doesn’t have to be overwhelming. One simple way to start is by designing raised garden beds. These beds not only help with soil drainage but also reduce the need for excessive bending, making gardening less strenuous. Consider incorporating container gardening for herbs or smaller vegetable plants. This allows for flexible arrangements and can beautifully complement the aesthetic appeal of your landscape. Making the Right Plant Choices Selecting the right plants is crucial for the success of your garden. It’s essential to consider your local climate and the current gardening season for planting vegetables to avoid disappointment. Some excellent choices for beginner edible gardens include leafy greens such as spinach or lettuce, chili peppers for an added kick, and strawberries—a hit with kids and adults alike! Mixing in ornamental plants can enhance the beauty of your space while attracting beneficial insects. Mulching and Soil Health A robust edible garden starts with healthy soil. Investing in high-quality soil amendments like mushroom compost can create a sponge-like effect, retaining moisture and nutrients efficiently. Don’t forget to add a layer of mulch; it keeps the soil moist, regulates temperature, and suppresses weeds. Using organic options not only provides nutrients as they break down, but also aligns with sustainable gardening practices. Watering and Maintenance Tips Regular watering is key to a flourishing garden. A more effective method is to use a drip irrigation system for efficiency. These systems minimize water waste by delivering moisture directly to the root zones of the plants. When it comes to maintaining your garden, adopting a specific watering schedule can make a difference, allowing plants to thrive without over-saturation or drought stress. Join the Gardening Community Gardening is a wonderful way to connect with your community. Sharing tips, produce, and the joys of your gardening journey can lead to friendships and support among local gardens. Join local gardening groups or explore community gardens to learn further and share your harvest with others. Not only will you gain knowledge, but you can inspire others to seek sustainable options. Conclusion So, are you ready to embrace the beauty of an edible garden right at your front door? By cultivating plants that both beautify your yard and nourish your family, you'll reap the benefits of fresh produce and a lush landscape. Getting started is easier than you think, so grab your spade and trowel, and let’s dig into gardening!

07.01.2025

Unlock the Secrets of Pruning Sedum: A Comprehensive Guide for Gardeners

Update Why Pruning Sedum is Key to a Thriving Garden Sedum, also known as stonecrop, is a low-maintenance plant that rewards gardeners with vibrant blooms and lush foliage. While it can thrive without regular pruning, engaging in this simple task can significantly enhance the health and aesthetics of your garden. Pruning helps prevent leggy growth, encourages bushier branches, and extends the blooming period. For those looking to maintain a tidy garden space, understanding the why behind pruning is essential. Timings that Make a Difference: When to Prune Sedum Choosing the right time to prune your sedum can dramatically affect its growth and flowering. Early spring is the ideal moment to assess any winter damage and trim back last season's growth, paving the way for fresh, vibrant shoots. If you have taller varieties of sedum, pruning in early summer can prevent them from flopping over. Additionally, after the blooms fade in late summer or fall, deadheading spent flowers is an excellent way to prepare the plant for winter while ensuring it looks tidy. How to Prune: A Step-by-Step Guide To prune sedum properly, begin with clean, sharp pruners. This helps promote clean cuts and reduces the risk of diseases spreading. Look for any stems that are dead, damaged, or diseased, and remove them first. For a more compact and bushy plant, cut stems back to just above a healthy leaf node. This not only promotes new growth but also enhances the overall vitality of your sedum. Specific Tips for Different Sedum Varieties Not all sedum varieties are created equal, and understanding the unique needs of your specific type can improve your results. For upright varieties like 'Autumn Joy,' pruning in the springtime helps them remain sturdy and prevents floppy growth. On the other hand, groundcover types can benefit from a more casual trimming to maintain their spread without exceeding their bounds. Consider Winter Considerations: Leaving the Heads Intact One debate among gardeners is whether to leave dried flower heads intact during winter. Some recommend allowing these heads to remain for winter interest while others prefer to cut them down before the cold sets in. Each approach has its benefits, and your decision may hinge on the look you prefer in your winter landscape. Pruning Joy: Connecting with Nature Gardening is an act of love, and engaging with your plants through pruning can enhance your connection to your outdoor space. Each cut and trim can encourage growth not just in plants, but also in your gardening skills. As you prune your sedum, think about the vibrant blooms and healthy plants that will follow. It’s a gratifying experience that feeds both your garden and your soul. Gardeners’ Perspective: A Call to Cultivate Whether you are an experienced gardener or just starting your journey, knowing when and how to prune sedum can transform your gardening experience. With actionable insights from when to prune, how to handle different types, and winter care tips, you're well-equipped to enhance your landscape. Start applying these strategies today and witness the rewards that come with attentive plant care!

Add Row
Add Element
cropper
update
Welcome to Marin Home Ideas
cropper
update

Welcome to Marin Home Ideas: Your Inspiration for Beautiful Living in Marin.
Whether you're dreaming of a full home remodel, refreshing your interior design, or creating the perfect outdoor oasis, Marin Home Ideas is your go-to source for inspiration and expert advice.
From stunning kitchen and bathroom renovations to stylish decor trends, smart home upgrades, and lush garden transformations, we bring you the latest in home design and improvement. 

  • update
  • update
  • update
  • update
  • update
  • update
  • update
Add Element

COMPANY

  • Privacy Policy
  • Terms of Use
  • Advertise
  • Contact Us
  • Menu 5
  • Menu 6
Add Element

4153075228

AVAILABLE FROM 8AM - 5PM

Add Element

ABOUT US

Marin Home Ideas is your go-to resource for turning your Marin home into a true haven. Our blog covers everything from creative remodeling and stylish decor to gardening tips, outdoor living, and smart financial moves. 

Add Element

© 2025 CompanyName All Rights Reserved. Address . Contact Us . Terms of Service . Privacy Policy

Terms of Service

Privacy Policy

Core Modal Title

Sorry, no results found

You Might Find These Articles Interesting

T
Please Check Your Email
We Will Be Following Up Shortly
*
*
*