Add Row
Add Element
cropper
update
Marin Home Ideas
update
Add Element
  • Home
  • Categories
    • Home Remodeling Ideas
    • Interior Design & Decor Ideas
    • Gardening & Landscaping Ideas
    • Outdoor Living & Entertaining
    • Health & Wellness at Home
    • DIY at Home
    • Kitchen Ideas
    • Bedroom Ideas
    • Bath Ideas
    • Cooking at Home
    • Home Office Ideas
    • Lighting Ideas
    • Furniture Ideas
    • Architecture Ideas
    • Senior Living at Home
    • Home Finance
    • Real Estate News
August 22.2025
3 Minutes Read

Unlock a Healthier Lawn: Your Essential Guide to Dethatching

Close-up of a dethatching rake on lawn, grass and thatch.

Transform Your Lawn: Understanding Dethatching

Your lawn deserves the best, and dethatching is a crucial part of maintaining its health. This process involves removing the layer of dead grass and organic matter that builds up between the soil and your grass blades, known as thatch. When thatch exceeds half an inch, it hampers your grass’s ability to absorb essential nutrients and water. Understanding when to dethatch is key—look out for brown patches, slow growth, or a spongy feel beneath your feet.

Signs It's Time to Dethatch Your Lawn

Regular maintenance of your lawn ensures it remains vibrant. You might wonder, how often should I dethatch? Typically, lawns benefit from dethatching every 2-3 years, and the best times to do so are early spring or fall, allowing the grass to recover quickly. Ensure you address signs like dead brown patches or a bouncy walk across the yard, indicating that it’s time to act.

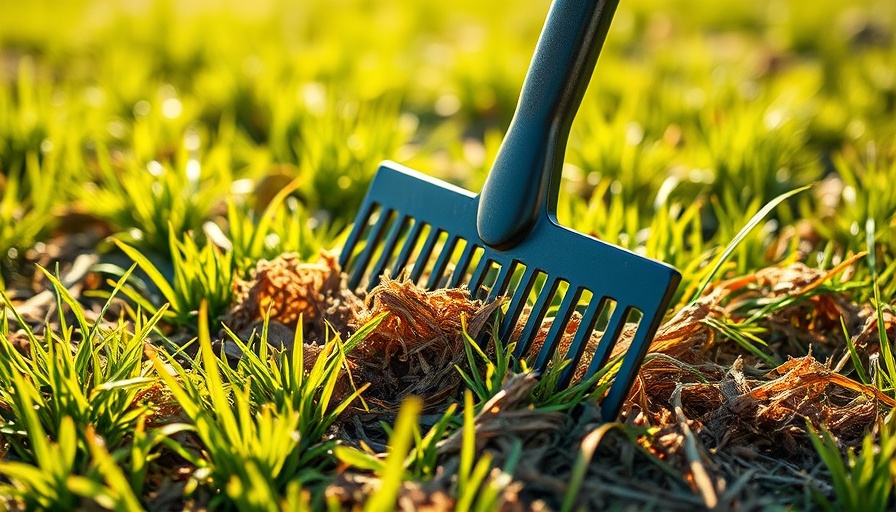
Deciding on the Right Tools for Dethatching

Choosing the right tools means considering your lawn size and conditions. Options range from simple handheld thatching rakes to powered dethatchers. Investing in a powered dethatcher could be perfect for larger yards, and renting one is an affordable, convenient option, especially if you want to avoid long-term storage worries. For smaller areas, a thatching rake can do the trick effectively.

Step-by-Step Guide to Dethatching

Here's a simplified guide to help you get started:

  1. Mow the Lawn: Trim your grass to about half its typical height to reduce potential damage during dethatching.
  2. Using a Powered Dethatcher: Clear any debris from your yard and engage the dethatcher’s blades to go over the desired area in parallel passes.
  3. Adjust the Rake: If using a thatching rake, adjust its angle to penetrate the grass effectively without causing damage.

Emphasizing the Importance of Dethatching

A healthy lawn contributes significantly to the aesthetics of your home, and a well-maintained lawn also enhances the curb appeal of your property. Regular dethatching not only helps improve air and water permeability but also fosters stronger roots leading to lush grass growth. Not only does this make for a beautiful yard, but it also provides a sustainable environment for plants and wildlife.

FAQs on Dethatching

As you embrace this DIY home improvement project, you may have some questions:

  • Can I dethatch my lawn too often? Yes, excessive dethatching can damage your grass, so adhere to the recommended frequency.
  • Is dethatching the same as aerating? No, while both are essential lawn care methods, dethatching focuses on removing the thatch layer, while aeration improves soil texture and allows nutrients to penetrate the roots.

Making Dethatching a Part of Your Lawn Care Routine

Integrating dethatching into your lawn maintenance routine can lead to higher grass quality and a healthier ecosystem around your home. This simple action has the potential to enhance the quality of not just your lawn but your overall home environment. Caring for your indoor space with DIY home improvement projects can complement your outdoor efforts. Embrace the movement towards sustainable living and enhance your lifestyle with care for both your home and yard.

Final Thoughts

Dethatching your lawn is not just about aesthetics; it’s a vital step towards achieving a lush, green outdoor space. By following these simple yet effective steps, you can promote healthier grass growth and a more vibrant lawn. Ready to take on the task? With the right tools and techniques, you can achieve a beautiful and healthy lawn that enhances your home. Incorporate this practice within your broader home maintenance and improvement strategies, and watch your living space transform.

DIY at Home

3 Views

0 Comments

Write A Comment

*
*
Related Posts All Posts
02.14.2026

How to Remove Snow Safely from Your Deck Without Damage

Update DIY Hacks for Safe Snow Removal on Decks Winter can be a beautiful but challenging time, especially for homeowners with decks that could easily be damaged by snow removal practices. If you cherish your outdoor space, here's how you can correctly remove snow without sacrificing the integrity of your deck or hard surfaces. Following expert tips can not only maintain your deck but also ensure safety for you and your loved ones when snowy weather hits. Understanding the Risks of Improper Snow Removal Snow accumulates on your deck and may seem innocuous, but improperly removing it can lead to significant damage over time. Notably, leading deck expert Dave Kile emphasizes that the issue often isn't the snow itself but the methods employed to remove it. If snow is left to compact into ice, a more aggressive—and potentially damaging—scraping is often required. It's essential to understand that while the immediate visual impacts of scraping or using the wrong type of shovel may be minimal, the long-term effects can include warped boards, loosened hardware, and unsightly cracks. Essential Tools for Gentle Snow Removal When it comes to snow removal, the right tools make all the difference. A plastic shovel with a rubber edge is recommended to glide smoothly over the surface without causing scratches. Instead of metal shovels, which can scratch or gouge wood and composite surfaces, opt for softer, more forgiving alternatives. Expert advice suggests using plastic push shovels or even a simple broom for light, fluffy snow. If the snow is heavier, remember to shovel parallel to the deck boards to avoid catching edges and damaging fasteners. Snow Removal Tips from the Experts Here are a few key practices from professionals to ensure your deck remains in tip-top shape during winter: Clear Snow Regularly: Don’t just shovel paths or leave piles on one side of the deck. Remove all snow to prevent excess weight that can compromise structural integrity. Be Cautious with Ice Melts: If ice formed, ensure to use calcium chloride on wood surfaces, avoiding rock salt that can damage. For harder surfaces, consider calcium magnesium acetate for minimal impact. Inspect and Maintain: Before the winter season, ensure your deck’s structure is solid—check for loose screws, nails, or signs of damage that might be exacerbated by heavy snow. Protecting Your Deck's Aesthetics Snow removal should be done with both safety and aesthetics in mind. Excessive scratching or discoloration can negatively affect your deck's appearance. Regular maintenance—even in winter—can help preserve your deck's visual appeal. Touch up any scratches with a suitable deck paint or sealant once the weather is clear to prevent moisture from compromising the wood. Checking for Structural Safety While decks are generally built to withstand significant snow loads, it's essential to recognize the threshold where snow becomes a safety hazard. Decks built to code can handle substantial weight, but if snow accumulates to depths greater than three and a half feet, it’s wise to start removing it to avoid potential collapses. Final Reminders Removing snow from your deck isn’t just about keeping the area tidy; it’s about protecting your investment and ensuring the safety of everyone who uses it. By taking the correct precautions and employing the right techniques for snow removal, you can enjoy your beautiful deck even in the cold months without worrying about damage. For a hassle-free winter, make sure to prep your deck with preventive measures and follow the experts’ tips on snow removal to keep it in pristine condition. So grab your plastic shovel, warm up your biceps, and safely remove that snow—it’s what’s best for both you and your deck! For more DIY home improvement and maintenance tips throughout the seasons, be sure to explore practical strategies that can help you create a safe and enjoyable environment in your home. Remember, winter maintenance can be gentle and effective!

02.14.2026

Essential Tips on How to Clean Work Boots for Longevity

Update How to Keep Your Work Boots in Pristine Condition Work boots are not just footwear; they are vital companions that support you through long hours on the job site. Properly maintaining your boots can significantly extend their lifespan and keep your feet comfortable and healthy. Whether you’re navigating muddy terrain or working in a sterile environment, knowing how to clean your work boots is crucial. Why Cleaning Your Work Boots Matters Many workers underestimate the importance of boot maintenance. A dirty boot doesn’t just look bad; it can even lead to discomfort and health issues if debris accumulates. Regular cleaning helps prevent wear and oxidation of materials, keeping them effective and safe. Cleaning your boots doesn’t have to be arduous; steady maintenance can lead to long-lasting protection. Daily Maintenance Tips for Work Boots Establishing a routine can keep your work boots in top shape. Here are some tips to incorporate into your daily or weekly maintenance: Air Them Out: After each use, allow your boots to dry naturally in a well-ventilated area. Avoid heaters or direct sunlight, which can damage leather and alter their shape. Remove Debris: Give your boots a light tap to shake off dirt, then use a soft brush to remove stubborn particles. Wipe Down: A damp cloth can help get rid of excess dust, focusing on seams and any crevices. Condition Regularly: Use leather conditioner occasionally to prevent drying and cracking, which can extend the life of your boots significantly. How to Clean Work Boots Thoroughly For a more in-depth cleaning, consider following these steps—a bit more involved, but worth it for your boots’ longevity: Remove the Laces: Start by taking off the laces and soaking them in warm, soapy water. This can help remove any stubborn dirt. Knock Off Mud: For dried mud, firmly knock the boots together. For lingering dirt, a soft nylon brush works wonders without damaging the leather. Wash the Exterior: Use lukewarm water mixed with a small amount of gentle soap to scrub the outer layers carefully. Pay special attention to tough stains, using a brush if needed. Interior Care: If the inside of your boots is muddy or wet, remove insoles and clean them separately. With warm, soapy water, scrub the insides and allow to air dry. Final Touch: After cleaning, re-apply conditioner to maintain the leather’s softness. How to Store Work Boots Storage conditions can significantly affect your work boots' integrity over time. Here are some recommendations: Store them upright in a cardboard box—this promotes airflow and prevents moisture buildup. Avoid plastic containers which can trap moisture and lead to mold. Keep boots in a room-temperature environment, ideally below 77°F, ensuring about 70% humidity or less. Signs That You Need New Work Boots No matter how well you care for your boots, wear and tear is inevitable, especially if you’re continuously on your feet under varying conditions. Be on the lookout for these signs: Visible damage like cracks, loose fasteners, or worn-out soles. Discomfort during wear; consistent aches can indicate it's time for new footwear. Unexpected wear patterns or changes in the boot’s physical appearance. Do-It-Yourself Tricks for Maintaining Work Boots Integrate some DIY techniques to enhance the cleaning process and care for your work boots: Use baking soda inside your boots overnight to neutralize odors. For a homemade conditioning solution, mix olive oil and vinegar in equal parts for an effective repellent against moisture. Rotate between pairs of boots to allow each to air out properly, balancing support and freshness. Conclusion: Invest in Your Footwear Your work boots are more than just a utility—investing time and effort into their care ultimately enhances your comfort, support, and overall health. By adopting these routines, your boots will be equipped to face each workday, ensuring you perform at your best. Embrace your boots’ potential, and let them do their job—you won't regret it!

02.14.2026

Protecting Your Plants from Snowstorms: Essential Tips and Strategies

Update Understanding the Dual Impact of Snow on Plants While snow often brings picturesque winter scenery, it can pose both risks and benefits to your garden. A light snowfall serves as a natural insulator for perennials and protects the ground from harsh winter winds, effectively safeguarding delicate roots. However, heavier snow loads can cause branches to bend or break, particularly in susceptible species like evergreens and certain deciduous trees. According to Sharon Yiesla, a Plant Knowledge Specialist at The Morton Arboretum, it’s essential to understand how your specific plants respond to snow to provide adequate protection. Identifying Vulnerable Plants in Your Garden Not every plant requires the same level of protection. Most hardy outdoor plants, those that are well-adapted to your USDA Hardiness Zone, can weather typical winter storms with ease. On the other hand, evergreens often require a bit more care due to their potential for snow damage. The open structure of arborvitae can easily accumulate snow, leading to collapse under its weight. Similarly, delicate deciduous plants, like small Japanese maples, may face risks during heavy snowfalls, thus necessitating protective measures. Pre-Storm Preparations: Get Your Garden Ready Preparing your plants before the storm hits is crucial for minimizing winter damage. Here are some proactive steps you can take: Loosely Tie Evergreens: For evergreens that tend to splay, tie their branches together using flexible materials such as fabric strips or old pantyhose. This will help prevent splitting or bending under heavy snow. Stakes for Support: Installing stakes around deciduous shrubs can help maintain their shape and support against accumulating snow. Utilize bamboo or metal stakes and gently tie branches with twine to offer additional stability. Cover Younger Plants: Protect new or tender plantings with wooden A-frames or lightweight covers. If you anticipate snow in areas where it’s uncommon, consider using bed sheets or cloth tarps to shield especially vulnerable plants. During the Storm: Monitor and Maintain Once the snow has started, your job isn’t finished! Monitoring your plants during the storm is critical to ensure their survival: Remove Heavy Snow: If possible, gently brush off heavy snow from evergreens and deciduous trees. It's best to avoid vigorous shaking, especially if the snow has frozen to the branches, as this could cause breaks. Opt for Caution: If snow loads become too dense, it might be wiser to leave some snow on the branches so that they can melt naturally without risk of fracturing. Post-Storm Recovery: Revitalizing Your Plants Once the storm has passed, check in on your garden to assess any damage. Take care to: Gently Prune Broken Limbs: For branches that have snapped, prune them back to prevent issues with pests and diseases. Provide Nutrients: To help your plants recover from the stress of winter weather, consider fertilizing in early spring when the risk of frost subsides, to invigorate their growth. Tips for Future Winters: Planning Ahead To effectively prepare for future winter storms, keep these tips in mind: Choose Hardy Varieties: Invest in plants that are well-suited to your zone. Hardy varieties are generally more resilient to winter’s rigors. Educate Yourself: Research the specific snow tolerance of each type of plant in your garden. The right knowledge can prevent costly mistakes and help maintain a flourishing garden. Consider Winter Mulching: Apply organic mulch around the base of your plants this winter. Mulching helps protect roots and conserve moisture during the freezing months. By understanding how snow affects your plants and taking proactive measures, you can help your garden weather even the toughest winter storms. Remember, it’s not just about surviving but thriving, even in winter!

Terms of Service

Privacy Policy

Core Modal Title

Sorry, no results found

You Might Find These Articles Interesting

T
Please Check Your Email
We Will Be Following Up Shortly
*
*
*