Add Row
Add Element
cropper
update
Marin Home Ideas
update
Add Element
  • Home
  • Categories
    • Home Remodeling Ideas
    • Interior Design & Decor Ideas
    • Gardening & Landscaping Ideas
    • Outdoor Living & Entertaining
    • Health & Wellness at Home
    • DIY at Home
    • Kitchen Ideas
    • Bedroom Ideas
    • Bath Ideas
    • Cooking at Home
    • Home Office Ideas
    • Lighting Ideas
    • Furniture Ideas
    • Architecture Ideas
    • Senior Living at Home
    • Home Finance
    • Real Estate News
April 24.2025
3 Minutes Read

Unlock the Beauty and Versatility of 19 Lily of the Valley Varieties

Various Lily of the Valley flowers with lush green leaves.

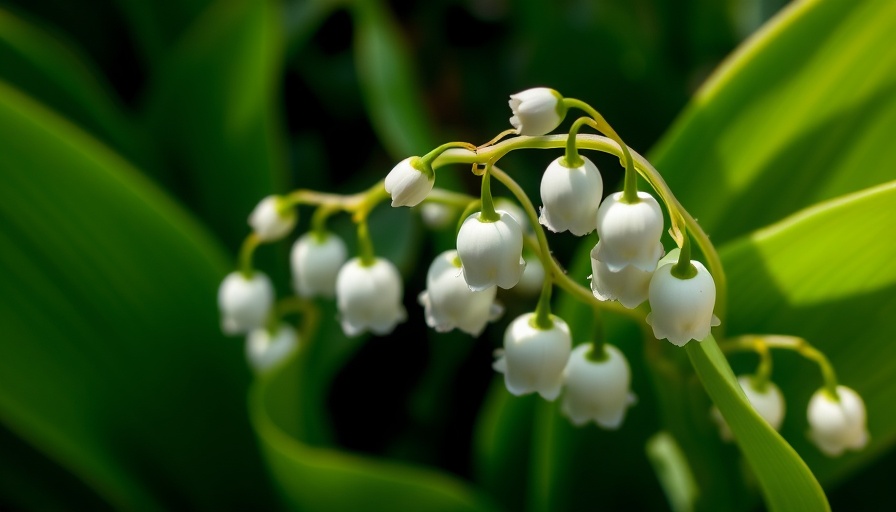
Discover the Enduring Charm of Lily of the Valley

Lily of the Valley (Convallaria majalis) captivates gardeners with its delicate, bell-shaped flowers that grace the spring landscape. While these blooms may appear fragile, their beauty belies a resilience that earns them a prominent place in gardens across the globe. These plants thrive in challenging conditions, are remarkably pest-resistant, and spread with unyielding determination, making them both admired and daunting for landscape designers.

Understanding Varieties: Beyond the Basics

While most gardeners are familiar with the classic species, the wide-ranging varieties of lily of the valley deserve attention. Specialty nurseries offer a variety of cultivars that can add unique character to your garden design. Here, we’ll explore 19 fascinating variations, each with distinct characteristics that can elevate any floral display or garden project.

The Unique Attributes of 19 Lily of the Valley Varieties

  • Albomarginata: Features striking green leaves bordered in white, maintaining the same beautiful blooms as the species.
  • Albostriata: A stunning variety with dark green leaves showcasing pale stripes that offer a sophisticated texture without aggressive spreading.
  • Berlin Giant: As the name implies, this variety towers over the species, growing over a foot tall, making it an excellent choice for dramatic garden accents.
  • With each cultivar offering something different, exploring varieties like Bordeaux, Bridal Choice, and Fernwood’s Golden Slippers will surely inspire your next gardening project.

Gardening Tips for Healthy Growth

Lily of the valley is often celebrated for its low maintenance needs, but providing the right care is crucial for these perennial plants. Here are some gardening tips to ensure your lily of the valley flourishes:

  • Soil Quality: These plants prefer rich, well-draining soil, making compost a valuable addition to promote healthy growth.
  • Sunlight Requirements: While they thrive in partial shade, a touch of early morning sun can enhance flower production.
  • Watering Techniques: Regular watering, especially during dry spells, will protect against stress and promote vibrant blooms.

Crafting the Perfect Landscape Design

Lily of the valley can play a significant role in a well-designed garden. Their charming blooms and lush foliage can complement a variety of landscaping ideas:

  • Garden Borders: Use lily of the valley to create natural borders that define pathways or flower beds.
  • Pollinator-Friendly Gardens: While not particularly attractive to pollinators, these plants can serve as a foundation for attracting more beneficial insects with the right companion plants.
  • Shaded Areas: Transform shaded space into stunning displays by grouping these lilies with other shade-loving flowers.

Handling the Invasive Nature of Lily of the Valley

Gardeners be warned: while lily of the valley boasts many attributes, its proclivity to spread aggressively can lead it to become invasive. Therefore, careful planning is essential:

  • Containment Strategies: Use garden edging or raised beds to control their spread and keep them from encroaching on neighboring plants.
  • Regular Maintenance: Periodic pruning can keep the growth in check and promote healthier plants.

Conclusion: Embrace This Resilient Green Gem

Incorporating lily of the valley into your garden design not only adds breathtaking beauty but also showcases your commitment to resilient plant choices. Whether you choose traditional varieties or more unique cultivars, these plants can offer lasting joy and delightful fragrance to your outdoor space.

For more gardening tips and design ideas, delve into the wonderful world of sustainable gardening practices and make your home a greener place!

Gardening & Landscaping Ideas

14 Views

0 Comments

Write A Comment

*
*
Related Posts All Posts
12.16.2025

Explore the Witch Hazel Plant: A Gorgeous Ornamental with Healing Skin Care Benefits

Update Discover the Enchanting Witch Hazel Plant The witch hazel plant (Hamamelis spp.) is not just a stunning addition to your garden; it also harbors remarkable skin care properties. Known for its vibrant winter blooms and easy maintenance, it can become a beloved feature in your landscaping. This hardy shrub reaches heights of 5 to 15 feet, producing beautiful starburst-like flowers in yellows and reds, which can brighten any garden during winter months. The Multifaceted Benefits of Witch Hazel Witch hazel is primarily revered for its therapeutic properties. Extracted from the bark and leaves of the plant, its astringent qualities make it an effective remedy for various skin ailments. From reducing inflammation and irritation to combating acne, witch hazel is a staple in many natural beauty routines. Its soothing nature makes it suitable for treating minor cuts and insect bites, enhancing its appeal as a must-have home remedy. Growing Witch Hazel: Tips for Your Garden Planting witch hazel requires some basic knowledge for optimal growth. Choose a location that offers full sun or partial shade, ideally in moist, well-drained soil rich in organic matter. Be attentive to your plant's watering needs, especially during its formative years. This beautiful shrub is hardy across USDA Zones 5-8, making it an excellent choice for various climates. Continuously assist its growth by pruning dead branches annually and managing suckers that might emerge at the base. Harvesting Witch Hazel for Skin Care One of the joys of cultivating witch hazel lies in the ability to harvest its branches for homemade skin care products. After a careful pruning session, you can prepare your own witch hazel extract by boiling the bark and twigs, thus creating a natural astringent to incorporate into your skincare regime. A few spritzes can tone your skin and reduce redness, giving you a refreshing feeling post-shower. Ornamental Uses in Landscaping An addition to your landscape, witch hazel can stand out through its seasonal blooms and unique branching structure. Combining it with low-maintenance companions, such as hellebores or snowdrops, can enhance your garden’s visual appeal and ensure year-round interest. Ideal placement near pathways or doorways can provide enchanting experiences as guests pass by and catch the spicy fragrance of its flowers. Enhancing Your Health with Witch Hazel Besides its aesthetic contributions, witch hazel's health benefits shouldn’t be overlooked. Its anti-inflammatory properties are particularly effective for those with oily skin types, helping to minimize the appearance of pores and reduce shine. For anyone prone to mild skin irritations, integrating witch hazel into their skincare can offer relief and rejuvenation. It can even assist in calms scalp sensitivity conditions like psoriasis. Final Thoughts: Embrace the Witch Hazel Whether you’re a seasoned gardener or just starting your journey, witch hazel offers aesthetic and practical benefits that enhance your gardening experience. Its resilience makes it an easy choice for anyone looking to beautify their garden while also reaping the rewards of its skin care properties. Consider integrating witch hazel into your garden plan this season, not only to enjoy its picturesque beauty but also to benefit from its natural healing properties. For those looking to explore and deep dive further into gardening and plant care, consider exploring local gardening workshops or communities that can provide valuable advice and shared experiences. It's a wonderful way to bond with nature and nurture both your garden and your skin!

12.16.2025

Transform Your Space: Make a Stunning Winter Arrangement Today

Update Crafting a Cozy Winter Arrangement: A Step-by-Step Guide As the colder months settle in, many find joy in embracing the beauty of winter through home decor. Creating a decorative winter arrangement is not just about aesthetics; it’s also an opportunity to express creativity and bring a touch of nature indoors. In this guide, I’ll walk you through the steps of making a charming winter arrangement that revitalizes your home and gives you a sense of accomplishment. Understanding the Seasonal Elements Winter arrangements typically use evergreen materials that reflect the season's spirit. Pine branches, holly, and fragrant cedar are excellent choices, providing both visual appeal and a delightful scent. Gathering these materials can be a fun outing—consider visiting a local park or asking neighbors if you can clip a few branches from their yards. It’s a unique way to connect with your community while sourcing beautiful natural elements! Gather Your Supplies Before you start creating, ensure you have the necessary supplies. Here’s what you’ll need: Fresh-cut greens (evergreens, branches, etc.) Seasonal embellishments (such as pinecones, berries, or ornaments) A sturdy container or vase Floral foam or oasis to hold the arrangement in place Pruners for cutting branches Protective gloves to keep your hands safe and clean Creating Your Arrangement To start, prepare your workspace by laying down a tarp or plastic sheet. This will help catch debris and make cleanup easier. Begin by soaking the floral foam in water and then setting it in your container. Next, cut your greens to various lengths and start placing them into the foam. Begin with the larger stems at the base to create a foundation, and gradually build up with shorter pieces. Be mindful of the overall shape you wish to create. Balance is key; consider making one side fuller than the other for a more natural look. Adding Seasonal Touches Now comes the fun part—adding embellishments! Incorporate twigs, pine cones, and berries to create depth and interest. Use your imagination! Think about the colors and textures that will draw attention and harmonize with your home's existing decor. Final Adjustments and Display Once you’ve created your arrangement, step back and take a look from different angles. Adjust any branches or embellishments as needed to achieve a balanced and full appearance. Finally, place your arrangement in an area where it can be admired—this could be your dining table, mantel, or entryway. The Emotional Connection of DIY Projects Creating your own winter arrangement offers more than just aesthetic benefits. Engaging in DIY projects like this can be incredibly therapeutic. The act of bringing your vision to life can reduce stress and foster a sense of accomplishment and pride. It’s a wonderful way to connect with nature, even in the chilly months. In Conclusion: Why You Should Try This Making a winter arrangement is a perfect way to embrace the season while enhancing your living space. It provides a creative outlet and an opportunity to use sustainable practices by repurposing materials from your environment. So gather your supplies, put on your gloves, and enjoy the calming process of creating something beautiful that reflects the warmth of your home in the heart of winter.

12.15.2025

Create Joy With a DIY Mini Grinch Tree: A Charming Holiday Tradition

Update Why a Mini Grinch Tree Makes the Perfect Holiday Gift As the holiday season approaches, many of us begin to think about unique and meaningful gifts to share with friends and family. Enter the mini Grinch tree—an adorable, quirky, and heartfelt decoration that captures the spirit of the season. According to Dr. Seuss, the holidays are about more than twinkling lights and extravagant trees; they are about kindness, generosity, and the warmth of community. For those looking to share a piece of this festive spirit, crafting a small Grinch tree is an opportunity that combines creativity with giving. Materials Needed for Your Tabletop Grinch Inspiration Creating your own mini Grinch tree offers a personal touch that store-bought options simply cannot match. For the best results, gather the following materials: Small evergreen tree (like lemon cypress or cedar boughs) Colorful potting soil Decorative moss for added flair A festive ornament for the top Batter-powered string lights and ribbon Floral wire to secure decor elements Using a lemon cypress provides both aesthetic appeal and a delightful scent, creating keepsakes that can be nurtured year after year. Step-by-Step: Crafting Your Mini Grinch Tree With your materials ready, it’s time to dive into crafting your mini Grinch tree. Follow these simple steps: Begin by planting your evergreen in a colorful pot at a slight angle to give it a Grinch-like appearance. Add decorative moss on top of the soil; while optional, it enhances the overall look. If desired, wind battery-powered string lights around the tree, working from bottom to top for a whimsical effect. Use floral wire or ribbon to create garlands, tucking loose ends into the tree. Complete your decoration with a large vibrant ornament at the top, ensuring it bends toward the center for a signature Grinch finish. This project not only sparks creativity but allows for customization and personalization, perfect for sharing unique holiday cheer! Why It’s More Than Just a Craft: Spreading Holiday Cheer Gift-giving during the holidays is an age-old tradition, and the act of creating something with your own hands brings joy to both the giver and the recipient. The mini Grinch tree symbolizes that it's not the size of the gesture that matters, but the thought and love behind it. The continued popularity of DIY projects underscores a societal shift towards more personal, sustainable holiday practices. According to a recent survey, more individuals are seeking ways to make holidays meaningful through crafting experiences rather than purchasing mass-produced items. Delightful Variations on the Grinch Tree Theme While the classic mini Grinch tree is a show-stopper on its own, experimenting with variations can lead to even more delightful creations. Consider making: Grinch Tree Kits: Put together DIY kits complete with all necessary materials and instructions, great for family bonding. Mini Grinch Garlands: Create mini garlands to hang around homes or offices, echoing the spirit of the Grinch. Personalized Ornaments: Use photos or mementos of loved ones as decorative items on the Grinch tree. These variations offer room for creativity while keeping the joyous spirit of Dr. Seuss alive! Wrapping it Up: Bringing Home the Spirit of Christmas The mini Grinch tree is more than just a quirky decoration; it's a potent reminder of the values that the holiday season stands for. As you engage in this festive craft, think about how it resonates with your loved ones and the joy that comes from sharing something made with love. So, gather your materials, tap into your creative side, and spread some holiday cheer with your own DIY mini Grinch tree!

Terms of Service

Privacy Policy

Core Modal Title

Sorry, no results found

You Might Find These Articles Interesting

T
Please Check Your Email
We Will Be Following Up Shortly
*
*
*