Add Row
Add Element
cropper
update
Marin Home Ideas
update
Add Element
  • Home
  • Categories
    • Home Remodeling Ideas
    • Interior Design & Decor Ideas
    • Gardening & Landscaping Ideas
    • Outdoor Living & Entertaining
    • Health & Wellness at Home
    • DIY at Home
    • Kitchen Ideas
    • Bedroom Ideas
    • Bath Ideas
    • Cooking at Home
    • Home Office Ideas
    • Lighting Ideas
    • Furniture Ideas
    • Architecture Ideas
    • Senior Living at Home
    • Home Finance
    • Real Estate News
May 09.2025
3 Minutes Read

Unlock the Secrets: How to Propagate Thyme for Your Garden

Young thyme plants in pots showing how to propagate thyme.

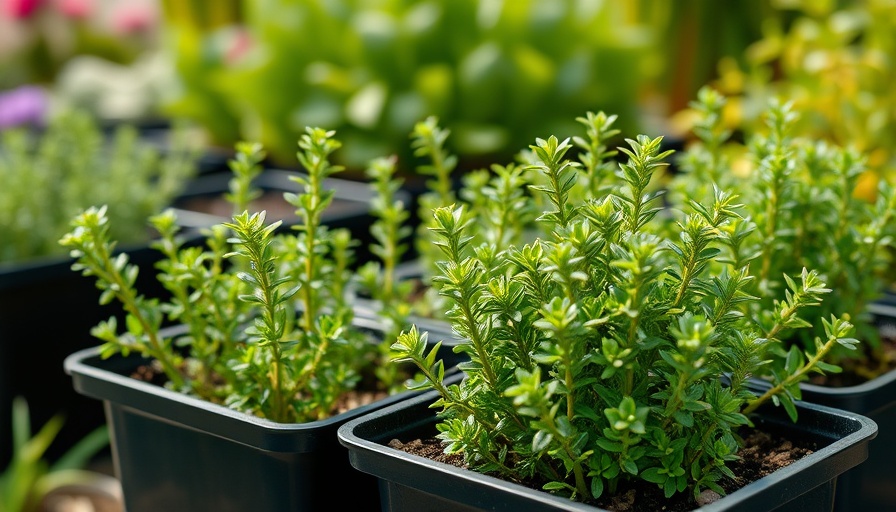
Discover the Joy of Growing Thyme

If you’ve ever brushed against a thyme plant and caught a whiff of its earthy, lemony aroma, then you know why it’s a favorite among gardeners and cooks alike. This aromatic herb is not just a staple in kitchens but also a boon for pollinator-friendly landscapes, thriving in various conditions. The best part? Propagating thyme is a rewarding endeavor that allows you to deepen your connection with nature and expand your garden without incurring extra costs.

Why Propagate Thyme?

Propagating thyme is an essential skill for any gardener eager to cultivate their herb bed. Not only does it save money, but it also offers the satisfaction of nurturing new plants from existing ones. Whether you want to expand your rock garden, fill gaps in your raised beds, or share starts with fellow gardeners, thyme propagation is quick and fulfilling.

Proven Methods for Propagating Thyme

There are several effective and straightforward methods for propagating thyme: through cuttings, layering, and divisions. Each technique offers its own unique benefits and is well-suited for different gardening scenarios. Let’s explore these methods in more detail.

1. Taking Cuttings: A Simple and Effective Method

Taking cuttings is perhaps the most popular way to propagate thyme. Simply snip a three-inch piece from a healthy stem, ensuring you include some fresh growth at the tip. Remove the lower leaves and place your cutting insoil. Maintain moisture and keep it in a warm area—soon, you’ll see roots developing!

2. Propagating by Layering: Patience Pays Off

Layering is another effective method, where a stem still attached to the parent plant is encouraged to root in the soil. This method takes longer but can be very rewarding. Simply bend a low-hanging branch toward the ground and cover a section of it with soil—keep the tip exposed to continue growing. In a few months, you can sever it from the parent plant to transplant.

3. Dividing Established Clumps: Maximize Your Harvest

Dividing mature thyme plants can instantly multiply your herb stock. This method works best during early spring or fall, ensuring the roots recover before temperature extremes. Carefully dig up your thyme, separating the roots into smaller clumps, and re-plant them in well-drained soil. Their resilience will reward you with lush new growth.

Timing Your Propagation: When Is Best?

The best time to propagate thyme is during its active growing season, from mid-spring through early summer. This timing increases your chances of success as the plant is focused on growth, but it’s also good to avoid periods of drought or excessive heat. Aim for cool and moist weather, especially when layering or dividing plants.

Transplanting Care: Ensuring Growth and Success

After propagating, it’s crucial to provide your new thyme plants with care to ensure their success. Monitor soil moisture closely, avoiding both overwatering and drying out. Once they establish roots, you can gradually introduce them to more sunlight and nutrient-rich soil.

Gardening Projects with Thyme

Thyme is highly versatile and can complement various landscaping ideas. Its creeping varieties are fantastic for ground cover or borders in your herb garden, while upright types can add vertical interest among flower beds. You can even create a decorative container garden filled with various herbs, including thyme, to bring culinary convenience and visual appeal right to your kitchen door.

Frequently Asked Questions About Thyme Propagation

1. How long does it take for thyme cuttings to root?
Typically, you can expect thyme cuttings to root within 3-6 weeks, given the right conditions.

2. Can I propagate thyme indoors?
Yes! As long as you have bright light and controlled temperatures, thyme can thrive indoors.

Embracing thyme propagation will not only enrich your gardening adventures but also engage your senses as you nurture these fragrant plants. So why not dive in and experiment with these techniques? You may just find that thyme becomes your favorite herb to grow.

Gardening & Landscaping Ideas

9 Views

0 Comments

Write A Comment

*
*
Related Posts All Posts
12.01.2025

Using Fresh Christmas Greenery for Festive Decorating: Tips & Tricks

Update Transform Your Home with Foraged Christmas Greenery As the holiday season approaches, many of us look to bring the beauty of nature into our homes. There's something special about decorating with fresh Christmas greenery sourced from our local gardens, parks, and neighborhoods. Not only does it provide a festive touch, but it also fosters a deeper connection to our local environment. The Benefits of Using Fresh Greenery Bringing in fresh greenery not only elevates the aesthetic of your home but also offers emotional and sensory benefits. The earthy aroma of evergreens can evoke fond memories and fill our spaces with warmth and comfort. Plus, using locally foraged plants is an eco-friendly option; it's sustainable and cost-effective! The Top Greenery to Consider When foraging for greenery, it's crucial to know which plants are both visually appealing and durable for decoration. Here are some favorites: Magnolia: Renowned for its striking appearance, Southern magnolia leaves feature a beautiful copper underside that adds interest to wreaths and arrangements. Cedar: A favorite for garlands, cedar can last for weeks without water, providing longevity to your holiday decorations. Blue Spruce: Its distinctive gray-blue needles make it a standout for outdoor wreaths and arrangements, though be mindful of its tendency to shed indoors. Holly: An iconic Christmas staple, holly's bright red berries offer a pop of color that makes any decor scheme vibrant and festive. How to Responsibly Prune and Forage When gathering greenery, it's essential to do so responsibly. Harvest branches as if you’re selectively thinning the plant, ensuring you’re not damaging it in the long run. Before you set off, familiarize yourself with the plants in your area and always seek permission if foraging on private property. Creative Uses for Your Fresh Greenery Once you've successfully foraged your greenery, here are some creative ways to use them: Wreath Making: Use a base of willow or grapevine and fill it with your foraged greens, berries, and even some seasonal elements like pine cones. For interactive guidance, check out resources that outline this process step-by-step. Table Decor: Create centerpieces or festive table settings using small bundles of greenery tied with a rustic string. Seasonal berries or pine cones can be added for an impressive finish. Garlands: Lay boughs of cedar or fir along mantles, banisters, or dining tables for a simple yet impactful holiday display. Common Misconceptions About Foraging While foraging can be a delightful way to engage with the natural world, misconceptions persist. Some folks think it’s illegal or dangerous. In fact, many common plants are perfectly safe to use for decoration. Always ensure you're foraging safely and ethically. Educate yourself about local flora through resources or workshops to safely enhance your holiday decor. Future of Holiday Decor: A Sustainable Approach As the trend of eco-conscious living grows, the incorporation of foraged greens into holiday decor will likely become a staple. By continuing to embrace this practice, we’ll not only celebrate the beauty of our surroundings but also help maintain the health of our local ecosystems. As you prepare to deck your halls this holiday season, consider using fresh, foraged greenery to create a seasonal wonderland that reflects both your festive spirit and love for nature. With careful planning, you can make your home beautiful while honoring the environment around you.

12.01.2025

Crafting a Heartfelt Miniature Twig Reindeer Ornament for the Holidays

Update Discover the Joy of Crafting a Miniature Twig Reindeer Ornament The holidays are a time for creativity and connection, and what better way to celebrate than by making a charming miniature twig reindeer ornament? Not only does this craft engage with the beauty of nature, but it also allows you to channel your inner artist while creating something special that can become a cherished keepsake or gift. Inspired by renowned miniaturist Janit Calvo, this project serves to remind us of the joy found in homemade decorations. Gathering Materials: What You’ll Need The beauty of this craft lies in its simplicity. You do not need a suite of complicated tools or expensive materials. Head out into your backyard or a local park to collect dry twigs. Look for Y-shaped twigs, which will serve as the body and legs of your reindeer. Gather other essential materials including: Branch cutters or hand pruners Sandpaper to smooth out rough edges Wood glue or a hot glue gun for assembly An eye hook (optional, for hanging as an ornament) Decorative elements: tiny Christmas balls, ribbons, or pom poms for a personal touch. Step by Step Guide: Crafting Your Reindeer Follow these steps to create your delightful ornament: Cut Your Twigs: Use branch cutters to trim your twigs into sections. Aim for a scale that fits the charm of your ornament—around 2-3 inches for the body and smaller cuts for the legs and antlers. Sanding: Smooth the edges of each twig with sandpaper. This will help the pieces fit together seamlessly and also ensure safety when handling the ornament. Assembly: Drill small holes where the legs will attach to the body and apply wood glue to secure the pieces together. A hot glue gun can also be helpful for quicker assembly. Decorate: This is where your creative flair can shine! Attach googly eyes, a pom pom nose, or wrap a small piece of ribbon around the neck. Use small twigs or green spruce for antlers for an authentic touch. Finish and Hang: If you’d like to hang your reindeer, add an eye hook to the back. Now your reindeer is ready to adorn your Christmas tree or to be gifted to friends and family. Incorporating Nature into Your Celebrations This handcrafted reindeer acts as more than just a holiday ornament; it’s a celebration of nature and handiwork. Crafts like these invigorate our creativity and connection with the natural world. Plus, they’re an excellent way to enjoy family time during the festive season, especially when performed as a collective crafting session. Inspiring Future Crafting Ideas Once you’ve mastered the art of crafting a twig reindeer, consider expanding into other miniature creations. You could create a whole menagerie of animals from nature's bounty, perhaps crafting a tiny owl, a festive fox, or even a whimsical gnome home. Utilize variations on this basic technique and personalize each piece to reflect your style or seasonal themes. Making It a Family Tradition Crafting these ornaments can easily become a cherished holiday tradition. Allocate a day in December to collect twigs and gather materials, then settle in for a cozy evening of creativity, laughter, and bonding. This not only cultivates family fun but can also be a wonderful way to teach young ones about nature and sustainability. Wrap-Up: Celebrate the Holidays With Heartfelt Crafts Engaging with crafts like the miniature twig reindeer ornament not only fills your home with holiday cheer but strengthens bonds with family and friends. It’s a seasonal reminder to appreciate the gifts of nature while creating lasting memories. So this holiday season, take a little time to disconnect from the hustle and bustle, connect with loved ones, and celebrate the spirit of crafting!

12.01.2025

Explore the Beauty of Echeveria: A Guide to 27 Spectacular Varieties

Update Unveiling the Allure of Echeveria: A Gardener’s Delight Echeveria plants are much more than just pretty faces in the succulent world. These captivating plants hail from the semi-desert regions of Mexico and Central America, where they thrive in less-than-ideal conditions, exhibiting unique rosette shapes and a myriad of colors. Whether you're a seasoned gardener or newly diving into plant care, understanding the appeal and diversity of Echeveria can enhance not only your garden but also your wellbeing. Why Echeveria Are the Stars of Succulent Gardens While all succulents possess a certain charm, Echeveria distinguishes itself through its stunning forms and adaptations. Each of the 27 varieties boasts distinct characteristics ranging from vivid colors to fascinating textures. Colors vary dramatically: soft blues, deep burgundies, and shadowy lavenders always catch the eye, while textures include bumpy, ruffled, and curled leaves that present an intriguing spectacle, especially when planted together. This versatility allows for engaging garden designs, whether as solitary specimens, in container gardening, or as part of larger floral arrangements. Diverse Varieties: Which Echeveria Will You Choose? The educational value of knowing which Echeveria varieties to choose is immense. Popular selections like Afterglow, known for its striking, luminous rosettes and fiery orange flowers, or the elegant Perle von Nurnberg, with its soft, gray-blue leaves, offer visual rewards and can be conversation starters. Similarly, rare varieties such as Cinderella and Neon Breakers entice collectors and casual gardeners alike. Their flowers bloom prolifically, inviting pollinators and creating a thriving miniature ecosystem in your yard. Practical Tips for Echeveria Care To keep your Echeveria thriving, remember they're drought-tolerant and prefer delightful but dry conditions. Though low-maintenance, they do require full sun and well-draining soil to flourish. Regular watering should be done when the soil is dry but approach with caution during the winter months – these succulents prefer to stay on the dry side during dormancy. With proper light and care, Echeveria can grow strong and produce stunning flowers that uplift any space. Creative Applications: Beyond the Garden Did you know Echeveria can enhance indoor spaces too? Their attractive appearance makes them popular choices for indoor plant enthusiasts. Placing an Echeveria in a bright window can elevate the ambiance of living rooms, offices, or even kitchens. Furthermore, their unique flair is useful in creating quirky wedding bouquets, unique home decor, or even vibrant arrangements in community gardens. With a bit of creativity, Echeveria can breathe life into both your garden and indoors, showing off nature's beauty in versatile ways. Future Trends for Echeveria and Sustainable Gardening As sustainability increasingly becomes a priority for gardeners, Echeveria's drought-resistant qualities align perfectly with the shift towards organic gardening and water-conscious landscaping. Implementing Echeveria into your designs can conserve resources and provide relief during water shortages. By selecting local varieties and practicing companion planting, gardeners can encourage garden diversity while staying mindful of their ecological footprints. Conclusion: Your Next Steps in Echeveria Gardening Having delved into the captivating world of Echeveria, it’s time for you to explore your gardening options. Whether you integrate them into a succulent arrangement or select a standout variety to showcase, these unique plants can transform your garden and elevate your living spaces. Start planting today and experience the joy that Echeveria can bring to your life!

Terms of Service

Privacy Policy

Core Modal Title

Sorry, no results found

You Might Find These Articles Interesting

T
Please Check Your Email
We Will Be Following Up Shortly
*
*
*