Add Row
Add Element
cropper
update
Marin Home Ideas
update
Add Element
  • Home
  • Categories
    • Home Remodeling Ideas
    • Interior Design & Decor Ideas
    • Gardening & Landscaping Ideas
    • Outdoor Living & Entertaining
    • Health & Wellness at Home
    • DIY at Home
    • Kitchen Ideas
    • Bedroom Ideas
    • Bath Ideas
    • Cooking at Home
    • Home Office Ideas
    • Lighting Ideas
    • Furniture Ideas
    • Architecture Ideas
    • Senior Living at Home
    • Home Finance
    • Real Estate News
July 11.2025
3 Minutes Read

Unlocking the Benefits of Making Detox Bath Salts at Home

Woman explaining how to make detox bath salts at home, vibrant garden backdrop.

Why Detox Baths Are Gaining Popularity

With the hustle and bustle of modern life, many are turning to self-care practices, like detox baths, to unwind and rejuvenate. The idea of making your own detox bath salts at home not only appeals to those looking for a therapeutic experience but also invites creativity and personalization. Bath salts made from natural ingredients allow individuals to customize their bath experience, promoting relaxation and well-being.

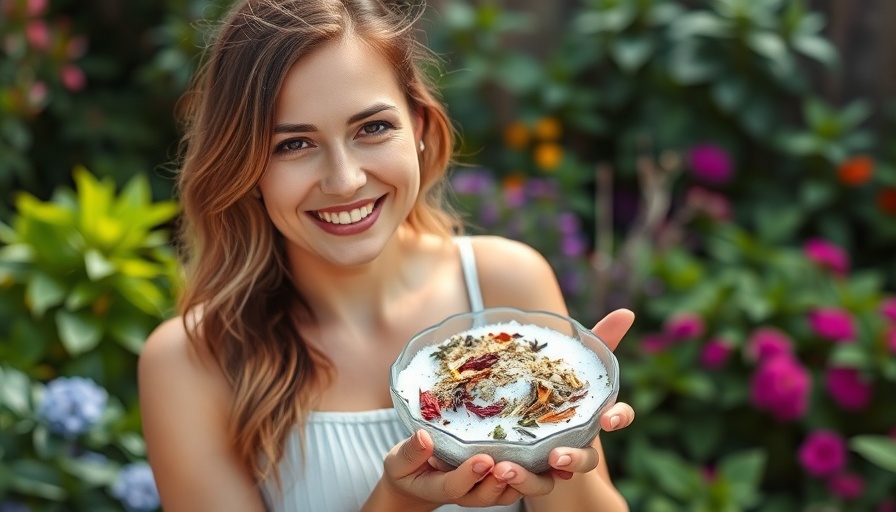
In 'Making Detox Bath Salts At Home', the discussion dives into the health benefits of DIY projects, exploring key insights that sparked deeper analysis on our end.

Embracing the DIY Spirit: Making Detox Bath Salts

Making detox bath salts at home provides a chance to explore organic gardening concepts by sourcing ingredients right from your garden—such as herbs noted for their relaxing properties, like lavender or chamomile. This endeavor encapsulates the essence of sustainable gardening, integrating elements of gardening with self-care routines. Besides, using homemade bath salts with natural and organic elements means enjoying a guilt-free bath, free from the harsh chemicals often found in store-bought products.

The Benefits of Homemade Detox Bath Salts

Utilizing ingredients like Epsom salt, sea salt, and baking soda, combined with essential oils, produces a luxurious bathing experience that offers numerous benefits. Epsom salt is known for its ability to alleviate muscle aches and help reduce inflammation, while sea salt may enhance skin health and promote hydration. In addition, adding essential oils not only boosts mood but can also make your garden aroma part of your bath experience. Engaging in this simple act of self-care nurtures both the body and the mind, grounding us in the present moment and allowing for a deeper connection with ourselves.

Connecting with Nature: The Role of Organic Gardening

By integrating gardening elements into the process of creating detox baths, individuals cultivate a deeper appreciation for nature and its resources. Imagine stepping out to your herbal garden to harvest fresh mint or rosemary and then incorporating them into your soothing bath salts. This connection fosters an environmentally friendly approach to self-care, emphasizing the importance of organic gardening and understanding where our products come from.

Best Practices for Organizing Your Garden for Bath Salt Botanicals

For those inspired to begin this holistic journey, the first step is to design a small herb garden that can grow plants suited for detox bath salts. Consider intermingling plants renowned for their benefits in relaxation alongside other herbs that can aid digestion or skin health—like thyme and basil. Implementing garden design techniques that allow for easy access while ensuring good soil health will lead to flourishing herbs for your DIY projects.

Creative Bath Salt Recipes to Start With

1. **Relaxation Blend**: Combine 1 cup Epsom salt, 1 cup sea salt, and 10 drops of lavender essential oil. This soothing blend is perfect for a pre-bedtime bath.
2. **Refresh Blend**: 1 cup Himalayan salt, 1 cup baking soda, 5 drops of peppermint oil, and dried mint leaves make for an invigorating bath, refreshing your senses.

How to Store and Use Your Homemade Bath Salts

Once you've created your cleansing concoctions, storing them in airtight glass jars preserves their potency. Keep your homemade bath salts in a cool, dark place, and use them within a month for the best results. Simply pour a few handfuls into running water and watch as the salts dissolve, releasing their therapeutic properties for a delightful bathing experience.

Bringing Community Involvement into Your Projects

Consider hosting a community workshop where you and your neighbors can come together to create and share your own detox bath salts. This not only strengthens community bonds but also allows for the exchange of knowledge regarding eco-friendly gardening and self-care practices. The experience of gathering, crafting, and enjoying the fruits of your labor can be a beautiful reflection of community spirit.

A Step Toward Sustainable Living

Incorporating detox bath salt-making into a sustainable lifestyle may seem small, but it contributes to greater wellness and environmental awareness. As we look to reconnect with nature, understanding how to utilize our resources responsibly not only benefits us personally but can also inspire those around us to take action, fostering a stronger commitment to sustainable gardening and self-care.

By nurturing our gardens, making our own bath products, and supporting one another through community activities, we cultivate a healthier lifestyle and a more connected world. So, why not embrace this newfound passion and start your detox bath journey today? Your mind and body will thank you!

Gardening & Landscaping Ideas

13 Views

0 Comments

Write A Comment

*
*
Related Posts All Posts
12.18.2025

Embrace the Holidays: Create Your Rustic Christmas Candle Centerpiece

Update Add Rustic Warmth to Your Holiday Home As the holiday season approaches, many of us are eager to welcome the warmth and coziness of Christmas into our homes. A beautiful way to enhance this ambiance is with a charming rustic and natural Christmas candle centerpiece. This DIY project can be created using materials you likely have at hand, especially if you love gardening and foraging for natural decor. What Makes This Centerpiece Special? This centerpiece isn't just another piece of decor; it embodies the spirit of comfort and creativity. Using fresh-cut greenery from your own garden not only adds a personal touch but is also a great way to utilize what’s around you. Imagine bringing the beauty of nature indoors and combining it with the warm glow of candles, setting a serene, festive mood for all your holiday gatherings. The Joy of Using Garden Greens Foraging from your garden offers a sustainable way to create holiday decor. Many evergreens, like Fraser fir and Portuguese laurel, are prime choices for this centerpiece. These plants are low maintenance; they don’t require watering, and they can be disposed of easily after the season. Plus, when paired with colorful berries, they offer a visually stunning contrast that elevates the entire decor. Creating Your Candle Centerpiece: Step by Step Gathering the right materials is the first step. You will need a small wooden planter box, dry floral foam (not wet floral foam), taper candles, and of course, fresh-cut greenery from your garden. Start by cutting your greens so they fit neatly into the box, utilizing a mix of both needle-leaf and broad-leaf varieties for texture and color. Arrange the craft foam in the box and place your taper candles into it, ensuring they are evenly spaced. Once your candles are secure, begin layering your greenery, working from the outside in—allowing cascading greens to frame the design and vibrant berries to burst from the center. Finally, light your candles and step back to admire your handiwork! Safety First: Candle Precautions While the glow of candles creates a cozy atmosphere, it’s essential to prioritize safety when using them around natural materials. Never leave candles burning unattended, particularly when near greenery. Consider alternative options like electric candles for a worry-free solution while still enjoying the visual appeal of a well-decorated centerpiece. Crafting Beyond Christmas: Timeless Decor Ideas Though this project perfectly suits the holiday season, your creativity doesn’t have to stop there. Consider designing similar centerpieces for different occasions, like spring baskets or summer gatherings using seasonal blooms and colors. With some modifications, the principles of this project can easily be adapted to any festive occasion, ensuring that your home stays beautiful year-round. Exploring Other DIY Holiday Projects If you’re inspired to craft more holiday decor items, think about creating a fresh foraged wreath or experimenting with simple rustic decor accents that can brighten your home during winter. There’s no shortage of creativity waiting to be harvested from your garden! In conclusion, making a rustic and natural Christmas candle centerpiece not only beautifies your space but also brings a sense of serenity to your celebrations. This DIY project is about embracing nature's beauty and making your holiday warm with a personal touch. So gather your materials, get crafting, and light up your holidays with a centerpiece that tells your unique story.

12.18.2025

Wood Ash in Gardening: The Nutrient-Rich Secret You Need to Know About!

Update Transform Your Wood Ash into Garden Gold As winter wraps its icy arms around Vermont, many of us find ourselves cozying up to the warm glow of the fireplace. This comforting ritual, however, leaves behind piles of wood ash that often find their way into landfills. But what if you could put that ash to use? It turns out, wood ash can be a boon to your garden when used correctly! The Nutritional Treasure in Wood Ash Wood ash contains essential nutrients that your plants crave. Composed of vital minerals such as potassium, calcium, and magnesium, it enriches the soil and enhances fertility. Its high calcium content is particularly beneficial for neutralizing excessively acidic soils, which many gardeners face. But before you start spreading ash like confetti, it’s crucial to test your soil’s pH to determine if it’s truly needed. Soil testing is essential—adding ash to alkaline soils (above 7.0) can lead to harmful effects by increasing alkalinity and soluble salts. Timing is Everything When it comes to composting wood ash, timing and moderation play vital roles. The general rule of thumb is to use ash in small amounts—no more than 5% of your compost. According to gardening experts, once your compost nears maturity, adding ash could elevate pH levels too much, releasing heavy metals into the environment. Therefore, it’s wise to incorporate cooled ashes directly into a new or uncooked pile rather than your finished compost. Safety First: Handle Wood Ash with Care While wood ash can be a powerful tool, safety should always come first. When handling wood ash, always wear gloves, eye protection, and a mask. This protects you from irritation and dust inhalation. Ensure that the ash is completely cool before adding it to your compost or garden bed. How to Properly Incorporate Wood Ash To effectively use wood ash in your garden, start by sprinkling it onto a compost pile along with your regular mix of brown and green materials. Aim to apply a quarter-inch layer of ash for each 18-inch section of browns, and add it to every six inches of greens. Make sure to turn the pile well to incorporate the ash evenly. Wood Ash: The When and Where Using wood ash is not a blanket solution for all garden types. It’s especially beneficial in areas where soil is acidic and lacks potassium. However, avoid using it on acid-loving plants like blueberries or azaleas. Instead, consider using the ash on lawns needing lime or areas that benefit from added potassium. Cautions and Misconceptions about Wood Ash With the right knowledge, wood ash can be a valuable amendment for your gardening endeavors. However, a common misconception is that more is better—this isn't true! Over-application can lead to nutrient imbalances and damage your soil structure. Always err on the side of caution and moderate your applications based on thorough testing. Final Thoughts: Enjoy the Benefits of Wood Ash In conclusion, wood ash is a sustainable garden amendment that can substantially benefit your soil, provided you use it wisely. By testing your soil, adhering to appropriate application methods, and prioritizing safety, you can transform a waste product into a gardener’s ally. So, the next time you clear out your fireplace, remember: that ash may just be the key to a flourishing garden this spring! Join the movement towards sustainable gardening! Incorporate composting, and discover how every part of your gardening process can contribute to a healthier earth. Enjoy experimenting and see the benefits you've created in your backyard!

12.17.2025

Unlock Creativity This Holiday: Recycle Christmas Cards Into Gift Tags

Update Transforming Memories: Recycled Christmas Cards as Gift Tags The holiday season is filled with beautiful memories captured in cards from friends and family. However, as the festivities wind down, many of those cherished cards are left to gather dust or be discarded. Recycling Christmas cards into gift tags not only provides a creative outlet but also promotes a sustainable practice by reducing waste. This simple craft allows you to repurpose those heartfelt greetings into practical items that bring joy throughout the year. Materials You’ll Need for a Charming Craft Project To begin this enchanting journey of upcycling, gather your supplies. You will need: Christmas cards Tag punch or scissors Hole punch or an alternative for threading Baker’s twine, ribbon, or string Having these items on hand will ensure your crafting experience is both smooth and enjoyable. You’ll be amazed at how many beautiful tags can be created from a single card! The Simple Process: How to Create Gift Tags from Cards With your materials ready, let’s dive into the steps of creating gift tags: Sort and Select: Go through your collection of Christmas cards, keeping those with captivating imagery and removing any that contain personalized messages. Only use the front of the card where the design shines. Punch or Cut: If you have a tag punch, position your card accordingly and make your cuts. You can also use scissors or pinking shears for decorative edges. Aim for shapes that will look appealing on gifts, like rectangles or festive shapes. Create Holes: Don’t forget to punch holes at the top of each tag for threading. Using a hole punch simplifies this step, but if one isn't available, a sturdy needle can substitute. Accessorize Your Tags: Thread the tags with baker’s twine, festive ribbons, or leftover strings. This will add a finishing touch prepped for adorning presents. Store with Love: Keep your beautifully crafted tags in a special box for next holiday season, or even use them for birthdays and other occasions throughout the year. By following these straightforward steps, you’ll find the task takes very little time, allowing you to embrace your holiday spirits while being environmentally conscious. Embrace the Joy of Sustainability While this project is fulfilling, it also ties into broader conversations about sustainability and waste reduction during the holiday season. Many people find themselves overwhelmed by the amount of waste generated during this festive period. By recycling Christmas cards, you’re not only creating something beautiful but also curbing unnecessary landfill contributions. This initiative aligns with the growing trend of conscious living, and every individual action counts towards a healthier planet. Beyond Christmas: Year-Round Usability While transforming Christmas cards into gift tags aligns perfectly with the season, the creativity doesn’t stop there. Consider saving cards from various occasions—birthdays, thank-yous, and other festive events—to ensure you have an array of unique gift tags at your disposal. Brightly colored and themed tags will make any present more personal and heartfelt. Community Connection: Share Your Creations Sharing this kind of crafting idea often inspires others in the community to engage in similar projects. Crafting together, whether in virtual gatherings or local workshops, fosters connections and allows for expression beyond traditional holiday greetings. It’s an opportunity for bonding over shared creativity and sustainability efforts. Whether you're a seasoned crafter or a newcomer wanting to explore DIY projects, transforming Christmas cards into gift tags is a fun, easy way to express creativity while adding a personal touch to gift-giving. So gather those old cards, roll up your sleeves, and get crafting! Your gifts will not only be wrapped with love but also with a story worth sharing.

Terms of Service

Privacy Policy

Core Modal Title

Sorry, no results found

You Might Find These Articles Interesting

T
Please Check Your Email
We Will Be Following Up Shortly
*
*
*