Add Row
Add Element
cropper
update
Marin Home Ideas
update
Add Element
  • Home
  • Categories
    • Home Remodeling Ideas
    • Interior Design & Decor Ideas
    • Gardening & Landscaping Ideas
    • Outdoor Living & Entertaining
    • Health & Wellness at Home
    • DIY at Home
    • Kitchen Ideas
    • Bedroom Ideas
    • Bath Ideas
    • Cooking at Home
    • Home Office Ideas
    • Lighting Ideas
    • Furniture Ideas
    • Architecture Ideas
    • Senior Living at Home
    • Home Finance
    • Real Estate News
June 27.2025
3 Minutes Read

Your Ultimate Guide on How to Dispose of Cooking Oil Properly

Used cooking oil in a frying pan on a stove, highlighting disposal.

Why Properly Disposing of Cooking Oil Matters

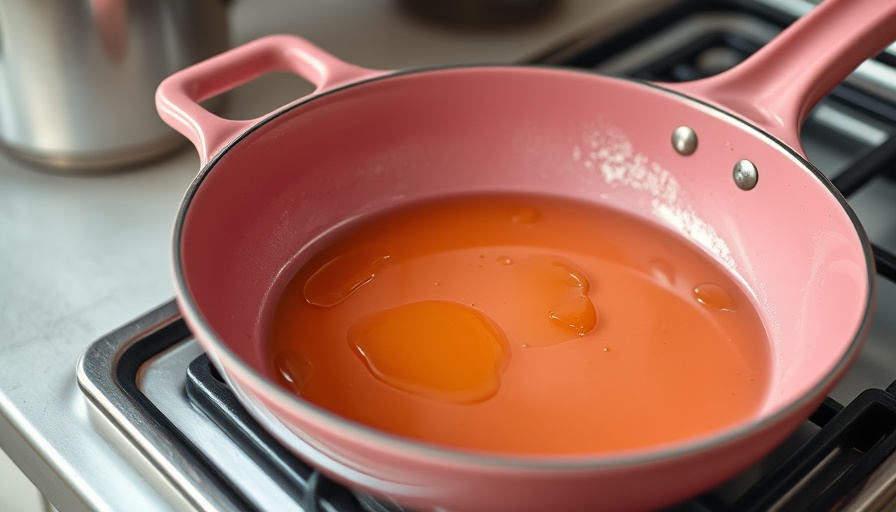
Many of us enjoy cooking with oil, whether it’s for frying crispy vegetables or sautéing aromatic spices. Yet, the task of disposing of used cooking oil often becomes an afterthought. Pouring even small amounts down the drain might seem harmless, but it can lead to severe plumbing problems over time.

As environmentalist and cooking oil recycler Jorge Argota aptly points out, used cooking oil congeals, creating blockages that affect households and sewer systems alike. A clogged pipe can lead to unpleasant odors, costly repairs, and even environmental damage. Surprisingly, municipalities face millions in expenses due to the consequences of improper oil disposal.

The Legal Landscape of Cooking Oil Disposal

Local regulations are increasingly acknowledging the environmental risks associated with used cooking oil. Most municipalities enforce Fats, Oils, and Grease (FOG) ordinances to prevent homes and restaurants from disposing of cooking oil down the drain. These regulations necessitate grease traps in restaurants and promote recycling programs to mitigate environmental impact. To find specific guidelines in your area, search online or reach out to local public works departments.

Step-by-Step Guide: How to Dispose of Cooking Oil

When faced with the task of disposing of used cooking oil, remember: cool, contain, and recycle. Here’s a detailed guide:

  • For small quantities (a half cup or less): Let the oil cool and then wipe it with a paper towel to toss in the trash. Alternatively, you can mix it with baking powder or kitty litter to solidify it.
  • For a few cups: Place the cooled oil into a closed container, like a jar or milk carton, then throw it away.
  • For larger amounts: Strain the oil back into its original bottle or sturdy container and take it to a cooking oil recycler or a hazardous waste center.

Where to Find Cooking Oil Disposal Options

If you’re wondering where to dispose of that fryer full of oil, fear not! Resources like Earth911 offer recycling locators that can direct you to drop-off sites across the country. Additionally, many local waste management departments facilitate oil collection and recycling events, especially around the holiday seasons.

Connecting Cooking Oil Disposal to Sustainable Living

Disposing of cooking oil correctly isn’t just about plumbing; it’s about fostering a sustainable environment. By recycling used cooking oil, we support green initiatives and contribute to our community’s well-being. With growing environmental concerns, prioritizing responsible disposal methods helps reduce our carbon footprints and promotes a healthier planet for future generations.

Creating a Greener Home with DIY Solutions

Incorporating sustainable practices into your home can go beyond cooking oil. Embrace DIY home improvement and cleaning hacks to promote sustainability! Consider simple projects like:

  • DIY composting: Turn kitchen scraps into rich compost.
  • Outfitting your kitchen: Invest in kitchen accessories made from recycled materials.
  • Green renovations: Use eco-friendly paints and materials to enhance your living space.

These projects don’t just improve your environment but are also fulfilling DIY home projects that can add value to your lifestyle.

In sum, whether it's recycling cooking oil or taking on meaningful DIY home improvement tasks, every small action contributes to a larger change. By being mindful of our practices, we protect our homes, communities, and the environment.

DIY at Home

10 Views

0 Comments

Write A Comment

*
*
Related Posts All Posts
10.03.2025

Discover the Cheapest and Most Expensive Cars to Insure in 2025

Update Understanding the Cost of Car Insurance Car insurance is a necessity for most drivers, shedding light on an often underestimated expense of vehicle ownership. Not only is it a legal requirement in many states, but it serves as a financial cushion against potential road mishaps that can happen when you least expect it. As we delve into the cheapest and priciest vehicles to insure for 2025, it's essential to understand the factors influencing insurance premiums. Top 10 Most Affordable Cars to Insure According to a new report by Forbes, various popular 2021 models have emerged as the least expensive cars to insure in 2025. Here are the standout contenders, showcasing budget-friendly options for those looking to save on insurance: Honda CR-V LX Jeep Wrangler JL Sport Subaru Crosstrek Subaru Forester 2.5I Hyundai Tucson SE Jeep Compass Latitude Chevrolet Equinox L Ford Escape S Volkswagen Tiguan SE Ford F-150 XL These vehicles exemplify reliability and affordability, making them great choices for those who want to minimize costs associated with car insurance while still enjoying a dependable ride. Most Expensive Cars to Insure for 2025 On the other end of the spectrum, some vehicles can significantly ramp up your insurance expenses. The Forbes report identified the following as the priciest cars to insure: Lexus NX 300h Dodge Ram 1500 Rebel Lexus RX 350 Nissan Altima 2.0 S Tesla Model 3 Standard Plus Volvo XC90 T8 Inscription Lexus ES 300H Tesla Model S Performance These luxury models often come with higher maintenance costs and advanced technology, factors that contribute to their insurance rates. For individuals considering one of these vehicles, it’s wise to weigh these potential costs against the allure of owning a luxury car. Why Are Some Cars Cheaper to Insure? Several critical factors play into how insurance companies set their rates. Notably, the model of the car is among the most significant. High repair costs and common accident rates often drive up premiums for luxury and high-performance vehicles. Meanwhile, cars known for their safety and durability tend to be less expensive to insure. Additionally, your personal factors, including your driving record, age, and even the location where you park your car at night, will also influence your respective premium rates. DIY Strategies for Reducing Insurance Costs Just like DIY home improvement projects can bring down costs and enhance your living space, there are practical strategies you can adopt to lower your car insurance payments: Compare Quotes: It's essential to shop around for insurance. Different providers may offer varying rates for the same coverage. Bundle Policies: Combining auto insurance with home or renters insurance usually leads to discounts. Improve Safety Features: Equipping your vehicle with advanced safety features can lead to premium reductions. Maintain a Clean Driving Record: Avoid traffic violations and accidents to keep your rates down. Consider Usage-Based Insurance: Programs that track your driving habits may provide savings for safe drivers. Adopting these tips can enable you to manage your insurance expenses more effectively and enhance the safety of your lifestyle. Final Thoughts: Making Informed Vehicle Choices Choosing a vehicle extends beyond the upfront cost; it includes considering the long-term financial implications of insurance. Understanding which cars are cheaper or pricier to insure can significantly impact your overall budget. As you navigate this crucial decision, consider how each model aligns with your lifestyle, budget, and the insurance implications. Explore trustworthy resources and stay informed to ensure your next automotive choice is a sound financial investment.

10.03.2025

The Ultimate Guide to Personalized License Plates: What You Need to Know

Update Unleash Your Creativity with Personalized Plates Adding a personalized license plate to your vehicle is not just about standing out; it's about expressing your identity, values, and humor. Whether you're looking for a clever pun or a heartfelt message, custom plates can be an exciting way to reflect your persona on the road. However, it’s crucial to navigate the accompanying rules and restrictions to avoid any potential pitfalls. Understanding the Common Rules for Custom Plates Before you dive into the creative process for your unique plate, it's essential to understand the general guidelines that most states across the U.S. enforce. According to experts like Amelia Dalgaard from Motorhead Mama, the guiding principle is simple: if it's something you wouldn't say in front of your grandmother, it likely won't fly. This means plates that are offensive, obscene, or could mislead other drivers—like impersonating a police officer—are off-limits. Top expert Alice Coleman from EpicVIN emphasizes that hate speech, drug references, and any confusing combinations of letters and numbers that mimic official plates are typically rejected. Having this foundational knowledge will not only streamline your plate creation process but also steer you clear of potential rejection down the road. The Impact of State-Specific Regulations Beyond the general rules, be advised that distinct states have unique guidelines that may further restrict your choices. For instance, in California, certain numbers—like 69—can only denote a vehicle's model year, lest they be interpreted as sexual innuendos. Florida takes a hard stance against any references to bodily functions and trademarks, while New York prohibits plates that resemble official titles, like 'POLICE' or 'NYS'. These variations highlight how important it is to familiarize yourself with local laws. Examples Beware! Commonly Rejected Custom Plates To avoid disappointment, it's wise to learn from the mistakes of others. In Florida alone, several humorous but ultimately rejected plates include BADA55V and IAMDUI. These reflect common pitfalls involving vulgarity and legal terminology that could be seen as disrespectful. Some states even hold the right to revoke a personalized plate post-issuance due to shifts in interpretation or due to complaints from law enforcement and the public. The Appeal Process: Your Voice Matters Should you find your fantastic idea for a personalized plate refused, don’t fret—all isn't lost. States have an established appeal process that allows you to present your case, which may include writing a letter, making an in-person appeal, or, in certain situations, even phone correspondence. This pathway opens a door for discussion, where your rationale and creativity can be put forward for reconsideration. Creative Sparks: Ideas for Your Custom Plate Once you're familiar with the rules and hopeful appeal process, it’s time to get creative! Personalized plates can reflect your hobbies, passions, humor, or inspirational messages. Here are a few ideas: Hobbies or Interests: If you're an avid gardener, try 'FLWRPWR' or for a fitness lover, how about 'FIT2RUN'? Fun Puns: Clever wordplays like 'LUV2XPLR' or 'WINNING' can add a whimsical touch that sparks joy. Inspirational Quotes: Share your philosophy with plates saying things like 'BEEHAPPY' or 'GR8DAY!' Keep in mind that creativity should always stay within the boundaries of state regulations! Conclusion: Your Unique Mark on the Road Awaits The journey to your custom plate can be as rewarding as the destination. By understanding the dos and don’ts of personalized plates, including general and state-specific guidelines, you can confidently express yourself while maintaining respect for community standards. So get inspired, let your imagination flow, and drive your passion proudly with a creative license plate!

10.01.2025

The Essential Guide to Filling Raised Garden Beds for Thriving Plants

Update Optimizing Raised Garden Beds: The Secrets to Soil Success Filling raised garden beds correctly can set the stage for thriving plants and a bountiful harvest. As gardening enthusiasts know, the secret to a healthy garden lies not just in care, but in the art of layering the right materials. My recent adventure into building a raised bed garden stands testament to this, as I’ve explored the many layers that provide the perfect environment for growth. Understanding the Key Layers for Vibrant Growth The primary goal when filling a raised garden bed is to create an environment where roots can flourish. To achieve this, divide the garden bed into distinct sections: the bottom third is dedicated to organic materials, while the top two-thirds should be a nutrient-rich soil blend. Starting with Weed Prevention The first layer involves creating a solid weed barrier. Opt for organic materials such as cardboard or several layers of newspaper. By covering the base of the bed, you drastically reduce weed infiltration. Not only is this a cost-effective approach but as cardboard breaks down, it enriches the soil further. This method also aligns with 'lasagna gardening,' a technique that advocates layering organic materials for both weed control and enhanced soil quality, as noted by enthusiasts in various DIY gardening forums. Adding Bulk Organic Material Next, fill about a sixth of the depth with brown organic materials like small twigs and branches. These components are perfect for adding bulk without fully closing off the growth potential for your plants. They decompose slowly, releasing moisture and nutrients into the soil, which is essential for healthy root systems. Many DIY gardeners collect fallen branches and twigs from their yards, ultimately turning what would be waste into precious garden resources. Incorporating Nutrient-Rich Green Waste The third layer consists of green organic waste such as grass clippings and dried leaves. This layer not only retains moisture but adds crucial nutrients that aid plant growth. Care must be taken to avoid weeds in this stage; only use organic plant waste that is free from seeds or invasive species. Using compost in this layer is also a great way to recycle material from previous gardening projects. Choosing the Right Soil Mix The final two-thirds of the raised bed should be filled with a high-quality soil mix—ideally labeled as “organic raised bed soil.” This soil is finely textured to provide good drainage and optimal growing conditions for plants. Some may opt for store-bought soil mixes, while others might prefer to create their own blend using topsoil and compost. The DIY approach not only saves money but also allows gardeners to customize their soil according to the specific needs of their plants. Future Predictions: Investing in Soil Health As gardening trends lean more towards organic practices and sustainability, investing time and resources into proper soil care and layered composting processes like lasagna gardening can lead to greater rewards. Notably, soil health directly correlates with plant vitality and the ability to fend off pests and diseases. Investing in these practices now pays off in greater yields and healthier plants in the long term. Incorporating Local Resources: Cost-Effective Gardening Utilizing local resources remains a smart move for budget-conscious gardeners. Gathering organic material from your own yard not only enriches your raised beds but also enhances soil quality over time. Local community groups or gardening clubs can provide great opportunities to exchange or share materials, ensuring that cost remains low while the quality of your garden remains high. Common Misconceptions about Raised Bed Gardening Many think that filling a raised bed requires purchasing bags of soil at a premium price. However, with a little creativity, such as using fallen branches, leaves, and cardboard, you can dramatically reduce expenses while enhancing your garden's health. It’s also a misconception that you need to fill the beds entirely with expensive store-bought soil when high-quality compost mixed with local resources will often yield better results. Final Thoughts on Your Gardening Journey As you embark on filling your raised garden beds, think about the layers strategically. Remember that gardening is a journey of learning and adaptation. Each season provides new opportunities to refine your techniques, so don't hesitate to experiment with different materials and methods. With these insights, you’re now on your way to creating a thriving garden that can bring both nourishment and joy. So roll up your sleeves and get started on this rewarding journey!

Terms of Service

Privacy Policy

Core Modal Title

Sorry, no results found

You Might Find These Articles Interesting

T
Please Check Your Email
We Will Be Following Up Shortly
*
*
*